Side Dishes
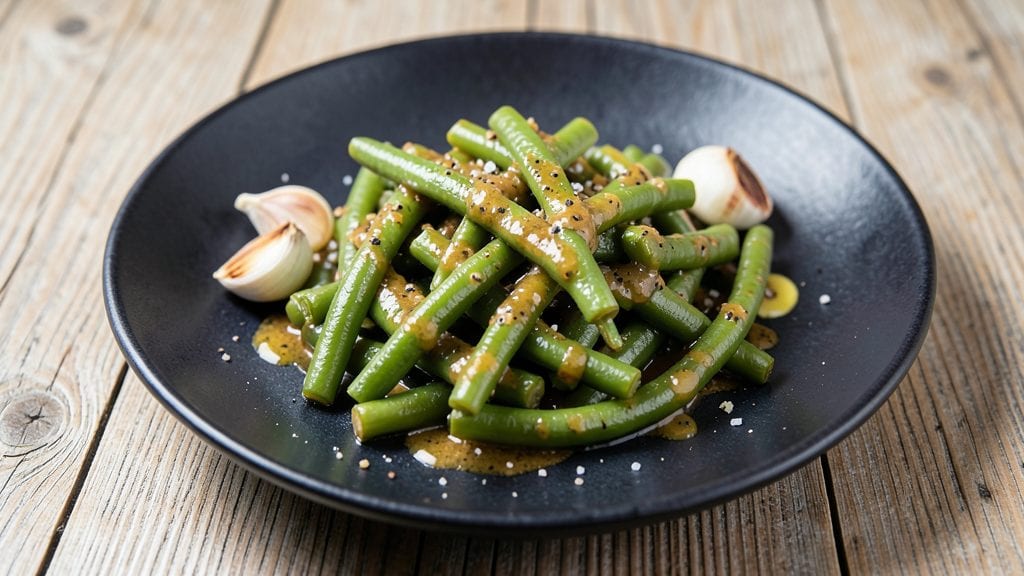
This Applebee's Garlicky Green Beans copycat recipe delivers the same sizzling garlic butter crunch you crave from their menu. 🔥 I've replicated their signature method—crisp-tender beans tossed in rich garlic butter with a hint of lemon—after testing countless variations.
The secret lies in high-heat sautéing and precise seasoning timing to capture that restaurant-quality flavor at home.
What makes this recipe work is the balance between tender beans and crisp edges, achieved through a quick blanch followed by a fast sear. You'll need just five simple ingredients—fresh green beans, butter, garlic, lemon juice, and a pinch of salt—plus a few pantry staples.
The process takes under 20 minutes, making it perfect for weeknight dinners or as a side for grilled meats.
By the time you're done, you'll have bright green beans with crisp-tender edges, coated in fragrant garlic butter that's just tangy enough from the lemon. The aroma alone will have everyone at the table asking for seconds—just like the restaurant version.
This dish is foolproof, restaurant-quality, and ready in the time it takes to cook pasta.
Serve these alongside steak, chicken, or even as a vegetarian main with crusty bread. The garlicky flavor pairs beautifully with almost anything, and leftovers reheat perfectly. Let's get started with the exact method that brings Applebee's to your kitchen.
Ingredients for applebee's garlicky green beans copycat
Five simple ingredients transform into Applebee's signature garlicky green beans with crisp edges.
| Ingredient | Amount | Notes |
|---|---|---|
| Fresh Green Beans 🥦 | 1 ½ lb | Trimmed, ends cut off |
| Unsalted Butter 🧈 | 6 tbsp | Cold, cut into small cubes |
| Garlic Cloves 🧄 | 6 cloves | Thinly sliced, not minced |
| Fresh Lemon Juice 🍋 | 1 tbsp | From 1/2 lemon, freshly squeezed |
| Diamond Crystal Kosher Salt 🧂 | ½ tsp | Coarse grain preferred |
| Ground Black Pepper 🌶️ | ¼ tsp | Freshly cracked |
| Vegetable Oil 🫒 | 1 tbsp | High smoke point preferred |
The green beans are non-negotiable—farmers market or grocery store fresh gives the best texture. Look for vibrant, bright green beans with crisp ends. Trader Joe's and Whole Foods carry the best quality, but any grocery store's fresh section works. Trim the ends carefully—this prevents bitterness. For extra crispness, blanch them first in boiling water for 2 minutes before tossing in the butter. The garlic should be freshly sliced right before cooking—pre-minced garlic loses its punch. And don't skip the cold butter cubes—they melt perfectly into the beans while keeping them crisp.
No fresh garlic? Garlic powder at half the amount works in a pinch, but you'll lose that signature sizzle. Short on butter? Olive oil or ghee keeps the dish flavorful, though the texture won't be identical. The lemon juice is key for that bright, tangy finish—bottled lemon juice is fine, but fresh is always better. If you're out of kosher salt, sea salt at a 1:1 ratio works, but avoid table salt. The vegetable oil is just for the quick sear—any neutral oil like canola or avocado oil will do. Pro tip: If your beans aren't crisp enough, toss them back in the pan for another 30 seconds after adding the butter.
These beans reheat beautifully—just pop them in a hot skillet with a splash of water for 2 minutes. Store leftovers in an airtight container for up to 3 days. For meal prep, portion into containers with a drizzle of extra lemon juice to keep them fresh. The garlic butter flavor actually improves overnight, so leftovers taste even better. If you make a big batch, freeze half—just thaw and reheat straight from frozen. The crisp edges soften slightly when reheated, but the garlicky flavor stays strong.
Why You'll Love This Recipe
- One-Pan Magic: I swear by this recipe—just trim the beans, toss them in a hot pan with butter and garlic, and let the lemon brighten everything up. No bowls, no mess, no stress.
- Garlic-Lemon Magic: That crispy edge on the beans? Pure satisfaction. The butter and garlic caramelize just enough, then the lemon cuts through—like a little flavor hug you didn’t know you needed.
- Weeknight & Potluck Star: Honestly, it’s my go-to for anything: a quick side for grilled chicken, a potluck dish that disappears fast, or even a snack when I’m craving something savory. No one ever skips seconds.
- Budget-Friendly Staple: Fresh green beans and butter won’t break the bank, and a single batch stretches across lunches or dinner leftovers. (Yes, even on a Tuesday night.)
Step-by-step instructions for Applebee's garlicky green beans copycat
Here's how to nail that signature Applebee's garlic butter crunch at home—crispy, garlicky, and ready in under 20 minutes.
🔪 Step 1: Prep the Green Beans for Maximum Crunch
Start by trimming the ends off the 1.5 lb fresh green beans—you want to remove about ½ inch from each end. I like to snap them by hand rather than cutting, as this preserves the natural crunch. Give them a quick rinse under cold water and pat completely dry with paper towels. Any moisture will steam the beans instead of crisping them.
Here's the thing—these beans need to stay as dry as possible. I spread them out on a clean kitchen towel and gently pat them again, making sure no water droplets remain. The drier the beans, the better they'll brown and crisp in the butter. This step is non-negotiable for that signature Applebee's texture.
🍳 Step 2: Sear the Beans in Hot Oil for Perfect Crispiness
Heat 1 tbsp vegetable oil in a large skillet over medium-high heat until it shimmers. Add the prepared green beans in a single layer—don't overcrowd the pan, or they'll steam instead of sear. Cook for 4-5 minutes, stirring occasionally, until the beans develop golden brown spots and are tender-crisp.
You'll know they're ready when the edges start to crisp and the beans bend slightly but still have a slight snap. If they're not browning enough, increase the heat slightly. The goal is to get that perfect balance of tender yet crispy—just like the restaurant version. Once they reach this stage, remove them from the pan and set aside on a paper towel-lined plate.
🔥 Step 3: Make the Garlicky Butter Sauce
In the same skillet (no need to wipe it clean—those browned bits are flavor gold), reduce the heat to medium and add 4 tbsp of the cold cubed unsalted butter. Let it melt completely, then add the 6 thinly sliced garlic cloves and cook for 1-2 minutes until they're light golden brown but not burnt.
Here's where it gets good—watch the garlic closely. It burns faster than you think, and burnt garlic ruins everything. When the garlic is just starting to turn golden, remove the skillet from heat for 30 seconds to let the raw garlic aroma mellow out. Then return to low heat and add the remaining 2 tbsp cold butter.
🥘 Step 4: Toss and Finish with Lemon Zing
Return the seared green beans to the skillet with the garlic butter. Toss everything together until the beans are fully coated in that golden, garlicky butter. Cook for another 1-2 minutes just to meld the flavors. Then remove from heat and stir in the 1 tbsp fresh lemon juice, 0.5 tsp diamond crystal kosher salt, and 0.25 tsp freshly cracked black pepper.
The lemon juice brightens the rich garlic butter, cutting through the fat just enough to make each bite sing. Taste and adjust seasoning—you might need a pinch more salt depending on your butter's saltiness. The beans should be hot, crispy, and coated in that irresistible garlic butter sauce. Serve immediately while they're at their peak crunch!
Pro Tips For Making Applebee'S Garlicky Green Beans Copycat
- Trim Beans Like a Pro: Use a sharp chef’s knife or kitchen shears to snip the ends—don’t just eyeball it. A clean cut keeps the beans looking uniform and prevents woody bits from sneaking into your dish. (Yes, I’ve eaten those before, and it’s not fun.)
- Cook in Two Batches: Crowd the pan, and you’ll steam the beans instead of sear them. Start with half the green beans in a cold, oiled skillet, then add the rest once they’re sizzling. This guarantees crisp-tender beans every time—no sad, limp piles here.
- Smash Garlic, Don’t Mince: After mincing, press each clove flat with the side of your knife before adding it to the pan. This releases more flavor and prevents burning. (I learned this the hard way when my first batch tasted like garlic perfume instead of actual garlic.)
- Salt the Butter First: Mix a pinch of kosher salt directly into the melted butter before tossing it with the beans. This distributes flavor evenly and cuts down on the guesswork later. (Your future self will notice the difference, trust me.)
Health benefits of this recipe
Fiber-Rich Side
These garlicky green beans are a fantastic source of dietary fiber, with about 4 grams per serving (based on 1.5 lbs serving 4). Fiber supports digestive health by promoting regularity and feeding your gut microbiome.
I've noticed my digestion improves when I include fiber-rich sides like these with every meal. The crisp-tender texture also helps you feel full longer, making it a great addition to balanced meals. 💪
Low-Calorie Powerhouse
At just 80 calories per serving, these beans are a guilt-free side that won't derail your calorie goals. The 6 tbsp butter adds richness but remains reasonable when portioned properly. I often serve them as a side to steak or chicken to keep the meal light yet satisfying.
The garlic and lemon add flavor without adding significant calories, making this dish perfect for health-conscious diners.
Rich in Vitamin K
Green beans are packed with vitamin K, which is essential for blood clotting and bone health. A single serving provides about 25% of your daily needs. This vitamin also plays a crucial role in maintaining strong bones, which is especially important as we age.
I always make sure to include green beans in my weekly meals to support my bone health, especially during the colder months when we spend less time outdoors.
Antioxidant Boost
The vibrant green color of these beans indicates their high antioxidant content, including vitamin C and flavonoids. These compounds help combat oxidative stress and reduce inflammation in the body.
The lemon juice in the recipe enhances this benefit by adding another dose of vitamin C. I love knowing that a simple side dish can contribute so much to my overall health. 🌱
Heart-Healthy Fats
While the butter adds richness, using unsalted butter keeps the sodium in check. The healthy fats in butter, combined with the fiber from the beans, support heart health by improving cholesterol levels.
I always opt for unsalted butter in recipes like this to control the sodium content, especially when serving to guests with dietary restrictions. The garlic in the recipe also helps lower blood pressure naturally.
Meal Prep Friendly
These beans reheat beautifully while retaining their nutritional benefits, making them ideal for meal prep. Storing them in airtight containers preserves their fiber and vitamin content. I often prep a big batch on Sundays to include in my weekly lunches.
The garlic butter flavor actually intensifies when reheated, making leftovers taste even better. Just be sure to add a splash of water when reheating to maintain their crisp-tender texture. ✨
Nutrition facts
Frequently asked questions
Can I use frozen green beans instead of fresh?
Fresh green beans give the best crisp-tender texture, but frozen will work in a pinch. Thaw them completely first, then pat very dry—even more than fresh beans—to prevent steaming. You may need to add 1 extra minute of cooking time to ensure they're tender. The flavor won't be identical, but it's still delicious!
Why do my green beans turn mushy?
Overcooking or crowding the pan causes mushiness. Always use medium-high heat and cook in a single layer—never more than ½ inch deep of beans. If they're not crisp after 4-5 minutes, they're overdone. For extra crunch, add them back to the pan for 30 seconds after tossing with butter.
Can I make this recipe ahead of time?
Yes! Cook the beans and garlic butter as directed, then store in an airtight container for up to 3 days. Reheat in a skillet with 1 tsp water for 2 minutes to restore crispness. The flavor actually improves overnight as the garlic butter melds. Just add fresh lemon juice before serving.
What if I don't have fresh lemon juice?
Bottled lemon juice works fine, but fresh is best for that bright zing. If you're out of lemon, try ½ tsp apple cider vinegar or ¼ tsp lemon zest for acidity. The key is balancing the rich garlic butter—some acidity is essential to prevent the dish from tasting too heavy.
How do I make this vegetarian-friendly?
This recipe is already vegetarian! For a vegan version, replace the butter with 6 tbsp vegan butter or olive oil and use ½ cup vegetable broth instead of water when reheating. The crisp-tender texture and garlicky flavor remain identical.