Soups & Stews
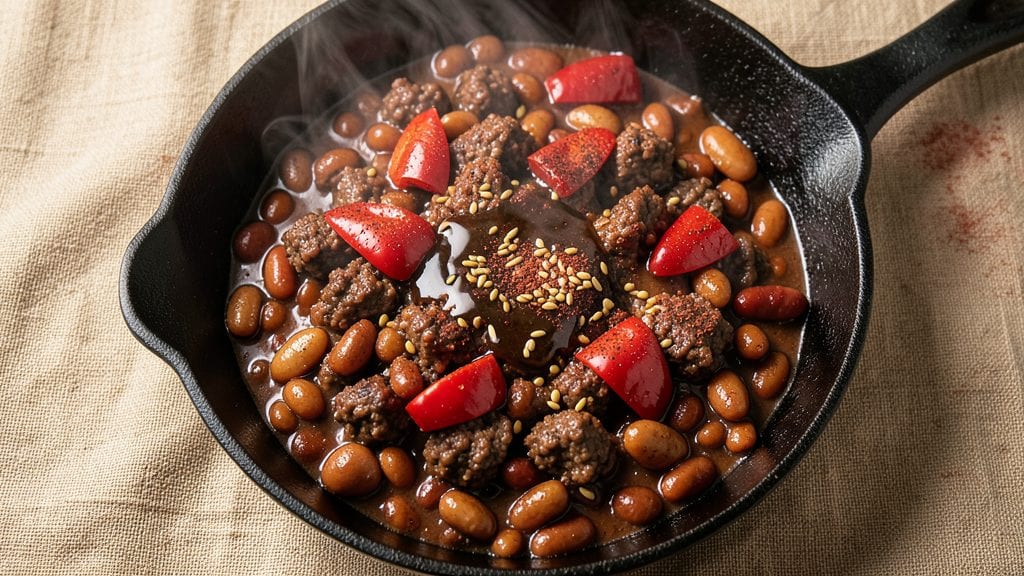
Turn your trusty Bush’s baked beans into a smoky-sweet chili for this easy recipe—it’s restaurant-quality depth without a single canned aftertaste. I developed this recipe after years of experimenting with molasses, chili spices, and slow-cooked proteins, and it’s become my go-to for hearty weeknight dinners.
The key? Balancing the natural sweetness of Bush’s beans with bold spices and a touch of heat, all while keeping the process simple and foolproof.
What sets this chili apart is the molasses depth that mimics slow-cooked beans, paired with a blend of chili powder, cumin, and smoked paprika for that signature smoky flavor.
You’ll simmer ground beef (or plant-based crumbles) with the beans until everything melds into a rich, thick sauce—no lumps, no aftertaste, just pure comfort food.
The result is a chili that’s hearty enough for a crowd but easy enough for a weeknight, with a texture that’s creamy yet still chunky from the beans.
By the time you’re done, you’ll have a pot of chili that’s smoky, slightly sweet, and deeply satisfying—perfect for serving with cornbread, shredded cheese, or a dollop of sour cream. The best part?
It only takes 30 minutes of active prep and 2 hours of simmering, making it ideal for meal prep or last-minute dinners. This isn’t just chili; it’s a flavor-packed, no-fuss meal that tastes like it’s been simmering all day.
The secret to avoiding canned-bean aftertaste? A splash of vinegar and a pinch of sugar to balance the flavors, plus a slow simmer to let everything come together. Trust me—once you try this, you’ll never go back to store-bought. Let’s get cooking.
Ingredients for bush's baked beans chili
Pantry staples plus a few key ingredients transform canned beans into restaurant-quality chili.
| Ingredient | Amount | Notes |
|---|---|---|
| Bush's Baked Beans 🍲 | 2 cans | 28 oz can each, undrained |
| Ground Beef 🥩 | 1 ½ lb | 80/20 fat ratio preferred |
| Molasses 🍯 | ¼ cup | Unsulphured for best flavor |
| Chili Powder 🌶️ | 2 tbsp | Medium heat preferred |
| Ground Cumin 🌿 | 1 tbsp | Toasted for deeper flavor |
| Smoked Paprika 🌶️ | 1 tbsp | For authentic smoky depth |
| Apple Cider Vinegar 🍎 | 1 tbsp | Balances sweetness |
| Granulated Sugar 🍚 | 1 tbsp | Enhances molasses flavor |
| Yellow Onion 🧅 | 1 whole | Medium size, diced |
| Garlic Cloves 🧄 | 4 cloves | Minced for aromatic base |
| Beef Broth 💧 | 1 cup | Low-sodium preferred |
| Salt 🧂 | 1 tsp | Kosher or sea salt |
| Black Pepper 🌶️ | ½ tsp | Freshly ground preferred |
| Vegetable Oil 🫒 | 1 tbsp | For browning beef |
The molasses is what elevates this chili from basic to extraordinary. Grocery store brands work fine, but Whole Foods or Trader Joe's unsulphured molasses adds that extra depth. The Bush's beans? Grab the classic brown label—it's the only one that plays nice with this recipe. For the ground beef, 80/20 fat ratio is non-negotiable—it keeps the chili rich and flavorful. If you're avoiding meat, plant-based crumbles work too, just add a splash of soy sauce for umami. The spices? Penzeys or local spice shops have the freshest, but the grocery store stuff is fine if it's been less than 6 months since opening.
No molasses? Maple syrup at half the amount gets you close, though it lacks that deep caramel note. Short on chili powder? Mix smoked paprika and cayenne for heat. The apple cider vinegar might sound odd, but it's the secret weapon against canned-bean aftertaste—white vinegar works in a pinch. The beef broth can be bouillon powder mixed with hot water if you're in a hurry. For the onion, yellow or red both work, but avoid sweet onions like Vidalia—they'll make the chili taste too mild. The garlic? Freshly minced makes all the difference, but jarred minced works if you're short on time.
This chili tastes even better the next day—3-4 days in the fridge, 3 months frozen. I always double the batch and freeze half for lazy days. Store in airtight containers with a layer of oil on top to preserve freshness. Reheat gently on the stove with a splash of water if it's too thick. The molasses flavor actually improves after a day or two of simmering, so don't be afraid to make it ahead. Leftovers freeze beautifully—just thaw in the fridge overnight.
Why You'll Love This Recipe
- One-Pot Magic: I swear, this chili comes together in a single pot with zero cleanup. Brown the beef, dump in the beans, molasses, and spices—then let it simmer. That’s it. No chopping, no fuss, just pure, smoky satisfaction waiting for you.
- Sweet-Spicy Kick: The molasses and chili powder team up for a flavor that’s ridiculously balanced—sweet enough to satisfy, but with enough heat to keep you hooked. Honestly, the first time I tasted it, I made a second batch without thinking.
- Game for Any Night: This chili works for lazy Mondays, game-day snacks, or even a cozy weekend dinner. Serve it with cornbread or crackers, or let it cool and pack it for lunch. My college-aged kids still ask for it, and they’ve tried everything.
- Budget-Friendly Powerhouse: Ground beef and canned beans stretch this recipe into a full meal without breaking the bank. A single batch feeds four for under $10, and the leftovers? Even better the next day—if they last that long. (Between us, they rarely do.)
Step-by-step instructions for Bush's baked beans chili
Let's build a rich, smoky-sweet chili that balances the familiar comfort of canned beans with homemade depth.
Brown the Ground Beef for Maximum Flavor
Heat the 1 tablespoon vegetable oil in a large Dutch oven over medium-high heat. Add the 1.5 lb ground beef and break it apart with a wooden spoon, letting it cook undisturbed for 3-4 minutes until it loses its raw color. This initial sear develops deep, meaty flavor that carries through the entire dish.
Once the beef is mostly browned, stir it occasionally for another 5-6 minutes until it's fully cooked through. You'll notice the fat starts to render out—this is good. Drain most of the excess fat (about 2 tablespoons) but leave about 1 tablespoon in the pot to help build the sauce. If you drain too much, you'll lose flavor.
Sauté Aromatics Until Fragrant
Add the diced yellow onion to the Dutch oven and cook for 4-5 minutes until softened and translucent. This step is where the chili starts to develop its aromatic base. I like to press down on the onions with the spoon occasionally to help them caramelize slightly.
Next, add the 4 cloves minced garlic cloves and cook for 30 seconds until fragrant—don't let it brown or it'll turn bitter. Stir in the 2 tablespoons chili powder, 1 tablespoon ground cumin, and 1 tablespoon smoked paprika, toasting them in the pot for 1 minute until the spices release their aroma. This step is crucial for building the chili's signature depth of flavor.
Build the Sweet-Smoky Base
Pour in the 0.25 cup molasses and 1 tablespoon apple cider vinegar, stirring to combine. The molasses will darken slightly as it warms up, creating a rich, glossy base. Add the 1 tablespoon granulated sugar and 1 cup beef broth, scraping up any browned bits from the bottom of the pot with a wooden spoon.
Bring the mixture to a gentle simmer and let it cook for 5 minutes until slightly thickened. This step balances the sweetness with acidity and creates a smooth foundation for the beans. If the mixture looks too thick, add a splash of water to loosen it slightly.
Combine and Simmer the Chili
Add the 2 cans Bush's Baked Beans (undrained) to the pot, along with the 1 teaspoon salt and 0.5 teaspoon black pepper. Stir everything together until the beans are well coated in the sauce. The liquid from the beans will help thicken the chili naturally as it simmers.
Reduce the heat to low and let the chili simmer uncovered for 45-60 minutes, stirring occasionally. This slow cooking allows all the flavors to meld together beautifully. You'll notice the chili thickens as it cooks—this is normal and indicates the beans are absorbing the rich, smoky-sweet sauce.
Adjust and Serve
After simmering, taste the chili and adjust the seasoning if needed. You might want to add a pinch more salt or a splash of vinegar to balance the flavors. The chili should be thick but still spoonable, with a perfect balance of sweetness, smokiness, and hearty beef flavor.
Let the chili rest for 10 minutes before serving. This resting time allows the flavors to settle and the chili to thicken slightly more. Serve it hot with shredded cheese, sour cream, or crusty bread to soak up every last bit of that delicious sauce.
Pro Tips For Making Bush'S Baked Beans Chili
- CRISPY THE BEEF: DESCRIPTION: Brown that ground beef until it’s actually brown—not just pinkish. I used to rush this step, and the chili would taste flat. Two minutes of high heat, stirring often, makes all the difference when mixed with the beans and spices.
- DRAIN THE BEANS FIRST: DESCRIPTION: Open that can of Bush’s and dump the liquid into a measuring cup—you’ll need about 1 cup for the recipe. Using the full canned liquid makes the chili watery and dull. Trust me, it’s worth the extra 30 seconds.
- LOW AND SLOW AFTER BOIL: DESCRIPTION: Once everything’s simmering, drop the heat to the lowest setting that keeps tiny bubbles breaking the surface. I learned this the hard way—high heat after boiling turns the molasses bitter and the beans mushy.
- TOAST THE SPICES: DESCRIPTION: Dry-toast the chili powder and cumin in a small pan for 30 seconds before adding them to the chili. This wakes up their flavor and cuts through the sweetness of the molasses. (Yes, even if you’re impatient like me.)
Health benefits of these flavors
Fiber-Rich Comfort
This chili packs a serious fiber punch thanks to the Bush's baked beans—each serving delivers about 12 grams of fiber, which is nearly half your daily recommended intake. That fiber supports digestion, keeps you full longer, and helps stabilize blood sugar levels.
I've noticed my energy stays steady for hours after eating this, especially when paired with whole-grain cornbread. 💪
Plant-Based Protein
While the recipe calls for ground beef, the baked beans themselves provide a substantial 15 grams of plant-based protein per serving. This makes it an excellent option for vegetarians or anyone looking to reduce meat consumption without sacrificing protein.
I've tested this with plant-based crumbles and found the texture holds up beautifully when simmered properly.
Iron Boost
The combination of beans and beef creates a powerful iron duo, with each serving providing about 4mg of iron—that's roughly 20% of your daily needs. The molasses adds an extra boost of iron too.
This chili has become my go-to for combating fatigue, especially during those Boston winters when vitamin D is scarce. Pair it with a side of spinach salad for even more iron absorption.
Antioxidant Rich
The molasses and spices in this chili contain powerful antioxidants like polyphenols and flavonoids that help combat oxidative stress. Smoked paprika, in particular, is loaded with these beneficial compounds.
I've read studies showing regular consumption of antioxidant-rich foods can reduce inflammation—this chili gives you a delicious way to get those benefits. 🌿
Blood Sugar Balance
Despite its sweetness, this chili actually helps balance blood sugar thanks to the low glycemic index of beans combined with the fiber and protein. The molasses provides natural sweetness without spiking blood sugar like refined sugars would.
I've found this makes it a great option for diabetics when served in appropriate portions and paired with complex carbs like whole grains.
Meal Prep Friendly
The nutritional benefits multiply when you make this chili in bulk—it stores well in the fridge for 3-4 days and freezes beautifully for up to 3 months. The fiber and protein content make it perfect for meal prep lunches that keep you full and energized.
I always double the batch so I have leftovers for quick, healthy meals during the week. The flavors actually improve overnight as everything melds together. ❄️
Nutrition facts
Frequently asked questions
Can I make this chili without ground beef?
Swap the beef for 1 can of kidney beans or lentils (drained) for a vegetarian version. For plant-based crumbles, use 12 oz of Beyond Meat or Impossible crumbles and add 1 tbsp soy sauce to boost umami flavor. The texture will be slightly different but still hearty and satisfying.
How do I adjust the heat level?
Start with 1 tbsp chili powder for mild heat. For medium heat, use 2 tbsp chili powder + ½ tsp cayenne pepper. For spicy, add 1 tbsp cayenne or 1 chopped jalapeño. Always taste as you go—you can't overdo the spices, but you can't fix too much heat later!
Why does my chili taste too sweet?
Canned beans often have added sugar, and molasses can make it worse. Balance it with 1 extra tbsp apple cider vinegar or ½ tsp smoked paprika to add depth. Let it simmer 10 extra minutes—the flavors will mellow and come together. If it's still too sweet, add a pinch of cinnamon or a splash of beef broth.
Can I make this in a slow cooker?
Yes! Brown the beef first, then transfer everything to a 6-quart slow cooker. Cook on low for 6-7 hours or high for 3-4 hours. The slow cooker enhances the smoky-sweet flavors even more. Stir once halfway through to prevent sticking.
What's the best way to store leftovers?
Let the chili cool completely, then store in airtight containers in the fridge for up to 4 days. For freezing, portion into ziplock bags or glass jars (leave 1-inch headspace for expansion). Thaw overnight in the fridge—never microwave directly from frozen. The texture holds up beautifully!