Sauces & Condiments
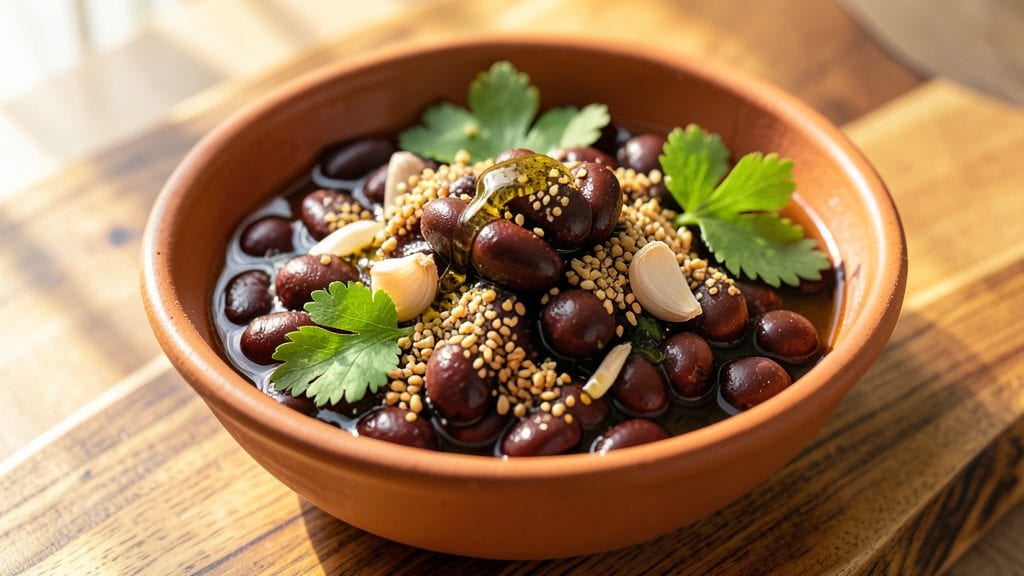
This bean chutney recipe delivers bold, smoky depth with just 10 minutes of active prep—no cooking required after blending. The secret lies in charring spices and beans for concentrated flavor, then balancing them with bright lemon and fresh herbs.
I developed this version after craving restaurant-quality chutney that worked as both a dip and a sauce, packed with protein and texture without dairy or meat.
The foundation is simple: black beans or chickpeas (your choice) blended with toasted cumin, coriander, and garlic for warmth, then brightened with lemon juice and fresh cilantro. The smoky depth comes from sautéing spices and beans until fragrant, while the acidity keeps the texture smooth but vibrant.
This chutney stays fresh for 5 days in the fridge, making it perfect for meal prep or last-minute entertaining.
What makes this version special is its versatility—spread it on sandwiches, mix it into grain bowls, or serve it with crispy vegetables and warm flatbread. The blend of smoky, spicy, and tangy flavors creates a restaurant-quality condiment that elevates any dish.
Whether you're hosting a dinner party or just need a quick flavor boost, this chutney delivers deep satisfaction with minimal effort.
For extra depth, toast the spices in a dry pan until fragrant before blending—this step transforms ordinary ingredients into something extraordinary. The result is a semi-thick paste that coats every bite, bringing layers of flavor without overwhelming the dish.
Let’s get started with this foolproof, no-cook chutney that’s as easy as it is impressive.
Ingredients for bean chutney
Ten simple ingredients for a restaurant-quality bean chutney that’s smoky, spicy, and ready in minutes.
| Ingredient | Amount | Notes |
|---|---|---|
| Black Beans or Chickpeas 🌱 | 1 ½ cups | Drained and rinsed thoroughly |
| Ground Cumin 🌿 | 1 tbsp | Toasted in dry pan first |
| Ground Coriander 🌿 | 1 tbsp | Toasted with cumin for depth |
| Garlic Cloves 🧄 | 4 cloves | Peeled and lightly charred |
| Fresh Cilantro 🌿 | ½ cup | Stems removed, loosely packed |
| Fresh Lemon Juice 🍋 | 2 tbsp | Freshly squeezed, no pulp |
| Extra-Virgin Olive Oil 🫒 | ½ cup | For creaminess and richness |
| Red Chili Flakes 🌶️ | ½ tbsp | Adjust for heat preference |
| Sea Salt 🧂 | ½ tsp | To taste, enhances flavors |
| Water 💧 | ¼ cup | Adjust for desired consistency |
The beans are the backbone here—black beans give a deeper, earthier flavor, while chickpeas add a creamier texture. Trader Joe’s or Whole Foods carry high-quality canned beans, but any organic brand works. Toasting the spices in a dry pan until fragrant (about 30 seconds) unlocks their full potential—don’t skip this step. For extra smokiness, char the garlic cloves directly over a gas flame or under a broiler for 2-3 minutes. Fresh cilantro is non-negotiable here; dried just won’t cut it.
No fresh cilantro? Fresh parsley or mint in the same amount works in a pinch, though flavor will shift slightly. Short on olive oil? Avocado oil or tahini adds richness, but olive oil’s fruity notes are ideal. The red chili flakes can be swapped for finely chopped fresh jalapeño if you prefer chunky heat. For a smoother texture, blend with 2 tbsp of water instead—this chutney should coat the back of a spoon but still be spreadable. If you’re serving it as a dip, aim for a thicker consistency by reducing the water slightly.
Store in an airtight container in the fridge for up to 5 days, though it tastes best within the first 3. The flavors meld beautifully over time, so it’s perfect for meal prep. To reheat, simply stir in a splash of water or olive oil—it’ll come back to life. For a quick flavor boost, toss this chutney with warm naan or roasted veggies. Freezing isn’t recommended, as the texture can get grainy, but you can freeze portions in ice cube trays for single-use servings.
Why You'll Love This Recipe
- No-Fuss Pantry Magic: I swear by this when I’ve got nothing but canned beans and spices. Open, rinse, blend—no chopping, no soaking, just toss in the cumin and coriander while the garlic sizzles in oil. That’s it. Honestly, I make this when I’m too tired to think, and it still tastes like I tried.
- Earthy & Bright: The cumin and coriander give it this warm, toasty depth, while the cilantro cuts through with freshness. That garlic? Oh, it’s there—bold but not overpowering, like a good handshake. My husband dips chips in it straight from the jar. (Yes, even on a Tuesday night.)
- Endless Spread Potential: Slather it on toast with fried eggs, mix it into rice bowls, or let the kids smear it on grilled cheese. I’ve even used it as a marinade for chicken—works every time. Between us, it’s my go-to for lazy dinners or when I’m feeding a crowd without stressing.
- Budget Hero: A can of beans, a spice rack staple, and a handful of cilantro? This costs me pennies per serving. Plus, it keeps for weeks in the fridge, so I make a big batch and forget about it. Not the prettiest, but the taste makes up for it—and my wallet thanks me.
Step-by-step instructions for bean chutney recipe
Here's how to blend everything together for a bold, smoky chutney that takes just minutes.
Toast the Spices for Maximum Flavor
Heat a dry skillet over medium heat and add the 1 tablespoon ground cumin and 1 tablespoon ground coriander. Toast for 30-45 seconds until fragrant and you can smell that warm, nutty aroma. Stir constantly so they don't burn—you want them just warm enough to release their oils but not darken.
This step is non-negotiable. Toasting the spices deepens their flavor and removes any raw taste. Once they're golden and smell amazing, immediately transfer them to a small bowl to cool. I like to let them sit for 2 minutes before moving on—this helps them release their full aroma when we blend.
Char the Garlic Cloves
While the spices cool, add the 4 peeled garlic cloves to the same dry skillet. Cook over medium heat for 1-2 minutes, turning occasionally, until they develop golden-brown spots and smell deeply aromatic. You're looking for just a hint of char—not blackened, just slightly crispy around the edges.
This charring adds a smoky depth that's essential for authentic chutney flavor. Let the garlic cool for 1 minute before removing it from the pan. I usually press it lightly with the back of a spoon to help release the oils and soften the cloves for blending.
Blend All Ingredients to Creamy Perfection
In a high-powered blender, combine the toasted spices, charred garlic, 1.5 cups drained black beans or chickpeas, 0.5 cup fresh cilantro, 0.5 cup extra-virgin olive oil, 0.5 tablespoon red chili flakes, 0.5 teaspoon sea salt, and 0.25 cup water. Start blending on low speed to let everything come together, then increase to high for 1-2 minutes until completely smooth.
Here's the thing—you want it creamy but not soupy. If it's too thick, add 1 teaspoon water at a time until it reaches a smooth, spreadable consistency. Taste as you go and adjust the sea salt or red chili flakes if needed. The chutney should be vibrant green with a rich, earthy aroma that makes your mouth water.
Finish with Fresh Lemon Juice
Transfer the blended chutney to a serving bowl and stir in the 2 tablespoons fresh lemon juice. This brightens the flavors and cuts through the richness of the olive oil. Give it a final taste and adjust seasoning—you might need a pinch more salt or chili flakes depending on your preference.
The lemon juice also helps balance the spices, creating that perfect harmony of smoky, spicy, and tangy. Let the chutney sit for 5 minutes before serving—this allows all the flavors to meld together. Serve immediately with grilled meats, fish, or spread on toast for a quick snack.
Store and Enjoy
Transfer any leftovers to an airtight container and refrigerate for up to 5 days. The flavors actually improve as it sits, developing even more depth. When ready to use, give it a quick stir and taste—sometimes it needs a splash of water to loosen it up again.
This chutney is incredibly versatile. Use it as a dip, spread, or marinade. The smoky, spicy depth pairs beautifully with grilled chicken, fish tacos, or even as a topping for avocado toast. And the best part? It's ready in under 10 minutes with no cooking required!
Pro Tips For Making Bean Chutney
- Toast the Spices: Heat your ground cumin and coriander in the dry pan for 30 seconds before adding garlic—this burns off the raw taste and deepens their flavor. I used to skip this, and the chutney always tasted like dust instead of warmth.
- Smash, Don’t Blend: Use a fork or potato masher to rough up the beans before blending—this keeps texture and prevents a gluey mess. Over-blending turns your chutney into a sad, pasty puree.
- Add Oil Last: Stir in your oil after removing from heat—it cools the spices and prevents them from cooking further, which can make the chutney bitter. Trust me, this small tweak makes a real difference.
- Pulse the Garlic: Lightly crush your garlic cloves with the flat of your knife before cooking—this ensures even cooking and prevents large, uncooked chunks. I learned this the hard way after biting into a surprise garlic surprise in my chutney.
Make-ahead tips for this bean chutney
Prep Ahead for Meal Prep
Make this chutney 2-3 days in advance—it tastes even better as flavors meld! Store in a glass airtight container (I use Le Parfait jars) in the fridge. The texture thickens slightly over time, so stir in 1-2 teaspoons of water before serving to restore spreadability.
This makes it perfect for batch cooking—just blend once and use throughout the week. 🌱
Freezing for Later Use
While not ideal, you can freeze this chutney in ice cube trays for single-use portions. Once frozen, transfer cubes to a ziplock bag and thaw in the fridge overnight. The texture may separate slightly, so blend briefly before using.
For best results, freeze only the portion you plan to use within 1 month. Avoid freezing in jars—they can crack from expansion. ❄️
Portioning for Convenience
Divide the chutney into small glass jars (like Weck jars) for easy grab-and-go use. Label with the date and store in the fridge. A single jar keeps for 5 days, making it ideal for lunches or quick snacks.
I keep one jar in my pantry for last-minute dips—just add a splash of water to loosen it up. This saves time when you're short on prep hours. 💡
Reheating and Reviving
If your chutney thickens too much, stir in 1 tablespoon of olive oil or water per ½ cup of chutney. For a quick reheat, microwave for 15-20 seconds (covered) to warm through.
I avoid stovetop reheating—it can break down the texture. Always taste after reheating and adjust seasoning if needed. The lemon juice helps revive flavors if it tastes flat. 🔥
Versatile Storage Containers
Use silicone molds (like Lapro silicone molds) to shape chutney into neat portions for easy slicing. These containers are microwave-safe and BPA-free. For travel, pack in small leak-proof containers (like OXO Pop Containers) to avoid spills.
Mason jars with silicone seals are my go-to for long-term fridge storage—they keep flavors fresh longer. 💪
Flavor Boost After Storage
After 3 days in the fridge, the chutney’s depth intensifies. Add a pinch of smoked paprika or a dash of hot sauce to refresh the heat. A squeeze of fresh lemon juice brightens flavors if they’ve mellowed.
I also like adding chopped fresh herbs (like mint or basil) just before serving for a vibrant finish. This keeps the chutney tasting fresh, even after storage. ✨
Nutrition facts
Frequently asked questions
Can I use dried beans instead of canned for this bean chutney?
but you'll need to soak and cook them first. Use 1 cup dried black beans or chickpeas, soak overnight, then simmer for 1-1.5 hours until tender. Drain well and let cool before blending. The texture will be slightly thicker, so add 2-3 tablespoons extra water during blending if needed.
How do I adjust the heat level in this chutney?
Start with the 0.5 tablespoon red chili flakes called for, then adjust to taste. For milder heat, reduce to ¼ teaspoon or swap for ½ teaspoon sweet paprika. For extra spice, add ½ teaspoon cayenne pepper or 1 finely chopped serrano pepper during blending. Always taste before serving!
What are the best ways to use leftover bean chutney?
This versatile chutney works as a dip for veggie sticks or pita chips, a spread for toast or sandwiches, or a marinade for grilled tofu or chicken. Stir it into hummus or soups for extra depth, or drizzle over tacos, grain bowls, or roasted vegetables. The possibilities are endless!
Why does my chutney separate after refrigeration?
This happens when the oil and water components separate naturally. Simply stir vigorously or blend briefly with 1-2 teaspoons water or olive oil to restore smoothness. The flavor won't be affected—it's completely normal! For prevention, store in a glass jar and avoid metal containers that can react with the acidity.
Can I make this chutney without a blender?
Yes, but the texture will be chunkier. Use a food processor or immersion blender instead. For a truly rustic version, mash the beans with a fork after sautéing spices and garlic, then stir in all other ingredients. The flavor will still be amazing—just less smooth!