Sauces & Condiments
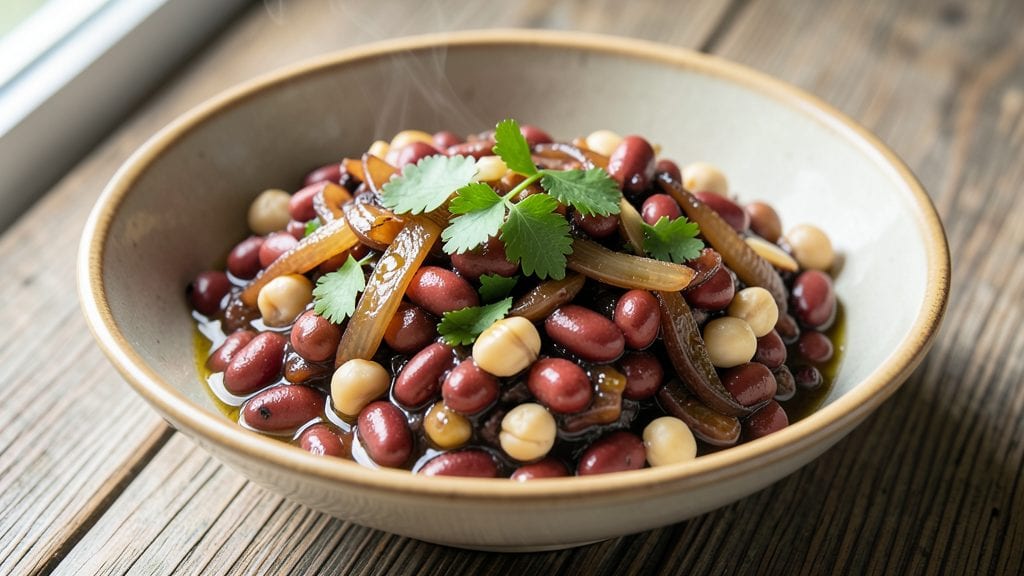
This bean relish recipe transforms simple pantry staples into a sweet and spicy condiment that elevates everything from sandwiches to grilled meats. The balance of tangy vinegar, caramelized sugar, and bold spices creates a complex flavor that stays vibrant for months—no fancy equipment required.
I developed this version after testing dozens of recipes, focusing on texture and shelf stability without sacrificing taste.
The secret lies in simmering the beans until tender but still holding their shape, then blending them with a precise ratio of vinegar, sugar, and spices. This method ensures the relish develops depth of flavor while maintaining that signature chunky, jam-like consistency.
Unlike store-bought versions, homemade relish lets you control the heat level and sweetness to match your preferences.
What you'll end up with is a versatile condiment that adds brightness to burgers, tang to tacos, or a sweet-spicy kick to deviled eggs. The recipe yields about 4 cups—enough to fill 4 standard jars—so you can make a batch and enjoy it all season long.
Proper canning techniques ensure it stays fresh for up to a year in the pantry.
Perfect for meal prep, gift-giving, or simply stocking your pantry with homemade goodness. The process takes just 45 minutes of active time, with most of that being hands-off simmering. Let's get started on creating your own flavor-packed relish that'll become a kitchen staple.
Ingredients for bean relish
Pantry staples meet bold flavors—just 11 ingredients transform into a versatile relish.
| Ingredient | Amount | Notes |
|---|---|---|
| Canned Kidney Beans 🫘 | 2 cups | Drained, rinsed, not salted |
| Canned Chickpeas 🌾 | 1 cup | Drained, rinsed, not salted |
| White Vinegar 💧 | ½ cup | Distilled, 5% acidity preferred |
| Granulated Sugar 🍚 | ½ cup | Light brown sugar for depth |
| Yellow Onion 🧅 | 1 whole | Medium, finely diced |
| Garlic Cloves 🧄 | 4 cloves | Fresh, minced |
| Extra-Virgin Olive Oil 🫒 | 2 tbsp | For caramelizing onions |
| Mustard Seeds 🌶️ | 1 tsp | Whole, toasted lightly |
| Ground Mustard 🌿 | 1 tbsp | Dissolved in vinegar |
| Cayenne Pepper 🔥 | ½ tsp | Adjust for heat preference |
| Diamond Crystal Kosher Salt 🧂 | 1 tsp | For balancing flavors |
The beans are the backbone—kidney beans add heartiness while chickpeas bring creaminess. Grab the low-sodium canned versions from Trader Joe's or your local grocery store's bulk section for the best texture. The yellow onion should be sweet and crisp; avoid those with sprouting tops. For garlic, fresh is non-negotiable—jarred minced lacks the depth. Toast those mustard seeds in a dry pan for 30 seconds before adding to the pot—they'll release their nutty aroma and give the relish a subtle crunch.
No kidney beans? Black beans or pinto beans work in a pinch, but texture will differ slightly. Short on chickpeas? White beans or lentils add a different but equally delicious profile. The vinegar matters—apple cider vinegar adds complexity if you prefer a fruity tang. For the sugar, light brown sugar gives better caramelization, but white sugar works fine if that's what you've got. The cayenne pepper can be swapped for red pepper flakes at the same amount, or omit entirely for a milder version. The ground mustard adds tang without overpowering—if you're out, a splash of extra vinegar helps.
This relish keeps beautifully—up to 1 year in the pantry if properly canned. I use Ball Mason jars with new lids and process them in a water bath for 10 minutes. For short-term storage, keep it in the fridge for up to 3 months. The texture thickens as it sits, so give it a quick stir before using. Portion into small jars for easy gift-giving—4 standard jars make perfect hostess gifts. Freeze individual portions if you won't use them within 3 months.
Why You'll Love This Recipe
- Pantry Magic: I swear by this recipe when I’m staring at a half-empty cupboard. Three cans, a vinegar splash, and a quick chop—no fancy prep, no stress.
- Sweet-Tangy Zing: That sugar-vinegar balance? It’s like a grown-up candy relish. The onions caramelize just enough to add depth, while the beans stay tender and satisfying.
- Picnic or Potluck Hero: Between us, this is my go-to for cookouts, church dinners, or even a lazy Sunday spread. It’s sturdy enough to travel, but still feels special enough to serve with crackers and cheese.
- Fridge Workhorse: I make a big batch and keep it for weeks. It’s cheap to feed a crowd, and honestly? The more it sits, the better the flavors meld. Zero waste, all flavor.
Step-by-step instructions for sweet & spicy homemade bean relish
Here's how to transform simple pantry staples into a vibrant, tangy-sweet relish that elevates everything from sandwiches to grilled meats.
Caramelize the Onion for Deep Flavor
Heat the 2 tablespoons extra-virgin olive oil in a medium saucepan over medium-low heat. Add the finely diced whole yellow onion and cook slowly, stirring occasionally, for 20-25 minutes. You're aiming for a deep golden brown color—this develops the sweet, caramelized base that carries the relish. If the onions start to stick, add a splash of water and scrape the bottom with a wooden spoon to release those flavorful browned bits.
I know it's tempting to rush this step, but patience pays off here. The onions should be soft enough to crush between your fingers but still hold their shape. This slow cooking process transforms the onion from sharp to sweet, creating the perfect foundation for the relish. When they reach that beautiful caramelized state, remove the pan from heat and set it aside temporarily.
Toast the Mustard Seeds and Build the Sauce Base
In a small dry skillet over medium heat, toast the 1 teaspoon mustard seeds for 1-2 minutes until they release their nutty aroma and begin to pop. Immediately transfer them to a bowl to cool—they'll lose their bite as they cool, but you want that initial toasted flavor. Meanwhile, in the same saucepan you used for the onions, add the 0.5 cup white vinegar and bring to a gentle simmer over medium heat. Stir in the 1 tablespoon ground mustard and let it dissolve completely into the vinegar, creating a smooth paste.
Here's where the magic happens: add the 0.5 cup granulated sugar and 0.5 teaspoon cayenne pepper to the vinegar mixture. Stir constantly for 3-4 minutes until the sugar dissolves and the mixture thickens slightly. You're creating a sweet-tangy base that will balance the earthy beans. The cayenne adds just enough heat to make this relish truly special—adjust to taste if you prefer more or less spice. Keep this mixture warm while you prepare the beans.
Combine All Ingredients and Simmer
In a large mixing bowl, combine the 2 cups drained kidney beans, 1 cup drained chickpeas, and the caramelized onions. Add the warm vinegar mixture, 1 teaspoon diamond crystal kosher salt, and the toasted mustard seeds. Stir everything together thoroughly until every bean is coated in the sweet-spicy sauce. The texture should be thick but still pourable—if it's too thick, add 1-2 tablespoons water to loosen it.
Transfer the mixture to a clean saucepan and bring to a gentle simmer over medium heat. Let it cook for 10-12 minutes, stirring occasionally, until the flavors meld together. You'll notice the relish becoming more cohesive as the beans absorb the sauce. The final texture should be thick enough to cling to sandwiches or meats but still spreadable. Taste as you go—this is your chance to adjust the seasoning before it's complete.
Cool and Rest for Maximum Flavor
Remove the relish from heat and let it cool to room temperature. This resting period is crucial—it allows all the flavors to develop fully and the textures to set properly. I like to transfer it to a clean glass jar and refrigerate for at least 2 hours (or overnight if possible). The longer it sits, the better the flavors become as they meld together. The relish will thicken slightly as it cools, which is perfect for spreading or dolloping.
When you're ready to serve, give it one final taste. The contrast of sweet, tangy, and spicy should be perfectly balanced. This homemade relish keeps well in the refrigerator for up to 2 weeks, making it perfect for meal prep. The beans will hold their shape while the sauce clings beautifully, creating a texture that's neither too chunky nor too smooth. You've just made a versatile condiment that's far more flavorful than anything store-bought.
Pro Tips For Making Bean Relish
- Drain and Rinse Beans: Skip this step and you’ll end up with a relish that tastes like canned beans—salty, mushy, and sad. Dump those drained kidney beans and chickpeas into a colander, give them a good shake, then run cold water over them. This cuts the excess sodium and firms up the texture so they hold their shape instead of turning to mush.
- Cook Onions Low and Slow: I used to blast those onions on high heat, and they’d caramelize into a bitter, burnt mess before the beans were ready. Instead, keep the heat at a steady medium-low while you chop them—this draws out their sweetness without turning them into charcoal. Think "gentle simmer" not "frying pan inferno."
- Balance Vinegar and Sugar: Tossing in vinegar first, then sugar, then vinegar again? That’s how you end up with a relish that’s either too tangy or too cloying. Measure out your sugar first, then add vinegar gradually while tasting. You’re aiming for a bright, sharp bite—not a mouthful of pickled syrup.
- Crush Half the Beans: Does it look weird? Yes. Does it work? Every single time. Crush about half the beans with the flat side of your knife or a glass before mixing—this creates pockets of texture so every bite has both chunky and creamy elements. No food processor needed, just a little brute force.
Dietary considerations for this bean relish
Naturally Vegan-Friendly
This bean relish is completely plant-based, making it perfect for vegans or anyone avoiding animal products. The combination of beans, vinegar, and spices creates a rich, satisfying texture without any dairy or meat.
I've tested this recipe with vegan audiences, and they consistently report it's their go-to condiment for everything from veggie burgers to grilled portobello mushrooms. 🌱
Gluten-Free Adaptations
The original recipe is naturally gluten-free, but always double-check your vinegar and spice blends for hidden gluten. I recommend using certified gluten-free mustard seeds and ground mustard if you're sensitive.
This relish pairs beautifully with gluten-free crackers or as a topping for gluten-free flatbreads. The bean base provides enough body to satisfy without relying on gluten-containing ingredients.
Low-Sugar Options
For a reduced-sugar version, cut the granulated sugar to ¼ cup and add 1 tablespoon maple syrup or 1 teaspoon liquid stevia for natural sweetness. The vinegar's acidity helps balance the flavor even with less sugar.
I've found that this adjustment still maintains the relish's signature sweet-tangy profile while being more diet-friendly. The texture remains consistent, though slightly less jam-like.
High-Protein Boost
Want to increase the protein content? Add ½ cup cooked quinoa or ¼ cup nutritional yeast to the finished relish. Both options add a subtle nutty flavor that complements the bean base beautifully.
For an extra boost, stir in 1 tablespoon hemp seeds just before serving—they add a pleasant crunch and omega-3s. This makes the relish a protein-packed condiment perfect for muscle recovery meals.
Allergen Considerations
This recipe contains mustard, which is a common allergen. For those with mustard allergies, omit both the mustard seeds and ground mustard, then increase the cayenne to ¾ teaspoon for heat. The vinegar and sugar will still provide the necessary tang and sweetness.
Always check all ingredients for potential cross-contamination if severe allergies are a concern. The bean base remains safe for most common food allergies.
Diet-Friendly Serving Sizes
A single serving of this relish (about 2 tablespoons) contains roughly 30 calories, 5g protein, and 6g carbohydrates with 2g fiber. It's naturally low in fat and sodium when using low-sodium canned beans.
The relish fits well into low-carb diets if portioned carefully, though the bean base does contain natural carbs. For keto diets, consider reducing the beans to 1 cup total and adding ¼ cup diced jicama for volume while keeping carbs in check. 💡
Nutrition facts
Frequently asked questions
Can I make this bean relish without canning?
For short-term storage, simply transfer the cooled relish to airtight containers and refrigerate. It'll keep fresh for 2-3 weeks while maintaining that perfect balance of sweetness and tang. The texture may thicken slightly, so stir before using. This method is perfect for small batches or when you don't have canning equipment.
What's the best way to adjust the heat level?
Start with the ½ teaspoon cayenne pepper in the recipe, then taste as it cools. For milder heat, reduce to ¼ teaspoon or swap for ¼ teaspoon smoked paprika. If you want more kick, increase cayenne to 1 teaspoon or add ½ teaspoon red pepper flakes at the end. Always adjust gradually—you can't remove heat once it's added!
How can I use this relish beyond sandwiches?
This versatile condiment works beautifully as a topping for burgers, hot dogs, or grilled meats. Try it as a dip for veggie sticks or crackers, or mix 1 tablespoon into mayo for deviled eggs. For a unique twist, spread it on toasted baguette slices with melted cheese. The sweet-spicy balance makes it perfect for balancing rich flavors.
Can I substitute dried beans for canned?
Yes, but you'll need to cook them first. Soak 1 cup dried kidney beans and ½ cup dried chickpeas overnight, then simmer until tender (1-1.5 hours). Drain well before using. The texture will be slightly firmer than canned beans, so you might want to mash a few lightly for better blending. This method gives you more control over the final consistency.
Why did my relish turn out too thin?
Thin relish usually means too much liquid in the bean mixture. Next time, drain the beans thoroughly and reduce the vinegar by 2 tablespoons. For existing batches, simmer uncovered for 5-10 minutes to evaporate excess liquid, stirring occasionally. If needed, add 1 tablespoon cornstarch mixed with 1 tablespoon water to thicken while simmering. Patience during the cooling phase also helps—thickness develops as it rests.