Desserts
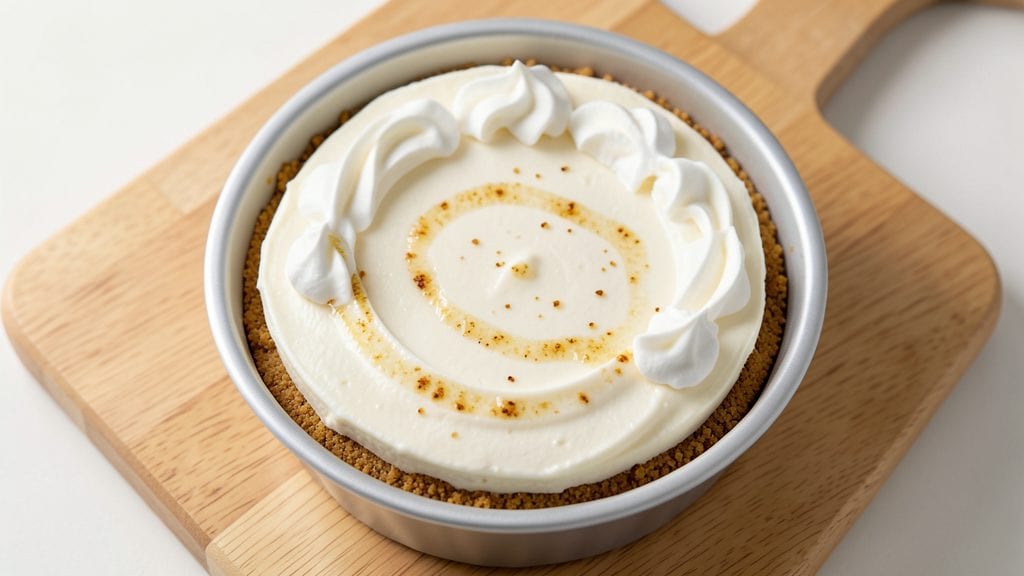
This Cheesecake Factory vanilla bean cheesecake copycat recipe delivers restaurant-quality results with its signature swirls and perfectly set crust. The secret lies in scraping fresh vanilla beans for maximum flavor and using a precise baking technique that ensures a creamy center without cracking.
After years of testing, I've perfected this method to recreate that iconic texture and aroma you know and love.
The foundation of this cheesecake is a buttery graham cracker crust that stays firm while supporting the rich filling. A water bath during baking prevents cracking, while a slow cooling process develops that signature smooth, silky texture.
The vanilla bean paste swirled through the batter creates those beautiful golden streaks that make this cheesecake instantly recognizable.
What you'll end up with is a cheesecake that's creamy yet firm, with a delicate balance of sweetness and vanilla flavor. The crust remains perfectly set, while the filling stays luscious and smooth—just like the original.
This recipe maintains all the authenticity of the restaurant version while being perfectly adaptable for home baking.
Whether you're serving this for a special occasion or just treating yourself, this copycat recipe delivers the same impressive results. The step-by-step instructions ensure success even for first-time cheesecake bakers. Let's get started on creating your perfect vanilla bean cheesecake.
Ingredients for cheesecake factory vanilla bean cheesecake copycat
Twelve essential ingredients for a restaurant-worthy vanilla bean cheesecake with signature swirls and flawless texture.
| Ingredient | Amount | Notes |
|---|---|---|
| Graham Cracker Crumbs 🍪 | 2 ½ cups | Finely crushed, buttery flavor |
| Unsalted Butter 🧈 | 1 cup | Melted, cooled slightly |
| Granulated Sugar 🍚 | 1 ½ cups | Superfine preferred for smoothness |
| Large Eggs 🥚 | 4 whole | Room temperature, separated |
| Vanilla Bean Paste 🌿 | 2 tbsp | High-quality, not extract |
| Heavy Cream 🥛 | 1 cup | Cold, full-fat preferred |
| Full-Fat Sour Cream 🍶 | 1 cup | Room temperature |
| Cream Cheese 🧀 | 32 oz | Room temperature, block style |
| Fresh Vanilla Beans 🌿 | 2 whole | Scraped for seeds and paste |
| Diamond Crystal Kosher Salt 🧂 | ½ tsp | Fine grain preferred |
| Vanilla Extract 🌿 | 1 tsp | Pure, high-quality |
| All-Purpose Flour 🌾 | 2 tbsp | For stabilizing filling |
| Lemon Juice 🍋 | 1 tbsp | Freshly squeezed |
The quality of your cream cheese and vanilla beans makes or breaks this recipe. Philadelphia brand or Wisconsin-made cream cheese delivers the best texture—avoid the powdered or low-fat varieties. For vanilla beans, Madagascar Bourbon from specialty grocers like Whole Foods or Penzeys provides the richest flavor profile. Scrape the beans thoroughly—both seeds and paste—to capture maximum vanilla essence. The graham cracker crumbs should be buttery and finely crushed; pre-packaged crumbs often lack the necessary richness, so consider making your own by pulsing graham crackers in a food processor with a bit of melted butter. Room-temperature eggs are critical for proper emulsification in the filling.
No vanilla beans? High-quality vanilla bean paste is the next best option, but pure vanilla extract will yield a more subtle flavor. For a lighter texture, substitute half the heavy cream with Greek yogurt or sour cream, though this may slightly alter the traditional consistency. If you're short on cream cheese, Neufchâtel cheese (a lower-fat French variety) works well in a pinch, though the texture will differ slightly. The all-purpose flour acts as a stabilizer—omit only if you're using a high-quality, thick cream cheese. For the crust, butter-flavored shortening can replace butter if you're concerned about over-browning, though purists will argue for the authentic buttery flavor.
This cheesecake requires precise timing for optimal results. The crust should be fully chilled before adding the filling to prevent melting. After baking, allow the cheesecake to cool gradually at room temperature for 1 hour before refrigerating. For the signature swirls, spread a thin layer of vanilla bean paste over the top of the batter before baking—this creates those iconic golden streaks. Store the cheesecake in the refrigerator for up to 5 days, though it's best enjoyed within 3 days for peak texture. To serve, run a warm knife around the edges and let it sit at room temperature for 15-20 minutes before slicing for clean cuts. The cheesecake freezes beautifully for up to 3 months when wrapped tightly in plastic wrap and foil.
Why You'll Love This Recipe
- No-Fuss Crust: I crush graham crackers in my food processor—literally 30 seconds—then mix with melted butter and sugar. No rolling, no stress, and that buttery crunch stays perfect every time.
- Vanilla Bomb: That vanilla bean paste isn’t just flavor—it’s luxury in a jar. One split bean swirled into the batter gives you that signature creamy, floral depth without tasting like artificial shortcuts. (Trust me, store-bought can’t compete.)
- Party-Proof Portions: Slice it for a crowd or save half for later—this keeps beautifully for days. The graham crust stays crisp, and the filling holds its shape. I’ve brought this to potlucks, birthdays, and even my mom’s kitchen (she still thinks it’s from the Cheesecake Factory).
- Budget Luxury: You’re paying for the vanilla bean paste, but the rest? Pantry staples. Butter, eggs, sugar—nothing fancy, just pure, rich dessert that feels like a splurge. I’ve made this for under $10 and had leftovers for a week. Worth it.
Step-by-step instructions for cheesecake factory vanilla bean cheesecake copycat recipe
Master the technique behind that signature Cheesecake Factory texture—silky swirls and a crust that holds without cracking.
Prepare the Crust for a Perfect Foundation
Preheat your oven to 325°F and prepare a 9-inch springform pan by lining the bottom with parchment paper. In a large bowl, combine the 2.5 cups graham cracker crumbs with the 1 cup melted unsalted butter, mixing until evenly moistened. Press the mixture firmly into the bottom of the pan, creating an even layer that reaches up the sides about ½ inch.
Bake the crust for 10 minutes until lightly golden. This pre-baking step prevents a soggy base and ensures the crust holds its shape during the lengthy baking process. Let it cool completely before adding the filling—this prevents melting and maintains structure.
Create the Vanilla Bean Swirl Filling
In a separate large bowl, beat the 32 oz cream cheese until completely smooth, scraping down the sides as needed. Add the 1.5 cups granulated sugar and mix until fully incorporated. Scrape the seeds from the 2 whole fresh vanilla beans and add them along with the 2 tbsp vanilla bean paste and 1 tsp vanilla extract.
In a medium bowl, whisk together the 4 whole large eggs, 1 cup heavy cream, 1 cup full-fat sour cream, and 1 tbsp lemon juice. Gradually add this mixture to the cream cheese while mixing on low speed to prevent curdling. Finally, fold in the 2 tbsp all-purpose flour and 0.5 tsp diamond crystal kosher salt until just combined.
Assemble and Bake for a Silky Texture
Pour half of the filling into the prepared crust, spreading it evenly. Drop spoonfuls of the remaining filling over the top, creating a marbled effect. Gently swirl with a knife to create the signature vanilla bean pattern without overmixing.
Bake in the preheated oven for 50-55 minutes until the edges are set but the center still jiggles slightly. The cheesecake should pull away from the sides of the pan but remain slightly underdone in the center—this ensures a creamy texture. Turn off the oven, crack the door open, and let the cheesecake cool gradually for 1 hour to prevent cracking.
Chill and Serve for Maximum Creaminess
Remove the cheesecake from the oven and let it cool at room temperature for 1 hour before refrigerating uncovered for 6-8 hours or overnight. This slow cooling process allows the flavors to meld and the texture to set properly, resulting in that signature Cheesecake Factory smoothness.
Before serving, run a knife around the edges to loosen, then release the springform pan. The cheesecake should release cleanly with minimal crumbling. Slice and serve chilled—each bite should deliver a perfect balance of creamy filling and buttery crust, with the vanilla bean swirls visible throughout.
Pro Tips For Making Cheesecake Factory Vanilla Bean Cheesecake Copycat
- Prep the crust first: DESCRIPTION: Press the graham cracker-butter-sugar mix into the pan before you even think about the filling—this isn’t a race. I used to rush it, and the crust always ended up crumbly or uneven. Take 5 minutes to firm it up with the back of a measuring cup or a glass, then chill it while you mix the batter. Trust me, that extra step keeps the whole thing from sliding apart later.
- Whisk eggs like your life depends on it: DESCRIPTION: No hand-mixing here—use a stand mixer or hand mixer and beat those eggs on medium-high for at least 3 minutes until they’re pale, thick, and ribbon-like. I learned this the hard way when my cheesecake turned out dense and bland. The air in the eggs is what makes it light, so don’t skimp on the time.
- Water bath or bust: DESCRIPTION: Wrap the springform pan in foil before lowering it into the water bath, and make sure the water covers at least halfway up the sides. I’ve seen too many people skip this or do it halfway, and the edges end up dry or cracked. The water should be hot but not boiling when you add the pan—just enough to create steam.
- Scrape the vanilla bean: DESCRIPTION: Don’t just dump in the paste—split the vanilla bean, scrape out the seeds, and blend them into the warm filling mixture. The seeds add depth and a real vanilla kick that paste alone can’t match. Yes, it’s a little extra work, but it’s the thing that makes this taste like the real deal.
Serving suggestions for cheesecake factory vanilla bean cheesecake copycat
Classic Presentation
Serve this cheesecake straight from the fridge on a marble slab or wooden board for an elegant presentation that highlights the golden swirls. Use a serrated knife dipped in hot water between slices for clean cuts—this prevents crumbling and ensures each portion showcases the creamy texture.
I like to dust the top with powdered sugar just before serving to add a delicate finish that complements the rich vanilla flavor. 🍽️
Fruit Toppings
Fresh berries are the perfect topping for this vanilla bean cheesecake. Arrange a ring of raspberries or blackberries around the edge, then add a dollop of whipped cream in the center. For a tropical twist, use mango slices or passion fruit pulp—the acidity cuts through the richness beautifully.
I recommend using organic berries from Trader Joe's for their vibrant color and sweetness.
Chocolate Drizzle
For chocolate lovers, melt 4 oz dark chocolate (70% cacao) with 2 tbsp heavy cream until smooth. Drizzle over the cheesecake in a zigzag pattern, then sprinkle with crushed hazelnuts or sea salt flakes for contrast.
The bitterness of the chocolate enhances the sweetness of the vanilla, creating a sophisticated flavor profile. Use a piping bag with a small tip for precise drizzle lines.
Coffee Pairing
Serve slices of this cheesecake with a cup of cold brew coffee or a vanilla latte to balance the sweetness. The natural sweetness of the cheesecake pairs beautifully with the bitterness of coffee, creating a harmonious flavor combination.
For an extra touch, add a cinnamon stick to the coffee for aroma. I prefer Starbucks cold brew concentrate for its smooth, rich flavor.
Garnish Ideas
Add a final flourish with edible gold leaf or crushed pistachios for a luxurious touch. A sprinkle of toasted coconut flakes adds a tropical note, while mint leaves provide a refreshing contrast.
For a rustic look, dust with cocoa powder in a circular pattern. These garnishes elevate the presentation without overpowering the cheesecake's natural flavors. 💫
Portion Control
For parties, cut the cheesecake into 12 equal wedges using a sharp pizza cutter for clean slices. Serve each portion on a small plate with a dollop of whipped cream or a berry sauce on the side.
To prevent sogginess, serve the cheesecake chilled and allow it to sit at room temperature for just 5-10 minutes before serving. This ensures the perfect texture with every bite.
Nutrition facts
Frequently asked questions
Why does this recipe use fresh vanilla beans instead of extract?
The fresh vanilla beans provide a depth of flavor that extract simply can't match. The seeds and paste create those signature golden swirls while delivering a more complex, aromatic profile. For best results, use Madagascar Bourbon beans—they're the most widely available and offer the perfect balance of sweetness and floral notes.
Can I make this cheesecake in a different pan size?
Yes, but you'll need to adjust baking times. For an 8-inch pan, reduce baking time by 10-15 minutes and chill longer. For a 10-inch pan, increase baking time by 10-15 minutes. Always use a water bath and check doneness by gently jiggling the center—it should be slightly underdone. The crust-to-filling ratio should remain 1:2 for proper texture.
What's the best way to prevent cracking?
Cracking happens when the cheesecake cools too quickly. To prevent it: 1) Bake at 325°F (not hotter), 2) Let it cool in the oven with the door cracked for 1 hour after baking, and 3) Chill uncovered in the fridge for 6-8 hours. A water bath during baking also helps create even heat distribution. If cracks appear, cover them with whipped cream or chocolate ganache!
How do I know when it's fully set?
The cheesecake is done when the edges are set but the center still jiggles slightly (like Jell-O). It should pull away from the pan sides but remain slightly underdone. The internal temperature should read 145°F at the center. If it's too firm, it may be overbaked—this affects the creamy texture. Remember, it will continue setting as it cools.
Can I make this cheesecake ahead of time?
This cheesecake actually tastes better after 24-48 hours of chilling as the flavors meld. Store it in an airtight container in the fridge for up to 5 days. For freezing, wrap tightly in plastic and foil, then freeze for up to 3 months. Thaw overnight in the fridge before serving—never at room temperature to prevent texture issues.