Side Dishes
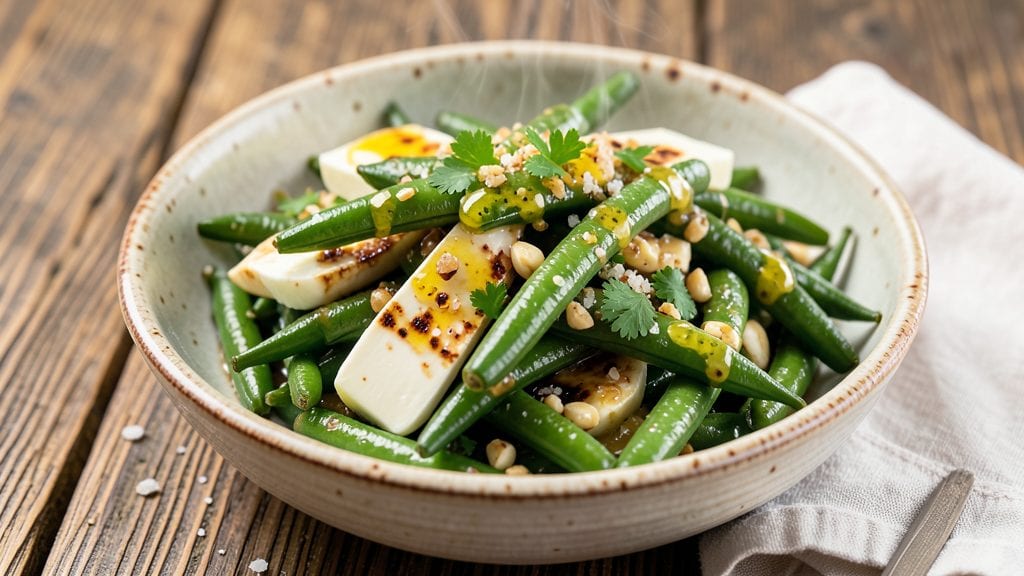
Grandma's green beans recipe is the kind of side dish that transforms ordinary meals into something special—simple yet unforgettable. The secret lies in crisp-tender beans tossed with rich butter, minced garlic, and a pinch of salt, all coming together in just 10 minutes.
I still remember the way my grandmother’s kitchen filled with that warm, garlicky aroma every Thanksgiving, and this recipe keeps that tradition alive.
What makes this dish truly special is how effortlessly it delivers restaurant-quality results with minimal ingredients. You’ll need fresh green beans, butter, garlic, and a few simple pantry staples—nothing fancy, just the kind of ingredients that build flavor through technique.
The key is timing: blistering the beans just right ensures they stay crisp while absorbing the buttery garlic mixture perfectly.
By the time you plate these green beans, you’ll have a side dish that’s golden, aromatic, and packed with that nostalgic taste of home. The buttery garlic crunch makes every bite satisfying, and the simplicity ensures you can pull this off even on busy weeknights.
It’s the kind of recipe that pairs beautifully with roasted meats, mashed potatoes, or even grilled fish.
Serve immediately while the beans are still crisp, or let them sit for a few minutes to develop even more flavor. This is comfort food at its finest—simple, timeless, and impossible to resist. Let’s get cooking!
Ingredients for grandma's green bean
Buttery garlic green beans—just 8 ingredients for a side dish that tastes like Thanksgiving nostalgia.
| Ingredient | Amount | Notes |
|---|---|---|
| Fresh Green Beans 🥦 | 1 ½ lb | Trimmed and cut into 2-inch pieces |
| Unsalted Butter 🧈 | ½ cup | Cold, cut into small cubes |
| Garlic Cloves 🧄 | 4 cloves | Minced finely for even distribution |
| Kosher Salt 🧂 | 1 ½ tsp | Adjust to taste after cooking |
| Lemon Juice 🍋 | 1 tbsp | Freshly squeezed for brightness |
| Fresh Parsley 🌿 | ¼ cup | Chopped finely for garnish |
| Black Pepper 🌶️ | ¼ tsp | Freshly ground for subtle heat |
| Vegetable Oil 🫒 | 2 tbsp | For blistering beans in skillet |
The green beans are everything here. Harvest-style beans (thicker, meatier) hold up best to blistering, but standard green beans work too. Look for vibrant, crisp beans at the store—avoid anything rubbery or yellowing. I usually grab mine from Whole Foods or my local farmers market, but the grocery store’s fresh section is fine if they’re bright and firm. The butter should be cold and cubed—it melts beautifully during cooking, creating that perfect buttery crunch. Fresh parsley adds a pop of color and brightness, so don’t skip it if you’ve got it.
No fresh parsley? Dried parsley at one-third the amount works, but it won’t be as vibrant. Short on garlic? Garlic powder at half the amount is a decent swap, though fresh is ideal. The vegetable oil is just for blistering—you could use olive oil instead, but it’ll add a different flavor profile. For extra richness, add a splash of heavy cream at the end. And if you’re feeling fancy, a sprinkle of toasted breadcrumbs before serving adds texture. The lemon juice is key for that bright, fresh finish—don’t skip it.
These beans are best served immediately, but if you must reheat, do it gently over low heat with a splash of water to keep them crisp. Store leftovers in the fridge for up to 3 days, though they’ll lose some of that perfect crunch. For meal prep, blister the beans ahead and store them separately from the butter mixture—toss them together just before serving. The flavor actually improves slightly as the garlic and butter meld together, so if you’re making this ahead, let it sit for 10 minutes off heat before serving.
Why You'll Love This Recipe
- Five-Ingredient Magic: I swear, this is the kind of recipe where you look at your pantry and think, "I can do this." Fresh beans, butter, garlic, salt, lemon—that’s it. No fancy prep, no hidden steps, just snip the ends and cook.
- Garlic Butter Bliss: That moment when the butter melts into the beans and the garlic starts to sizzle? Pure satisfaction. The crisp-tender beans soak up the richness, and the lemon brightens it all without overpowering—like a hug from my grandma’s kitchen.
- Weeknight to Dinner Party: Honestly, I’ve served this to my book club and my sleepover kids, and no one ever questions it. It’s the side that makes steak feel fancy or turns grilled chicken into a celebration. (Yes, even on a Tuesday night.)
- Leftovers That Don’t Suck: Between us, most green beans turn sad after day two. Not these. The butter keeps them tender, and the lemon keeps them from tasting stale. I’ve reheated portions for lunch three times—zero complaints, just seconds. Budget-friendly? Absolutely.
Step-by-step instructions for grandma's green beans recipe
Here's how to create this classic buttery garlic green bean dish with perfect texture and flavor.
Blanch the Green Beans
Fill a large pot with 4 quarts of water and bring to a rolling boil over high heat. Add the 1.5 lb fresh green beans and cook for 3-4 minutes until they're bright green and slightly tender but still crisp. You'll know they're ready when they float to the surface and a knife slides in easily.
Drain immediately in a colander and rinse under cold water for 30 seconds to stop the cooking process. This blanching step removes any bitterness and ensures your beans stay vibrant and crisp. I like to work in batches if needed, but don't overcrowd the pot or the water temperature will drop.
Sauté Garlic in Butter
Heat a large skillet over medium heat and add the 2 tablespoons vegetable oil. Once hot, add the 0.5 cup unsalted butter cut into small cubes and let it melt completely, about 2 minutes. The butter should foam and turn golden - this is when you'll add the 4 cloves minced garlic.
Cook the garlic for 30-45 seconds until fragrant but not browned. Watch carefully - garlic burns quickly and turns bitter. Remove the skillet from heat at this point to preserve the garlic's delicate flavor. Here's where the magic happens - the residual heat will continue cooking the garlic gently in the butter.
Toss Beans in Garlic Butter
Return the skillet to medium-low heat and add the blanched green beans along with 1.5 teaspoons kosher salt and 0.25 teaspoon black pepper. Toss everything together gently for 2-3 minutes until the beans are coated in the garlic butter and heated through. You should see the beans glisten with the melted butter.
The beans should be hot but still maintain their crisp texture. If they start to look too soft, remove them from heat immediately. This is where Grandma's secret comes in - the beans should be tender-crisp, not mushy. The butter should be melted but not browned - if it starts to darken, reduce the heat slightly.
Finish with Lemon and Parsley
Remove the skillet from heat and stir in the 1 tablespoon lemon juice. This brightens the flavors and cuts through the richness of the butter. Let the mixture sit for 1 minute to allow the lemon to infuse with the beans. Then stir in the 0.25 cup chopped fresh parsley.
Taste and adjust seasoning if needed - you might want to add a pinch more salt or a splash more lemon juice. The final dish should have a perfect balance of buttery richness, garlicky depth, and bright acidity. Serve immediately while the beans are still crisp and the butter is melted and glossy.
Rest and Serve
Transfer the green beans to a serving dish and let them rest for 2-3 minutes before serving. This allows the flavors to meld together and the beans to absorb any remaining butter. The dish should be hot but not boiling when you serve it.
Grandma's green beans should have a beautiful golden color from the butter, with each bean coated in a delicate garlic-parsley sauce. The texture should be crisp-tender with a satisfying crunch. Serve immediately with your favorite main dish - these green beans are the perfect side to complement any meal.
Pro Tips For Making Grandma'S Green Bean
- Trim Like a Pro: Snip the ends of your green beans at a sharp angle—about a quarter-inch off—so they don’t curl up while cooking. I learned this the hard way after watching my beans turn into a tangled mess in the pan, and it’s the one prep step that actually changes the outcome.
- Salt the Butter First: Toss a pinch of kosher salt into the butter while it melts—it dissolves better than sprinkling it later. After burning three batches where the salt clumped, I finally realized this is the non-negotiable step for even flavor distribution.
- Sear the Garlic Fast: Use high heat for the garlic—just 30 seconds max—until it’s golden, not brown. I was skeptical until I tried it: crispy edges add depth without bitterness, and the lemon juice won’t overpower it.
- Finish with Lemon Last: Add the lemon juice after the beans are tender but still bright green—it brightens the dish but wilts them if added too early. Sounds weird, but it works: the acid locks in freshness without turning them mushy.
Flavor customization for these flavors
Spicy Kick Option
For a Southern-inspired twist, add ½ teaspoon of cayenne pepper or 1 teaspoon of crushed red pepper flakes when tossing the beans with garlic butter. This adds a subtle heat that pairs beautifully with the buttery richness.
I like to add it with the salt and pepper at Step 3—just toss it in and stir well. If you want more heat, add 1 teaspoon of hot honey at the end for a sweet-spicy balance. 🌶️
Herb Variations
Swap out parsley for other fresh herbs to change the flavor profile. Try ½ cup chopped chives for a mild onion-like note or ¼ cup chopped dill for a bright, tangy twist. For a Mediterranean touch, add ¼ cup chopped basil with a pinch of red pepper flakes.
I find that herbs like dill or basil work best when added at the very end—just stir them in after the lemon juice. 🌿
Creamy Twist
For a richer, creamier version, stir in 2 tablespoons of heavy cream or ¼ cup of crème fraîche at the end. This adds a luxurious texture that’s perfect for special occasions.
I like to warm the cream slightly before adding it to the beans—just heat it in a small saucepan over low heat for 1 minute to avoid curdling. Finish with a pinch of salt to balance the richness. 🧈
Nutty Crunch
Add texture with 2 tablespoons of toasted slivered almonds or ¼ cup of chopped pecans for a Southern-inspired crunch. Toast the nuts in a dry skillet over medium heat for 2-3 minutes until golden and fragrant, then sprinkle them over the finished beans.
This works especially well with the spicy kick option for a sweet-and-salty contrast. 🌰
Cheesy Finish
For a comforting, cheesy version, stir in ¼ cup of grated Parmesan cheese or 2 tablespoons of crumbled feta at the end. The saltiness of the cheese cuts through the butter and adds another layer of flavor.
I recommend using freshly grated Parmesan for the best taste—it melts slightly and coats the beans beautifully. 🧀
Smoky Depth
Add a smoky element by sprinkling ½ teaspoon of smoked paprika or 1 teaspoon of liquid smoke (just a drop or two) into the garlic butter at Step 2.
This works especially well if you’re serving these beans with smoked meats like pulled pork or brisket. The smokiness complements the buttery garlic flavor perfectly. 🔥
Nutrition facts
Frequently asked questions
Can I use frozen green beans instead of fresh?
Yes, but with a few adjustments. Thaw frozen beans completely first, then pat them completely dry to prevent excess moisture from steaming instead of blistering. You'll need to increase the cooking time by 1-2 minutes during blanching since frozen beans start out softer. The texture won't be quite as crisp as fresh, but they'll still taste delicious!
What's the best way to make these beans ahead of time?
Blister the beans and store them separately from the butter mixture in the fridge for up to 2 days. When ready to serve, simply reheat the beans in a skillet over medium heat for 2 minutes, then add the cold butter mixture and toss until melted and glossy. The flavors will meld beautifully during reheating.
Can I make this recipe without butter?
For a lighter version, use 2 tablespoons of olive oil instead of butter, plus 1 tablespoon of lemon juice for brightness. Add the garlic and beans as usual, then finish with extra lemon zest. The texture will be slightly different but still delicious - just less rich and creamy.
How do I know when the green beans are done?
The beans are perfect when they're bright green, slightly tender but still crisp with a satisfying snap when bitten. They should float to the surface during blanching and a knife should slide in easily. In the skillet, they should be heated through but still maintain their shape - if they look mushy, they've been overcooked.
What's the secret to keeping the beans crisp?
Three things: don't overcook them, blanch first to remove moisture, and work quickly when tossing with butter. The blanching step is critical - it removes excess starch that would make the beans soft. Also, serve immediately while they're piping hot to maintain that perfect crunch!