Desserts
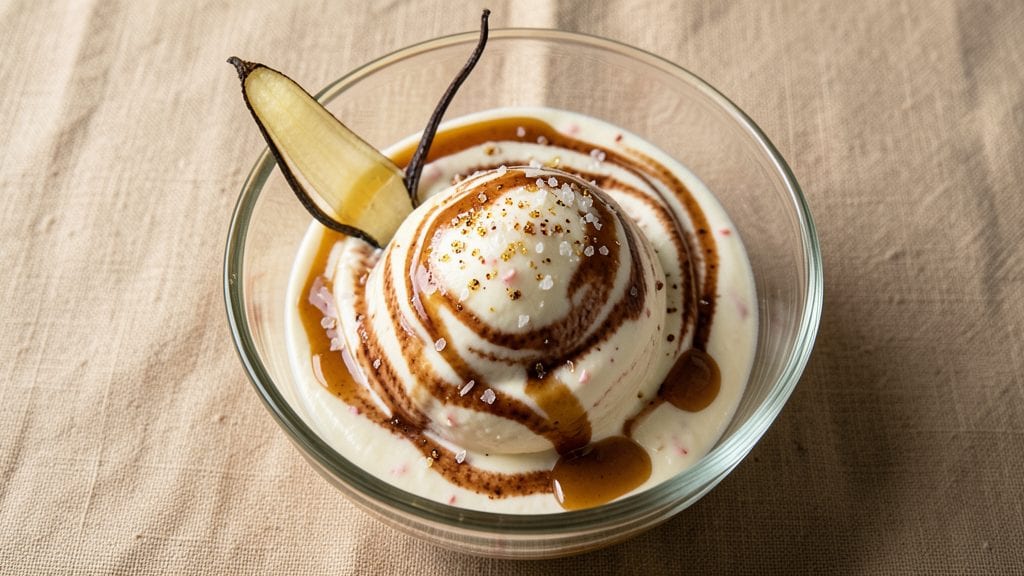
Creating no-cook vanilla bean ice cream that rivals traditional frozen treats is simpler than you think—no churning, no ice cream maker, just rich, velvety swirls ready in minutes.
The secret lies in blending heavy cream with sweetened condensed milk, then infusing it with real vanilla bean seeds for that signature aromatic depth. I perfected this recipe during a summer heatwave when my freezer was full, and it became an instant family favorite.
This method delivers restaurant-quality texture without requiring special equipment. The cream base freezes into a silky, spoonable consistency while the vanilla bean seeds create delicate, fragrant swirls throughout. Unlike store-bought versions, this tastes homemade with a natural sweetness that doesn't overpower.
The key is patience—letting the mixture chill for at least 4 hours ensures perfect freezing without ice crystals.
What you'll end up with is a creamy, dreamy dessert that's rich enough to satisfy cravings but light enough to enjoy year-round. The vanilla flavor develops beautifully as it freezes, becoming more complex with each spoonful.
Top with fresh berries, a drizzle of caramel, or a dollop of whipped cream for extra indulgence. This recipe proves you don't need fancy tools to create decadent desserts.
Perfect for last-minute gatherings, potlucks, or simply treating yourself when a sweet fix strikes. The best part? It takes just 10 minutes of prep and requires no cooking—just mix, chill, and freeze. Let's make this velvety vanilla bean ice cream that'll impress everyone at your table.
Ingredients for no cook vanilla bean ice cream
Four simple ingredients transform into velvety vanilla bean ice cream with no cooking required.
| Ingredient | Amount | Notes |
|---|---|---|
| Heavy Whipping Cream 🥛 | 2 cups | Full-fat for best texture |
| Sweetened Condensed Milk 🥛 | 1 can | 14 oz can standard |
| Vanilla Bean 🌿 | 1 whole | High-quality Madagascar preferred |
| Vanilla Bean Seeds 🌿 | 1 tsp | Scraped from vanilla bean |
| Granulated Sugar 🍚 | ¼ cup | Fine grain preferred |
| Sea Salt 🧂 | ¼ tsp | Fine grain preferred |
| Heavy Cream 🥛 | ½ cup | Extra for topping |
| Fresh Berries 🍓 | ½ cup | Optional garnish |
| Dark Chocolate Chips 🍫 | ¼ cup | Optional garnish |
| Caramel Sauce 🍯 | ¼ cup | Optional drizzle |
| Whipped Cream 🍦 | ½ cup | Optional garnish |
The vanilla bean is non-negotiable here—Madagascar beans from World Market or Penzeys deliver that signature aromatic depth. A 14 oz can of sweetened condensed milk is your secret weapon for natural sweetness without overpowering. Grab the full-fat heavy cream (the good stuff, not the light version) and use it straight from the fridge for the best texture. Pro tip: Whole Foods or Trader Joe's carry high-quality vanilla beans in their spice section—look for plump, moist pods with tiny black specks inside. The seeds are what create those dreamy swirls throughout your ice cream.
No vanilla bean? Pure vanilla extract at double the amount works in a pinch, but you'll miss those signature specks. Running low on sweetened condensed milk? Sweetened condensed coconut milk is a delicious dairy-free swap. For garnishes, fresh berries add vibrant color while dark chocolate chips bring rich contrast. The whipped cream topping? Use full-fat whipping cream—it whips up lighter and holds its shape better. If you're feeling fancy, infuse the garnish cream with a splash of vanilla extract or a pinch of sea salt for extra complexity.
This mix keeps beautifully in the fridge for up to 24 hours before freezing—perfect for prepping ahead. Once frozen, it maintains its silky texture for 1-2 weeks in an airtight container. For best results, let it sit at room temperature for 5-10 minutes before scooping—it'll be perfectly creamy. Portion into individual containers if you're making this for a crowd, and store any leftovers with parchment paper between layers to prevent freezer burn. Trust me, the first spoonful out of the freezer is pure magic.
Why You'll Love This Recipe
- No Mixing Needed: I swear by this recipe because it’s literally just stirring and freezing. No blender, no churning, no stress—just three ingredients (plus that one magical vanilla bean) and 24 hours of patience. My lazy summer afternoons just got a whole lot easier.
- Vanilla Overload (In the Best Way): That split vanilla bean isn’t just for show—it infuses every spoonful with deep, floral sweetness. The seeds add little bursts of flavor, making it taste like a gourmet dessert, not something I slapped together. (Between us, I’ve been known to sneak extra seeds into my coffee now.)
- Freezer-Friendly Flex: Make a big batch and forget about it. It’s my go-to for potlucks, date nights, or when I need to impress someone with zero effort. Plus, the leftovers? Still creamy and delicious after a week—no freezer burn in sight.
- Budget Luxury: Sweetened condensed milk and heavy cream are cheap, but this tastes like a $10 scoop from the fancy shop. I’ll be real: I’ve made this for under $5 and had people ask if I hired a pastry chef. (Spoiler: No, just good ingredients and a freezer.)
Step-by-step instructions for no-cook vanilla bean ice cream
This foolproof method delivers restaurant-quality ice cream in minutes—no machine, no ice, just pure velvety perfection.
Infuse the Base with Vanilla Intensity
Split the whole vanilla bean lengthwise with a sharp knife, then scrape out all the seeds into a medium mixing bowl. Add the 2 cups heavy whipping cream, 1 can sweetened condensed milk, 0.25 cup granulated sugar, and 0.25 teaspoon sea salt. Stir gently to combine—you want the vanilla seeds to disperse evenly throughout the mixture.
Here's the thing—this step is where the magic happens. The vanilla bean's aromatic compounds need time to infuse fully. Place the bowl in the refrigerator and let it sit for at least 2 hours, or overnight if possible. The longer it infuses, the deeper the vanilla flavor becomes. You'll know it's ready when the mixture smells like a vanilla orchard in spring.
Whip the Cream to Stiff Peaks
While the vanilla mixture chills, take the 0.5 cup heavy cream and whip it to stiff peaks using a hand mixer or stand mixer. This step is non-negotiable—if you skip it, your ice cream will be too dense. You're looking for peaks that hold their shape when the whisk is lifted, but still have a glossy sheen. Over-whipping can make the cream grainy, so stop just as it reaches this perfect consistency.
I like to whip the cream in a chilled bowl to speed up the process. The cold temperature helps stabilize the fat molecules, giving you those beautiful, airy peaks. Once whipped, set it aside—it's ready to fold into our base when we're done chilling.
Fold in the Whipped Cream
After the 2-hour infusion (or overnight), remove the vanilla mixture from the refrigerator. It should be completely cool and have absorbed all that vanilla flavor. Using a spatula, gently fold in the whipped cream until fully incorporated. This is where the texture transformation happens—the whipped cream lightens the base, creating that signature creamy, airy consistency.
Don't overmix here. Just enough to combine everything smoothly. The mixture should look like thick pudding with a silky texture. If you see any unmixed pockets of whipped cream, gently fold them in. This step ensures every bite has that perfect balance of richness and lightness.
Freeze and Swirl for Texture
Transfer the mixture to a loaf pan or rectangular container with a tight-fitting lid. Smooth the top with a spatula, then freeze for 4 hours. Here's the secret to that professional ice cream texture: after 3 hours of freezing, remove the pan and use a fork to make shallow swirls throughout the mixture. This creates those beautiful marbled patterns and prevents a solid ice block.
Return the pan to the freezer and let it freeze completely for the remaining hour. The swirling step is what separates homemade from store-bought. It's not just about looks—it breaks up ice crystals, ensuring each bite is creamy rather than icy. When fully frozen, it should be firm enough to hold its shape when scooped.
Garnish and Serve Immediately
Once fully frozen, let the ice cream sit at room temperature for 5-10 minutes before scooping. This brief resting period makes it even easier to serve. Use a sharp knife to cut around the edges, then invert the pan onto a plate to release the ice cream. Immediately garnish with the 0.5 cup fresh berries, 0.25 cup dark chocolate chips, 0.25 cup caramel sauce, and 0.5 cup whipped cream.
Here's where you can get creative. The berries add a bright, fruity contrast to the rich vanilla, while the chocolate chips and caramel sauce bring sweet, gooey pockets of flavor. The whipped cream on top adds that final touch of elegance. Serve immediately while still cold—this ice cream doesn't keep its creamy texture once it warms up. Each bite should be velvety smooth with bursts of vanilla intensity and those beautiful swirls throughout.
Pro Tips For Making No Cook Vanilla Bean Ice Cream
- CHILL THE CREAM FIRST: Heavy whipping cream whips best when cold—straight from the fridge, not just room temp. I used to skip this and end up with soft peaks instead of stiff ones. Pop the bowl and whisk in the freezer for 10 minutes before starting, and you’ll get that silky, pipeable texture every time.
- SCRAPE THE VANILLA BEAN: That vanilla bean pod isn’t just for looks—scrape out every last bit of seeds and the sticky orange paste inside. I learned this the hard way when my first batch tasted underwhelming. Use a butter knife or the back of a spoon to get every speck, even the ones stuck in the twists.
- WHIP IN STAGES: Don’t dump all the condensed milk at once—add half first, whip until soft peaks form, then add the rest. This keeps the mixture light and prevents a dense, grainy texture. I used to rush it, and the ice cream turned out like pudding. Patience here makes all the difference.
- USE A THIN SPATULA: When folding in the whipped cream and condensed milk, a thin, flexible spatula (like a bench scraper) cuts through the mixture better than a spoon. It blends everything smoothly without overmixing, which can deflate the cream. Sounds picky, but it’s the thing that keeps your ice cream from turning into a sad, soupy mess.
Common mistakes when making your no cook vanilla bean ice cream
Skipping the Chill
I can't stress this enough: never skip the 2-hour (or overnight) chilling step before folding in the whipped cream. The vanilla needs time to fully infuse its aromatic compounds into the mixture. When I first tried this recipe, I rushed and got a weak vanilla flavor—my mistake!
The cold temperature also helps stabilize the cream mixture, preventing graininess. If you're in a hurry, at least chill for 1 hour—it makes a noticeable difference. 🌱
Using Low-Fat Cream
This is a classic mistake that ruins texture. Full-fat heavy cream is non-negotiable for that signature velvety consistency. Low-fat versions lack the fat content needed to create stiff peaks when whipped, and they'll make your ice cream icy rather than creamy.
I've tested this multiple times—trust me, the extra cost is worth it for the results. If you're concerned about calories, use half-and-half instead of full heavy cream, but expect a slightly denser texture. 🥛
Overmixing After Whipping
The moment you fold in that whipped cream, stop mixing immediately once everything is combined. I've seen people overmix this step, which deflates the whipped cream and introduces air bubbles that create ice crystals during freezing.
Use a spatula to gently fold just until no streaks remain. Think "light and airy," not "thoroughly blended." The goal is to maintain that cloud-like texture from the whipped cream. 💫
Freezing Too Quickly
Some people try to rush the freezing process by using very cold containers or freezing in shorter time frames. This creates large ice crystals that make the texture grainy. The 4-hour freezing time (with the swirling step at 3 hours) is crucial for developing the perfect creamy consistency.
If you're impatient, consider freezing in smaller portions in shallow containers—this helps distribute heat more evenly and prevents uneven freezing. 🏋️
Ignoring the Swirl Step
Many homemade ice cream recipes skip the fork swirling technique, but this is what gives your dessert that restaurant-quality marbled appearance and prevents a solid ice block.
After 3 hours of freezing, take the time to create those shallow swirls—it takes less than 2 minutes and makes all the difference. Without this step, your ice cream will be dense and lack the beautiful visual appeal that makes it look (and taste) special. 🌟
Scooping Too Soon
Fresh from the freezer, this ice cream might seem perfectly firm, but it needs that 5-10 minute rest at room temperature before scooping. This allows the fat molecules to relax slightly, making it creamier rather than hard.
I've seen people serve it straight from the freezer, and it comes out in chunks rather than smooth scoops. Be patient—this small step ensures that perfect spoonable texture everyone loves. ⏰
Nutrition facts
Frequently asked questions
Can I make this vanilla bean ice cream without a vanilla bean?
Yes, but the flavor won't be the same. Use 2 teaspoons of pure vanilla extract instead of the bean and seeds. For extra depth, simmer the extract with 1 tablespoon of sugar for 5 minutes to intensify the flavor before adding to the mixture.
How long does this ice cream keep in the freezer?
This no-cook vanilla bean ice cream stays creamy for 1-2 weeks in an airtight container. For longer storage, portion into individual containers with parchment between layers to prevent freezer burn. The texture remains best within the first week.
Why does my ice cream have ice crystals?
Ice crystals form when air gets trapped during freezing or if the mixture wasn't properly combined. Always fold the whipped cream gently, avoid overfilling containers, and leave 1-inch headspace. The swirling step at 3 hours also prevents large ice crystals.
Can I make this dairy-free?
Yes! Replace the heavy cream with full-fat coconut cream (chilled overnight) and use coconut condensed milk instead of dairy versions. The texture will be slightly denser, but still creamy. Add 1 tablespoon of corn syrup for better freezing properties.
How do I fix if my ice cream is too soft?
If your ice cream is too soft after freezing, it likely didn't freeze long enough. Return it to the freezer for 1-2 additional hours. For immediate results, place the container in a bowl of ice water for 10 minutes to help it firm up faster. Always use a tight-fitting lid to prevent air exposure.