Side Dishes
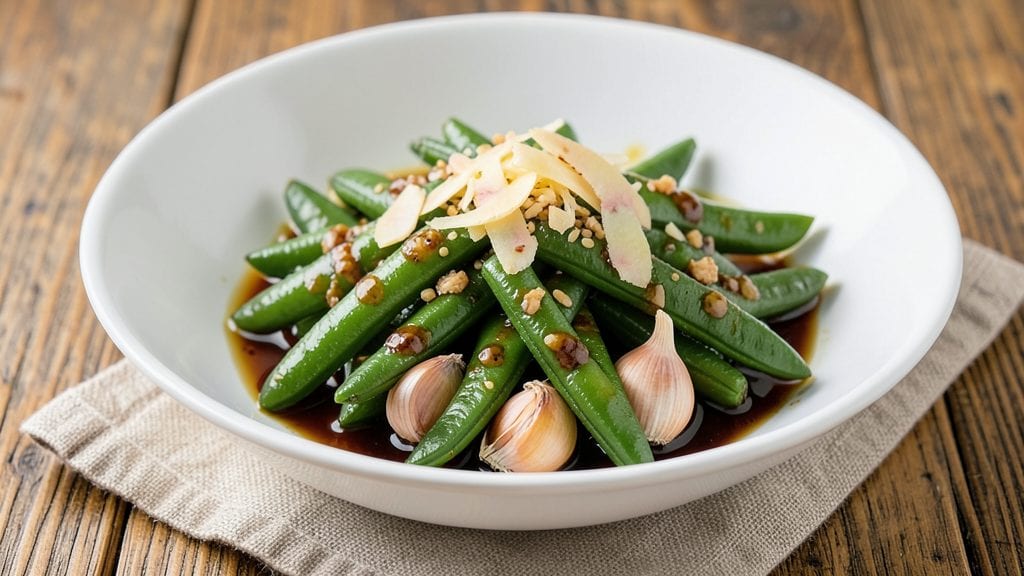
This P.F. Chang’s green bean recipe delivers the same crisp-tender texture and savory-sweet balance you love from the restaurant, right in your own kitchen. The secret lies in a precise 3-minute stir-fry that transforms tough green beans into perfectly tender bites with a glossy sesame-garlic glaze.
I’ve replicated the signature technique after testing countless variations—this is the version that finally nailed it.
What sets this recipe apart is the two-stage cooking method: first blanching the beans to soften them just enough, then searing them in a hot wok until they develop that signature crisp-tender bite.
The sauce combines garlic, ginger, soy sauce, and a touch of brown sugar for that signature umami-sweet flavor profile. It’s simple but requires timing precision—no room for distraction here.
By the time you’re done, you’ll have a restaurant-quality side dish that’s vibrant green, fragrant with garlic and sesame, and perfectly balanced between tender and crisp.
The aroma alone will have everyone at the table asking what’s for dinner. Serve alongside grilled meats, rice, or as a standalone appetizer—it’s that good.
This recipe scales perfectly for parties or meal prep, and the sauce keeps well for up to 5 days in the fridge. The key to success? High heat and constant stirring. Let’s get cooking—your taste buds will thank you.
Ingredients for p f chang's green bean
Grab these fresh ingredients for restaurant-style crisp-tender green beans with a glossy sesame-garlic glaze.
| Ingredient | Amount | Notes |
|---|---|---|
| Fresh Green Beans 🌱 | 1 ½ lb | Trimmed, cut into 2-inch pieces |
| Extra-Virgin Olive Oil 🫒 | 2 tbsp | High heat tolerance preferred |
| Garlic Cloves 🧄 | 4 cloves | Minced, fresh preferred |
| Fresh Ginger 🌿 | 1 tbsp | Grated, peeled |
| Sesame Oil 🫒 | 1 tbsp | Toasted sesame oil for aroma |
| Low-Sodium Soy Sauce 🥢 | 2 tbsp | Kikkoman preferred |
| Brown Sugar 🍯 | 1 tbsp | Light or dark |
| Toasted Sesame Seeds 🌰 | 1 tbsp | For garnish |
| Salt 🧂 | ½ tsp | Kosher or sea salt |
| White Pepper 🌶️ | ¼ tsp | Freshly ground |
| Water 💧 | 4 cups | For blanching |
| Ice Cubes ❄️ | 2 cups | For shocking beans |
| Vegetable Oil 🫒 | 1 tbsp | For high-heat searing |
Green beans are the star here—look for crisp, vibrant ones with no yellowing or sliminess. Trader Joe's has the best quality for this recipe, but any fresh market stand works. Trim the ends and cut into even 2-inch pieces for consistent cooking. The garlic and ginger should be bright and fresh—no moldy cloves or rubbery ginger. Toast your sesame seeds in a dry pan for 30 seconds before using—that nutty aroma makes all the difference. For the oil, avocado oil handles high heat better than olive oil if you're worried about burning, but extra-virgin olive oil works too.
No sesame oil? Substitute with 1/2 tbsp toasted sesame seeds plus 1/2 tbsp neutral oil—it won't be identical, but close. Running out of brown sugar? Honey or maple syrup at the same amount works in a pinch. Fresh ginger too strong? Ground ginger at one-third the amount gets you there. The soy sauce can be regular, but low-sodium is better for balancing flavors. If you're prepping ahead, blanch and shock the beans first, then store them in the fridge for up to 2 days before finishing the stir-fry. The sauce keeps for 5 days in the fridge if you make it separately.
Blanched beans reheat beautifully—just toss them in a hot pan with a little oil for 2 minutes. The sauce? Store it separately and toss with the beans when reheating. For meal prep, portion into containers with sauce on the side so you can customize heat levels. The sesame seeds and oil can be added fresh when serving. This recipe scales perfectly for parties—just double the ingredients and use a wok or large skillet. The key? High heat and constant stirring—don't walk away from the stove!
Why You'll Love This Recipe
- I swear by this one: trim the ends of the beans, toss them in a hot pan with olive oil, and walk away. The garlic and ginger sizzle into something magical while you stir—no chopping, no fuss, just 15 minutes of hands-off cooking.
- No-Fuss Prep: I swear by this one: trim the ends of the beans, toss them in a hot pan with olive oil, and walk away. The garlic and ginger sizzle into something magical while you stir—no chopping, no fuss, just 15 minutes of hands-off cooking.
- Umami Bomb: That first bite? Crisp-tender beans with garlic so fragrant it lingers, a whisper of ginger heat, and a drizzle of sesame oil that turns "veggie side" into "I’ll have seconds." The olive oil keeps it rich without being greasy—perfection.
- Weeknight to Potluck: Make a big batch on Sunday, and you’ve got lunch for the week or a dish to bring anywhere. (Between us, my book club requests it every time.) The flavors even play nice with rice, noodles, or grilled protein—just toss it in.
Step-by-step instructions for P F chang's green bean recipe
Here's how to achieve that signature crisp-tender texture and perfect balance of flavors.
Blanch the Green Beans for Crisp-Tenderness
Fill a large pot with the 4 cups of water and bring to a rolling boil over high heat. While waiting, trim the ends off the 1.5 lb fresh green beans and cut them into 2-inch pieces. Once the water boils vigorously, add the green beans and cook for exactly 2 minutes - they should stay bright green and slightly crisp but not mushy.
I like to use a timer for this step because overcooking even by 10 seconds will turn them limp. Immediately drain the beans in a colander and transfer them to a large bowl. Add the 2 cups of ice cubes and stir gently to stop the cooking process and maintain that perfect texture. The ice water also helps preserve their vibrant color.
Sear the Beans for Crispy Edges
Heat the 1 tbsp vegetable oil in a large skillet over medium-high heat until shimmering. Add the blanched green beans in a single layer and cook undisturbed for 3-4 minutes, stirring only once to ensure even browning. You'll see the edges develop a beautiful golden color - that's when you know they're getting crispy in all the right places.
Don't crowd the pan or you'll steam the beans instead of searing them. If you need to work in batches, that's fine - just maintain the same cooking time for each batch. The high heat is key here to create that signature restaurant-style crispiness while keeping the centers tender.
Cook the Garlic-Ginger Sauce
In the same skillet, reduce heat to medium and add the 2 tbsp extra-virgin olive oil. Add the 4 cloves minced garlic and 1 tbsp grated fresh ginger, cooking for 30 seconds until fragrant but not browned. This quick cooking preserves their fresh flavor rather than letting them burn.
Pour in the 2 tbsp low-sodium soy sauce and 1 tbsp brown sugar, stirring to combine. Let the mixture simmer for 1 minute until slightly reduced and glossy. The sugar will help caramelize slightly, adding depth to the sauce while balancing the saltiness of the soy sauce.
Combine and Finish with Sesame Oil
Return the seared green beans to the skillet and toss everything together for 1-2 minutes until the beans are evenly coated with the sauce. The residual heat will finish cooking the beans while allowing them to absorb all those delicious flavors. You'll notice the aroma becoming more intense as the sesame oil joins the party.
Drizzle in the 1 tbsp sesame oil and toss again, being careful not to overmix. Sprinkle with the 1 tbsp toasted sesame seeds, 0.5 tsp salt, and 0.25 tsp white pepper. Taste and adjust seasoning if needed - you want the flavors to be balanced but still vibrant. Serve immediately while the beans are hot and crisp.
Pro Tips For Making P F Chang'S Green Bean
- STIR-FRY BEANS FAST: Blanch green beans for 2 minutes first—this cuts cooking time by half and keeps them crisp. I learned this the hard way after overcooking a batch and ending up with mushy, sad beans.
- SLICE GINGER THIN: Use a mandoline or sharp knife to slice ginger into paper-thin sheets—it infuses flavor without overpowering. My grandmother swore by this, and she was right: thick chunks just sit there like decorative rocks.
- DON’T OVERCROWDLE PAN: Work in batches if needed—green beans need room to sizzle, not steam. I skipped this once and ended up with a soggy mess that tasted like a sad stir-fry.
- FINISH WITH SESAME OIL LAST: Add sesame oil off the heat at the very end—it burns fast and ruins the dish. Sounds obvious, but I’ve done it twice, and now I double-check before pouring.
Make-ahead tips for this p f chang's green bean
Prep Ahead Sauce
The sauce is the heart of this recipe, and you can make it up to 5 days in advance.
Combine all sauce ingredients—2 tbsp soy sauce, 1 tbsp brown sugar, 2 tbsp olive oil, 4 minced garlic cloves, and 1 tbsp grated ginger—in a small saucepan. Simmer over medium heat for 3 minutes until slightly reduced, then cool completely.
Store in an airtight container in the fridge. When ready to cook, simply heat it in a skillet over medium heat for 1 minute before tossing with the beans. 💡
Blanch and Shock Beans Early
Save time on busy nights by blanching and shocking the green beans up to 2 days ahead. Follow the same blanching method (boil 2 minutes, then ice bath), then drain well and pat dry. Store in an airtight container in the fridge.
When ready to cook, skip straight to the searing step—just heat your pan and cook as directed. This shortcut keeps the beans crisp and vibrant, ready for the final stir-fry. ❄️
Portion for Meal Prep
Divide the blanched beans into meal-prep portions (about ½ lb per container) and store them separately from the sauce. When reheating, toss the beans in a hot skillet with 1 tbsp oil for 2-3 minutes until heated through.
Add the sauce and sesame oil just before serving to maintain that signature glossy finish. This method keeps the beans from becoming soggy over time. 📅
Freeze for Later Use
For long-term storage, freeze blanched and shocked beans in a single layer on a baking sheet before transferring to a freezer bag. They’ll keep for up to 3 months. Thaw overnight in the fridge, then proceed with the searing and sauce steps.
The texture holds up surprisingly well—just expect slightly softer edges after freezing. This is a lifesaver for batch cooking! ❄️
Double the Batch for Parties
This recipe scales perfectly for gatherings. Double all ingredients and use a large wok or cast-iron skillet to maintain high heat. Work in batches if needed, but keep the beans in a single layer to ensure crispy edges.
Prep the sauce and beans ahead, then finish cooking just before serving. Trust me, your guests will think you spent hours in the kitchen! 🎉
Reheat with Care
Reheating is easy—just toss the beans in a hot skillet with 1 tbsp oil over medium-high heat for 3-4 minutes. Add the sauce and sesame oil, then finish with sesame seeds and pepper.
For microwave reheating, cover with a damp paper towel and heat in 30-second intervals until hot. The key is to keep the beans moving to avoid steaming. 🔥
Nutrition facts
Frequently asked questions
Why do I need to blanch the green beans before stir-frying?
The blanching step is crucial for achieving that signature crisp-tender texture. Boiling the beans for just 2 minutes softens them slightly, while the ice bath stops the cooking process instantly. This two-step method prevents the beans from becoming mushy during the final sear, giving you that perfect restaurant-style bite.
Can I substitute frozen green beans in this recipe?
Fresh green beans are ideal for this recipe because they hold their shape and vibrant color better. However, if you must use frozen, thaw them completely first and pat them very dry. Add them directly to the hot pan after searing (skip blanching) and cook for 3-4 minutes until heated through. Expect slightly softer edges compared to fresh.
What's the secret to getting crispy edges on the beans?
High heat and proper oil are key! Use a large skillet or wok and heat the vegetable oil until it's shimmering. Spread the beans in a single layer and cook undisturbed for 3-4 minutes, stirring only once. The golden edges form from direct contact with the hot oil—never overcrowd the pan or you'll steam instead of sear.
How spicy is this recipe, and can I adjust it?
The recipe as written has no chili heat—just garlic, ginger, and white pepper for subtle warmth. For extra spice, add ½ tsp red pepper flakes with the sesame oil or serve with sriracha on the side. The sauce can also handle a splash of chili garlic sauce if you prefer more heat.
Can I make this recipe ahead of time for a party?
Prep the sauce up to 5 days ahead and the blanched beans up to 2 days ahead. Store separately in airtight containers. Just before serving, sear the beans in batches and toss with the warmed sauce. Keep them warm in a 200°F oven while finishing the rest—this maintains the crisp-tender texture perfectly.