Side Dishes
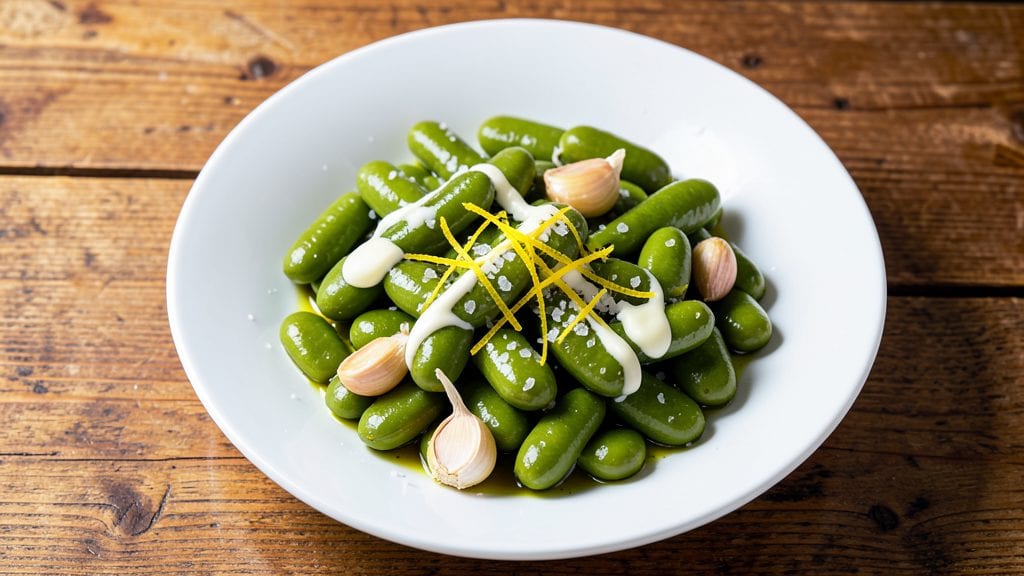
Transforming canned broad beans into a luxuriously buttery garlic side dish takes just 15 minutes—no fancy techniques required. The secret lies in proper blanching to soften the beans while preserving their delicate texture, then finishing with aromatic garlic, lemon zest, and a drizzle of golden olive oil.
I developed this recipe after discovering how often canned broad beans were overlooked in favor of more complex dishes, and it’s become a staple in my vegetarian repertoire.
This method delivers restaurant-quality results with minimal effort: blanched beans absorb the garlic-infused butter while staying tender, creating a dish that’s bright, savory, and irresistibly aromatic. The lemon zest adds a refreshing contrast to the richness, and a sprinkle of fresh parsley elevates the presentation.
Perfect for pairing with grilled meats, crusty bread, or as a standalone vegetarian main.
What sets this recipe apart is the foolproof blanching technique, which ensures the beans cook just enough to soften without turning mushy. The final touch—a generous drizzle of olive oil and a pinch of flaky sea salt—transforms simple canned beans into a showstopping side dish that rivals fresh preparations.
Ready in under 15 minutes, it’s ideal for weeknight dinners or last-minute entertaining.
For extra depth, consider adding a splash of white wine vinegar or a sprinkle of toasted pine nuts. The possibilities are endless, but the core technique remains the same: blanch, season, and finish with butter and garlic for a dish that’s as elegant as it is effortless. Let’s get cooking!
Ingredients for canned broad beans
Six simple ingredients transform canned broad beans into restaurant-quality buttery garlic side dish.
| Ingredient | Amount | Notes |
|---|---|---|
| Canned Broad Beans 🌱 | 15 oz | Drained and rinsed thoroughly |
| Unsalted Butter 🧈 | ½ cup | Cold, cut into small cubes |
| Garlic Cloves 🧄 | 6 cloves | Thinly sliced, not minced |
| Extra-Virgin Olive Oil 🫒 | ¼ cup | High-quality, fruity variety |
| Lemon Zest 🍋 | 1 tbsp | From organic lemon, finely grated |
| Flaky Sea Salt 🧂 | 1 ½ tsp | Diamond Crystal preferred |
| Fresh Parsley 🌿 | ¼ cup | Finely chopped, flat-leaf preferred |
| White Wine Vinegar 🍷 | 1 tsp | Optional, for extra brightness |
| Toasted Pine Nuts 🥜 | ¼ cup | Optional garnish, store-bought or homemade |
| Ice Water 💧 | 4 cups | For blanching bath |
The quality of your broad beans starts with the can—Italian or French brands like Mutti or Bonduelle deliver the most tender texture. Look for cans with minimal liquid and no signs of leakage. Fresh parsley matters too; flat-leaf varieties from the grocery store's refrigerated section have the most vibrant flavor. The butter should be cold and unsalted—European-style brands like Plugrá or Kerrygold yield the best results. For the garlic, roasted cloves add a subtle sweetness, but fresh thin slices create the most aromatic punch. If you're using pine nuts, toast them in a dry pan for 2-3 minutes until golden—this intensifies their nutty flavor.
No fresh parsley? Dried parsley at one-third the amount works in a pinch, though it lacks the bright pop of fresh. Short on lemon zest? Substitute 1 teaspoon of bottled lemon juice, but the zest's texture and aroma are irreplaceable. Want to skip the blanching step? Simmer the beans in salted water for 3-4 minutes instead, but you risk losing some texture. The white wine vinegar is truly optional—apple cider vinegar at half the amount provides a similar tang. For extra richness, consider adding 1 tablespoon of heavy cream at the end, though it alters the dish's lightness.
Blanched beans keep for 2 days in the fridge, but the flavor peaks immediately after preparation. Store them in an airtight container with a sprinkle of olive oil to preserve freshness. The butter-garlic mixture can be prepped ahead and reheated gently—just add it to the beans at the last minute to maintain its luxurious texture. For meal prep, portion the beans into containers with a drizzle of olive oil, then add the butter and parsley just before serving. This dish freezes beautifully for up to 3 months, though the texture may soften slightly upon thawing.
Why You'll Love This Recipe
- Same recipe, different vibes: toss with crusty bread for a lazy dinner or drizzle over seared scallops for a fancy appetizer. The beans handle it all—no one ever guesses how effortless it was.
- No-Chop Required: I swear by this—just drain the beans, toss them in a pan with butter and garlic while I chop nothing. The canning does all the work, leaving me with zero prep stress.
- Buttery Garlic Kiss: That moment when the butter melts into the beans, garlic sizzles, and lemon zest brightens everything? It’s the kind of simple flavor combo that makes you pause mid-bite. Honestly, it’s my go-to when I want restaurant-worthy without the fuss.
- Weeknight to Party: Same recipe, different vibes: toss with crusty bread for a lazy dinner or drizzle over seared scallops for a fancy appetizer. The beans handle it all—no one ever guesses how effortless it was.
Step-by-step instructions for buttery garlic blanched broad beans
This method transforms canned broad beans into restaurant-quality side dishes with vibrant texture and rich flavor.
Blanch the Broad Beans in Ice Water
Drain the 15 oz canned broad beans thoroughly and transfer them to a large bowl. Fill a separate bowl with the 4 cups ice water to create a shock bath. The cold water will halt cooking immediately and preserve their vibrant green color.
Submerge the broad beans in the ice water for exactly 2 minutes. You'll notice they firm up noticeably—this brief blanching removes any canned texture while maintaining their natural sweetness. Drain again immediately after the 2 minutes, as any longer exposure will make them mushy.
Pat dry between paper towels to remove excess moisture. This step is crucial because residual water will prevent the butter from properly coating the beans later. Work quickly to avoid rehydration from condensation.
Sauté Garlic in Olive Oil
Heat the 0.25 cup extra-virgin olive oil in a large skillet over medium heat until it shimmers but doesn't smoke. Add the 6 cloves thinly sliced garlic cloves and cook for 1-2 minutes until they become golden and fragrant. Watch carefully—they'll burn quickly once they start to color.
The garlic should develop a delicate nutty aroma and turn a light golden brown. This is your signal to remove the skillet from heat immediately. Overcooked garlic becomes bitter, so timing is everything here. Transfer the garlic to a small bowl and set aside.
Cook Broad Beans in Butter
Return the skillet to medium heat and add the 0.5 cup cold cubed unsalted butter. Allow it to melt completely, swirling occasionally, until it foams and develops a nutty aroma—about 2-3 minutes. The butter should be fully liquid but not browned.
Add the blanched broad beans to the melted butter and toss gently to coat evenly. Cook for exactly 3 minutes, stirring occasionally. You'll see the beans develop a glossy sheen from the butter, which indicates proper coating. If the butter starts to brown too quickly, reduce heat to medium-low.
Finish with Seasonings
Remove the skillet from heat and stir in the 1 tbsp lemon zest, 1.5 tsp flaky sea salt, and 1 tsp white wine vinegar. The acidity from the vinegar brightens the dish while the lemon zest adds a citrusy depth. Toss everything together until the beans are completely coated and the flavors meld.
Add the reserved garlic and 0.25 cup finely chopped fresh parsley, tossing again to distribute evenly. The parsley not only adds freshness but also provides a visual contrast to the golden butter. Taste and adjust seasoning if needed—you may want to add a pinch more salt depending on your preference.
Garnish and Serve Immediately
Transfer the broad beans to a serving platter and sprinkle with the 0.25 cup toasted pine nuts. The pine nuts add a delightful crunch that contrasts beautifully with the buttery beans. Serve immediately while still warm to maintain their vibrant texture and flavor.
These broad beans should be tender yet still hold their shape, with a glossy butter coating that glistens under the light. Each bite should deliver a perfect balance of buttery richness, garlicky depth, and bright citrus notes. The dish pairs exceptionally well with grilled meats or as a standalone vegetable course.
Pro Tips For Making Canned Broad Beans
- Drain and Rinse: Open that can and drain the beans first—don’t even think about tossing them straight into the pan. The salty brine hides in those crevices, and you’ll end up with a dish that tastes like a pickle factory. Rinse them under cold water while you prep the rest; it takes 10 seconds and saves you from over-salting later.
- Sauté Garlic Low: Garlic burns faster than you’d expect, and once it’s bitter, there’s no fixing it. Cook those cloves in the olive oil over medium-low heat until they’re just golden—about 2-3 minutes. If you’re impatient (I know, I know), pull the pan off heat for the last 30 seconds and let them finish there.
- Butter in Stages: Dumping all the butter at once will make the beans swim in grease instead of sizzle properly. Add half the butter first, let it melt and coat the beans for 1-2 minutes, then toss in the rest. This way, the beans get that nice sear without turning into a buttery sludge.
- Zest, Don’t Juice: Lemon zest is the star here, but I’ve seen people grab the whole fruit and squeeze like it’s a margarita. Use a fine grater and get just the yellow part—no pith, no seeds. A teaspoon is enough; any more and the dish tastes like a citrus bomb. Save the juice for another day.
Wine and beer pairings for this canned broad beans
Crisp White Wine
This buttery garlic broad bean dish pairs beautifully with a dry Italian white wine like Pinot Grigio or Vermentino. The wine's crisp acidity cuts through the richness of the butter while complementing the garlic and lemon notes.
I reach for a chilled bottle from Alto Adige—its mineral finish enhances the dish's brightness. Serve at 45-50°F for optimal flavor contrast. 🍷
Light-Bodied Beer
A Belgian witbier or German Helles lager brings refreshing contrast to the buttery beans. The citrusy notes in witbiers like Hoegaarden mirror the lemon zest, while a crisp Augustiner Helles balances the garlic's richness. Keep the beer well-chilled (38-42°F) to maintain its effervescence and cleansing qualities. 🍺
Sparkling Wine
For a celebratory touch, serve with Prosecco or Cava. The effervescence cleanses the palate between bites, while the slight sweetness in Prosecco harmonizes with the butter. I prefer Italian DOC Prosecco—its dry style won't overpower the dish's delicate flavors. Serve at 40-45°F to preserve its bubbles. ✨
Herbal Infusions
For a non-alcoholic pairing, try rosemary-infused sparkling water with a splash of lemon. The herbal notes echo the parsley's freshness, while the bubbles refresh the palate.
I make mine by steeping 2 sprigs rosemary in 1 cup boiling water for 10 minutes, then mixing with soda water and ice. 💧
Red Wine Alternative
If you prefer red, opt for a light Pinot Noir from New Zealand or Oregon. Its bright acidity and red fruit notes won't clash with the dish's garlic and lemon. Decant for 15-20 minutes to soften tannins and enhance aroma. Serve at 60-65°F for optimal balance. 🍇
Nutrition facts
Frequently asked questions
Can I use fresh broad beans instead of canned?
Fresh broad beans require more prep work—you’ll need to pod them, blanch for 3-4 minutes in boiling water, then shock in ice water before cooking. Canned beans skip these steps, but if using fresh, reduce the final cooking time to 2 minutes to avoid mushiness. The flavor is similar, but texture may differ slightly.
What if I don’t have flaky sea salt?
Use 1.5 teaspoons of kosher salt as a substitute—it’s less dense but works in equal volume. For a finer texture, pulse 1 teaspoon of regular table salt in a blender. Flaky salt adds visual appeal, but the dish will still taste delicious without it.
Can I make this dish ahead of time?
Blanch and season the beans up to 1 day ahead, but hold off on the butter until serving to prevent sogginess. Reheat gently in a skillet with 1 tablespoon olive oil for 2-3 minutes, then add the butter and garlic fresh. The texture stays best when made-to-order.
Are there gluten-free or vegan alternatives?
This recipe is naturally gluten-free. For vegan, replace butter with 0.5 cup vegan butter or olive oil and use plant-based flaky salt. The dish remains rich and flavorful without dairy. Check your vinegar and parsley for hidden additives if strict vegan compliance is needed.
Why do my beans turn mushy?
Over-blanching or overcooking causes mushiness. Stick to exactly 2 minutes in ice water and 3 minutes in butter—no longer. If beans feel soft after blanching, reduce the final cooking time by 1 minute. Pat them very dry before cooking to prevent steam from softening them further.