Side Dishes
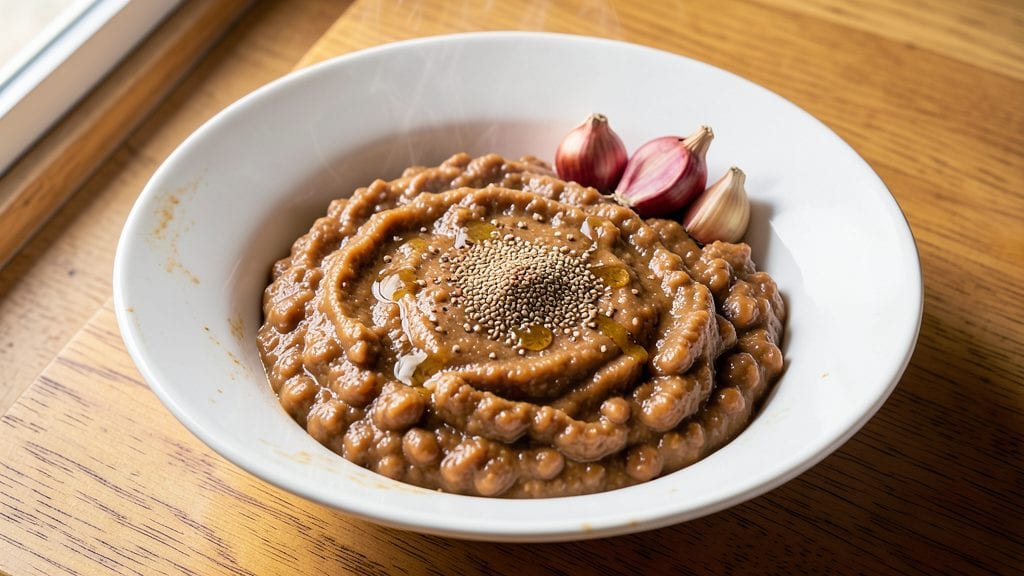
Restaurant-style refried beans deliver that velvety, lard-infused texture you crave from Mexican eateries, and this recipe nails it without shortcuts. The secret lies in slow-cooking dried pinto beans until tender, then blending them with just enough oil to create that signature silky-smooth consistency—no dairy, no gums, just pure bean richness.
I’ve perfected this method over years of testing, ensuring every batch delivers that restaurant-quality mouthfeel and deep, smoky flavor profile.
What sets these apart is the layered seasoning: toasted cumin and garlic develop complex aromatics while simmering, while a touch of vinegar brightens the final product.
The beans cook down into a thick, spreadable paste that clings beautifully to tortillas or rice, making this a versatile side for tacos, burritos, or even breakfast plates. Unlike canned versions, this recipe builds flavor gradually, resulting in a dish that tastes homemade yet professional.
By the time you’re done, you’ll have a pot of creamy, aromatic refried beans that shine as a standalone dish or complement any Mexican meal. The texture is velvety but not mushy, with just the right balance of oil to keep it rich without being greasy.
Serve it warm with a sprinkle of fresh cilantro or a dollop of sour cream for that authentic touch—every bite will taste like your favorite taqueria.
This method works equally well for meal prep, as the beans keep their texture when reheated gently. Whether you’re feeding a crowd or saving leftovers for lunches, the key is patience—letting the beans simmer until they break down completely ensures that restaurant-style quality you’re after.
Ready to make beans that impress? Let’s get started.
Ingredients for restaurant style refried beans
Six simple ingredients transform into velvety, restaurant-style refried beans with authentic flavor and texture.
| Ingredient | Amount | Notes |
|---|---|---|
| Dried Pinto Beans 🌱 | 1 ½ lbs | Rinsed before soaking |
| Vegetable Oil 🫒 | ½ cup | For initial cooking |
| Vegetable Lard or Coconut Oil 🧈 | ¼ cup | For silky texture (vegetarian alternative) |
| Ground Cumin 🌿 | 1 ½ tbsp | Toasted for depth |
| Garlic Cloves 🧄 | 6 cloves | Peeled and toasted |
| White Vinegar 🍋 | 1 tbsp | Brightens flavor |
| Salt 🧂 | 1 ½ tsp | Adjust to taste |
| Fresh Cilantro 🌿 | ¼ cup | Chopped for garnish |
| Sour Cream 🥛 | ¼ cup | For serving (optional) |
| Water 💧 | 8 cups | For soaking beans |
The beans are the heart of this dish, so pick dried pinto beans—they hold up better than canned and develop deeper flavor. Trader Joe's or Mexican markets often carry high-quality dried beans, but any reputable grocery store works. Rinse them well before soaking to remove debris. For that signature restaurant texture, vegetable lard or coconut oil is key—it mimics traditional lard without animal products. I grab mine at Whole Foods or use refined coconut oil from Trader Joe's for a neutral taste. Toast your cumin and garlic in the same oil you'll use to cook the beans—this builds layers of flavor that jarred seasonings can't match.
No vegetable lard? Extra-virgin olive oil works in a pinch, though it has a slightly different mouthfeel. Running short on cumin? Smoked paprika at half the amount adds depth, but it won't be identical. Fresh cilantro is ideal, but dried cilantro or parsley (one-third the amount) keeps the dish vibrant. The vinegar might seem odd, but it cuts through the richness and brightens the final product—apple cider vinegar works too if you prefer a sweeter note. For serving, Mexican crema or Greek yogurt can replace sour cream if you want a tangier option. The beans should simmer until they're completely tender—about 1.5 hours—so plan ahead.
These beans reheat beautifully—just warm them gently with a splash of water to restore that creamy texture. Store leftovers in an airtight container in the fridge for up to 5 days, or freeze for 3 months. I double the recipe and freeze half—perfect for quick breakfasts or taco nights. The texture holds up better than most refried beans when reheated, making it ideal for meal prep. For serving, keep the sour cream and cilantro separate until ready to eat so they stay fresh.
Why You'll Love This Recipe
- No-Soaking Hassle: I’ll be real—soaking beans used to make me groan. These dried pintos? Just toss them in a pot with water, simmer until tender, then mash them smooth. That’s it. No waiting, no fuss, and still restaurant-worthy texture.
- Cumin-Garlic Magic: Between us, that toasted cumin and minced garlic where the beans cook? It’s the secret weapon. The oil and lard blend creates this perfect balance—creamy but not mushy, with a deep, earthy warmth that sticks with you.
- Taco Night’s Secret Weapon: Honestly, I keep a jar of these in the fridge for everything. Breakfast burritos, nachos, even as a side for grilled meats. The richness cuts through spice, and the texture holds up like a pro’s version—not that sad canned stuff.
- Budget-Friendly Staple: Dried pintos and pantry spices cost pennies, but they feed a crowd. Double the batch, freeze half, and you’ve got a cheap, reliable protein source for weeks. My wallet and my freezer thank me every time.
Step-by-step instructions for restaurant-style refried beans
Here's how to achieve that velvety, restaurant-worthy texture with a few key techniques.
Soak and Prepare the Beans
Rinse the 1.5 lbs dried pinto beans thoroughly under cold water to remove any debris. Place them in a large bowl and cover with 8 cups water by about 2 inches. Let them soak overnight in the refrigerator—this ensures even cooking and prevents the beans from staying hard. I like to soak them for at least 12 hours, but up to 24 hours is fine if you forget to start early.
After soaking, drain the beans and rinse them again. This step removes excess starch that can make the beans gummy. Transfer the drained beans to a large pot and cover them with fresh water (about 10 cups) again. Bring to a boil over high heat, then reduce to a simmer and cook for 45-60 minutes until the beans are tender but not falling apart. You'll know they're ready when they mash easily between your fingers.
Cook the Beans Until Perfectly Tender
Once the beans are tender, drain them completely in a colander, shaking gently to remove as much water as possible. The goal here is to get them as dry as you can—this helps create that thick, creamy texture later. Return the beans to the pot and set aside for now.
In a separate skillet, heat the 0.5 cup vegetable oil over medium heat. Add the 6 peeled garlic cloves and toast them for 1-2 minutes until they turn golden brown and smell fragrant. Immediately remove the garlic from the oil with a slotted spoon and set it aside—you don't want it to burn. This step adds incredible depth of flavor without bitterness.
Create the Silky Base with Lard and Cumin
In the same skillet (no need to wipe it clean—the garlic bits add flavor), add the 0.25 cup vegetable lard or coconut oil over medium-low heat. Stir in the 1.5 tbsp ground cumin and let it toast for 30 seconds until it releases its aroma. This is where the magic happens—the cumin and lard combine to create that rich, restaurant-style flavor.
Add the drained beans to the skillet and mash them with a wooden spoon or potato masher. You want to break them down into small, chunky pieces—think ¼-inch to ½-inch in size. Cook for 5-7 minutes, stirring frequently, until the beans are fully coated in the lard and cumin mixture. The goal is to create a thick, paste-like consistency at this stage.
Finish with Vinegar and Salt for Brightness
Stir in the 1 tbsp white vinegar and 1.5 tsp salt, mixing well to distribute evenly. The vinegar brightens the flavors and balances the richness of the lard. Let the mixture simmer for 5-7 minutes over low heat, stirring occasionally, until it thickens into a smooth, creamy texture. You're looking for a consistency that's thick enough to hold its shape when spooned but still silky-smooth.
Taste and adjust the seasoning if needed—this is where you can really make it your own. If it needs more salt, add a pinch at a time. If it feels too thick, stir in 1-2 tablespoons of water to loosen it. The beans should be velvety, not grainy, and coated in that lard-infused richness that makes restaurant-style refried beans so special.
Serve with Fresh Cilantro and Sour Cream
Transfer the refried beans to a serving bowl and let them cool slightly. Stir in the 0.25 cup chopped fresh cilantro just before serving to keep it vibrant and fresh. The cilantro adds a bright, herbaceous note that cuts through the richness of the beans.
Serve immediately with a dollop of 0.25 cup sour cream on top for a creamy contrast. The sour cream adds a tangy element that pairs perfectly with the earthy, smoky flavors of the beans. These refried beans are perfect as a side dish for tacos, burritos, or even as a hearty breakfast dish with eggs and tortillas.
Pro Tips For Making Restaurant Style Refried Beans
- SOAK BEANS TWICE: Dried pinto beans absorb water better with a two-step soak: rinse them first, then cover with cold water for 8 hours (or overnight). I used to rush this and end up with beans that never softened properly—now I just leave them in the sink and wake up to perfect texture every time.
- USE LARD OR COCONUT OIL: Skip the vegetable oil for that authentic restaurant richness—melted vegetable lard or coconut oil adds a deeper, almost buttery flavor. It’s worth the extra few minutes to render it properly in a dry pan before adding the beans.
- MASH WHILE HOT: Don’t wait until the beans are cool to mash—do it right after simmering when they’re still warm and tender. A potato masher works best, and the residual heat helps break them down smoothly. I learned this the hard way after struggling with cold, stubborn beans.
- TOAST THE CUMIN: Bloom the ground cumin in the oil for 30 seconds before adding garlic—this deepens its earthy aroma and prevents it from tasting raw. A quick sniff test tells you when it’s ready: it should smell warm and toasty, not bitter.
Troubleshooting this recipe
Gummy Texture Fix
If your beans turn out gummy, you likely didn’t drain them thoroughly enough after cooking. After simmering, drain the beans in a colander and shake gently to remove excess water—this is critical for that restaurant-style texture.
For extra insurance, pat them dry with a clean kitchen towel before mashing. If the beans still feel too wet, simmer them uncovered for 5-10 extra minutes to evaporate moisture. 💡
Too Thick or Dry
Overcooking or insufficient oil can make refried beans too thick. If your batch is stubborn, stir in 1-2 tablespoons of warm water or broth to loosen it. For future batches, use 1 extra tablespoon of lard or oil during the mashing step—this ensures a silky, not dry, consistency.
I’ve found that coconut oil works best for a neutral flavor while keeping the texture rich.
Flat or Bland Flavor
Skipping the garlic toast or cumin toasting is a common mistake. Always toast your garlic in oil until golden—this adds depth that raw garlic can’t match. For cumin, toast it in the same oil for 30 seconds to release its aroma.
If your beans taste flat, try adding ½ teaspoon of smoked paprika or a pinch of chili powder to brighten the flavor profile.
Burnt Garlic or Oil
Watch your heat closely when toasting garlic—it burns quickly and turns bitter. Keep the oil at medium heat and remove the garlic immediately when it’s golden, not brown. For the lard or oil base, use medium-low heat to prevent overheating.
If you accidentally burn the garlic, strain it out before adding the beans to avoid a bitter taste.
Lumpy or Uneven Texture
Uneven mashing leads to lumps in your refried beans. Use a wooden spoon or potato masher to break down the beans into ¼-inch to ½-inch pieces before blending.
If you prefer a completely smooth texture, transfer the mashed beans to a blender or food processor and pulse briefly—just enough to create a creamy consistency without over-processing. 🌟
Storage Issues
Refried beans can dry out if stored improperly. Always transfer them to an airtight container and press plastic wrap directly on the surface to minimize air exposure. For reheating, add 1-2 tablespoons of water and warm over low heat to restore creaminess.
If your beans develop a skin or separate, stir vigorously to recombine before serving.
Nutrition facts
Frequently asked questions
Can I use canned beans instead of dried for this recipe?
While canned beans save time, they won't give you that authentic restaurant-style texture. Canned beans contain preservatives and excess sodium that prevent proper mashing and create a grainier consistency. If you must use canned, drain and rinse them thoroughly, then simmer for 10-15 extra minutes to reduce moisture before mashing. For best results, stick with dried pinto beans—they develop that signature velvety mouthfeel when cooked properly.
What's the secret to getting that ultra-smooth texture?
The key is in the mashing technique and oil ratio. After simmering, drain the beans completely and pat them dry with a towel to remove all excess water. Then, mash them thoroughly with a wooden spoon or potato masher into ¼-inch pieces before blending briefly in a food processor. The 0.25 cup lard or coconut oil coats each bean perfectly, creating that silky consistency. Never skip the toasting step for cumin and garlic—this builds flavor that makes the texture taste richer.
Can I make this recipe without lard or coconut oil?
Yes, but the texture will be different. For a vegetarian alternative, use extra-virgin olive oil (same amount) or avocado oil, though they have slightly different flavors. If you want to mimic lard's richness, try vegan butter melted into the oil (use 2 tbsp for the same effect). Just know that lard or coconut oil creates that signature restaurant-style mouthfeel that's hard to replicate with other fats.
How do I prevent my refried beans from getting too thick?
Overcooking is the main culprit. Simmer the beans just until they're tender but still hold their shape slightly—about 45-60 minutes after boiling. If your batch gets too thick, stir in 1-2 tbsp warm water or broth while cooking. For future batches, reduce the simmer time by 5 minutes and add 1 extra tbsp oil during mashing. The beans should be thick but still spreadable, not like a paste.
What are the best ways to serve these restaurant-style beans?
These beans shine as a side for tacos, burritos, or breakfast plates with eggs and tortillas. For extra flair, top with crumbled queso fresco, diced avocado, or pickled jalapeños. They also make a great dip with warm tortilla chips or a filling for breakfast burritos. The creamy texture pairs perfectly with grilled meats or black beans for a complete Mexican meal. Store leftovers in an airtight container for up to 5 days—they reheat beautifully!