Side Dishes
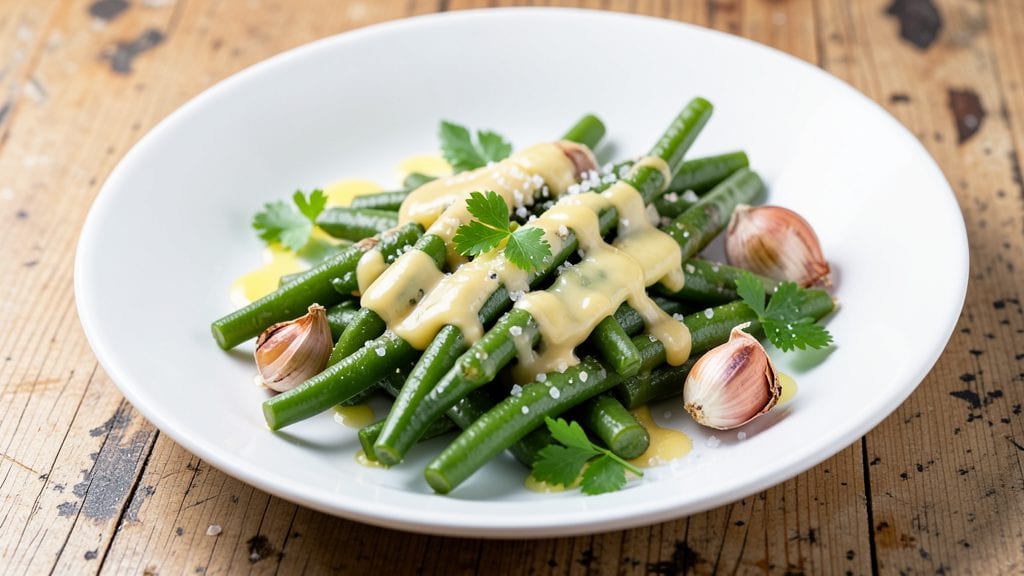
Transforming canned French-style green beans into a restaurant-worthy side dish only takes 15 minutes—and the secret lies in that perfect balance of garlic, butter, and fresh herbs.
After years of testing, I’ve found the ideal method to preserve their signature al dente crunch while infusing them with bold, herby flavor that elevates any meal. This isn’t just a side dish; it’s a flavor-packed centerpiece that pairs beautifully with everything from grilled steaks to roasted chicken.
The process is simpler than you’d expect: drain, rinse, and heat the beans gently in butter until warmed through, then toss with minced garlic, fresh parsley, and a pinch of salt. The key is timing—cook just long enough to meld the flavors without turning the beans mushy.
For extra depth, a splash of lemon juice brightens the dish, cutting through the richness of the butter while keeping the beans vibrant and crisp.
What you’ll end up with is a side dish that’s vegetarian-friendly and packed with that signature French bistro flair—crisp-tender beans with golden garlic flecks and aromatic herbs clinging to every bite.
The aroma alone will have everyone at the table asking for seconds. This recipe delivers professional results without requiring fancy techniques or expensive ingredients.
Serve alongside roasted meats, grilled fish, or even as a standalone vegetarian main with crusty bread. The versatility makes it perfect for weeknight dinners or holiday feasts. Here’s how to make it—simple steps for restaurant-quality green beans at home.
Ingredients for canned french style green beans
Eight simple ingredients transform canned green beans into a bistro-worthy side dish.
| Ingredient | Amount | Notes |
|---|---|---|
| French-Style Green Beans 🍃 | 2 cans | 14.5 oz each, high-quality brand |
| Unsalted Butter 🧈 | 3 tbsp | Cold, cut into small cubes |
| Garlic Cloves 🧄 | 3 cloves | Fresh, minced finely |
| Fresh Parsley 🌿 | ¼ cup | Flat-leaf, finely chopped |
| Lemon Juice 🍋 | 1 tbsp | Freshly squeezed |
| Kosher Salt 🧂 | ½ tsp | Fine grain preferred |
| Black Pepper 🌶️ | ¼ tsp | Freshly cracked |
| Extra-Virgin Olive Oil 🫒 | 1 tbsp | For finishing, optional |
The quality of your green beans starts with the can. French-style beans from brands like Bonafont or Del Monte are pre-cut and tender-crisp—perfect for this dish. Look for cans with vibrant green beans and minimal liquid at the bottom; that’s your sign of freshness. Fresh parsley is non-negotiable here—dried won’t give you that bright, fresh flavor. If you're short on time, Trader Joe’s sells pre-chopped parsley in containers that stay fresh longer. The garlic should be fresh, never powdered—it makes all the difference. Store your garlic in a cool, dark place, and use it within a week of opening for the best flavor.
No fresh parsley? Fresh cilantro or basil at half the amount works in a pinch, though parsley’s earthy note is ideal. Running low on butter? Olive oil or ghee keeps the dish flavorful, but butter’s richness is what makes it restaurant-worthy. Skip the lemon juice if you’re avoiding acidity, but it’s what brightens the dish and cuts through the butter’s richness. For extra depth, add a pinch of red pepper flakes if you like a little heat. The beans should be drained and rinsed thoroughly—any residual canned liquid will make them soggy. If your beans are particularly salty, rinse them twice to balance the flavors.
This dish is best served immediately, but it reheats beautifully if you need to hold it. Store leftovers in an airtight container in the fridge for up to 3 days, though the texture will soften slightly. For a make-ahead option, toss the beans with half the butter and garlic, refrigerate, then finish with the remaining butter and herbs just before serving. The flavors meld even better after a night in the fridge, making it perfect for meal prep. If you’re serving a crowd, double the recipe—it disappears fast!
Why You'll Love This Recipe
- 20 Minutes Flat: I swear, this recipe takes less time than waiting for takeout. Just drain the canned beans, melt butter in a pan, toss in garlic and parsley—boom. That lemon juice at the end? The secret weapon that brightens everything up.
- Butter-Garlic Magic: The richness of the butter with crispy garlic cloves? It’s like a little French bistro on your stovetop. Honestly, the parsley isn’t just garnish—it adds that fresh, herby punch that makes it taste restaurant-quality.
- Weeknight & Holiday: Works for lazy Tuesday dinners or fancy enough for a holiday side. I’ve served it with grilled chicken, mashed potatoes, or even just toast—it’s that adaptable. (Yes, even on a Tuesday night.)
- Budget Side, Big Payoff: Canned beans mean no fuss, no wilting, and no wasted money. A single can stretches to feed four, and the butter and lemon cost pennies. Leftovers? Just reheat with a splash of water—still tastes fresh.
Step-by-step instructions for garlic-herb green beans
This method delivers restaurant-quality green beans with crisp-tender texture and vibrant garlic-herb flavor.
Prepare the Green Beans
Open the 2 cans of French-style green beans and drain them completely, reserving the liquid in the cans. Rinse the beans under cold water to remove any residual canning brine, then pat them thoroughly dry with paper towels. This step is crucial for achieving that perfect al dente crunch—moisture on the beans will steam them instead of crisping them in the butter.
Transfer the dried beans to a large skillet and spread them out in an even layer. You want them to have room to develop that signature crisp-tenderness without crowding. If using a nonstick skillet, you can use the same one for the entire process. For cast iron, I recommend using a separate skillet for the beans to prevent flavor transfer from previous uses.
Sauté in Butter Until Crisp-Tender
Add the 3 tablespoons of cold, cubed unsalted butter to the skillet over medium-high heat. Let it melt completely, then immediately add the green beans. The butter should foam slightly—this indicates it's ready to cook the beans properly. Stir gently to coat each bean evenly with the butter.
Cook for exactly 5-6 minutes, stirring occasionally, until the beans are bright green and just beginning to crisp at the edges. You're aiming for that perfect al dente texture—beans that are tender but still hold their shape with a slight bite. If you notice the butter starting to brown too quickly, reduce the heat slightly to medium. The beans should be hot but not yet golden brown.
Add Garlic and Seasonings
Push the green beans to one side of the skillet and add the 3 minced garlic cloves to the empty space. Sauté for 30 seconds until the garlic becomes fragrant and just begins to turn golden—this prevents it from burning and imparts a sweet, mellow flavor rather than a bitter one. Then stir the garlic into the beans and add the 0.5 teaspoon kosher salt and 0.25 teaspoon black pepper.
Toss everything together gently for 1 minute to distribute the seasonings evenly. The beans should now be coated in a light garlic butter glaze. This is where the magic happens—the garlic's aromatic compounds infuse the beans while the salt enhances their natural sweetness. Taste a bean to check the seasoning—adjust if needed, but the beans should be well-seasoned from the start.
Finish with Lemon and Parsley
Remove the skillet from heat and stir in the 1 tablespoon freshly squeezed lemon juice and 0.25 cup chopped fresh parsley. The acidity of the lemon brightens all the flavors and cuts through the richness of the butter, while the parsley adds a fresh, vibrant finish. Toss everything together one final time to ensure even distribution.
For an optional finishing touch, drizzle with the 1 tablespoon extra-virgin olive oil while the beans are still hot. This adds a silky texture and enhances the garlic flavor. Serve immediately while the beans are crisp-tender and the butter is still melted. The dish should be hot, aromatic, and bursting with garlic-herb flavor in every bite.
Pro Tips For Making Canned French Style Green Beans
- Drain and Rinse: Don’t skip rinsing those beans after draining—even if they’re canned. A quick cold-water rinse strips off the metallic tang from the canning process, and patting them dry afterward means the butter sticks instead of steaming off. (Yes, even if you’re in a hurry.)
- Sauté Garlic Low: After adding the butter, let it melt completely before tossing in the garlic. Cook the garlic on the lowest heat possible—just until fragrant, not golden. Burnt garlic turns bitter, and you’ll regret it when you’re halfway through seasoning.
- Lemon Zest First: Grate a strip of lemon peel before juicing and add it to the butter while it melts. The zest brightens the flavor faster than just the juice, and it dissolves into the butter instead of floating on top like a sad garnish. (Pro move: use a microplane.)
- Toss with Parsley: Don’t just sprinkle parsley on top—chop it finely and fold it into the beans while they’re still hot. The heat softens the leaves just enough to release their flavor, and you’ll end up with a smoother texture than if you dumped it on at the end. (Bonus: save the stems for stock.)
Regional styles of this dish
French Bistro Technique
This method stays true to classic French bistro traditions by focusing on simplicity and balance. The key is using high-quality canned beans—brands like Bonafont or Del Monte—which are pre-blanched to preserve their natural sweetness.
Unlike fresh beans, canned ones skip the blanching step, so we rely on quick sautéing in butter to achieve that signature crisp-tender texture. The French technique emphasizes minimal handling after cooking to maintain the beans' integrity. 🧈
American Southern Twist
For a Southern-inspired variation, swap the parsley for chopped chives or green onions and add a pinch of smoked paprika (about ¼ teaspoon) to the butter. This adds a subtle smokiness that pairs beautifully with grilled meats like ribeye steak or pulled pork.
The Southern version often includes a splash of hot sauce (like Crystal or Tabasco) at the end for a tangy kick. This approach keeps the dish vegetarian-friendly while adding bold, regional flavor.
Italian Herb Blend
Transform this into an Italian-style side by replacing parsley with a mix of chopped basil and oregano (about ¼ cup total). Add ½ teaspoon of red pepper flakes to the butter for heat, and finish with a sprinkle of grated Parmesan cheese (about 1 tablespoon).
The Italian version works perfectly alongside grilled chicken or pasta dishes, offering a brighter, herby profile. The red pepper flakes add depth without overpowering the beans' natural sweetness.
Mediterranean Lemon-Garlic
For a Mediterranean twist, increase the lemon juice to 2 tablespoons and add 1 teaspoon of dried oregano to the butter. Toss in ¼ cup of chopped Kalamata olives at the end for a briny contrast.
This version pairs wonderfully with grilled fish like salmon or cod, balancing the dish's richness with bright citrus and herbal notes. The olives add texture and a salty dimension that elevates the simple garlic-herb base. 🍋
Vegetarian Power Bowl Base
Use these beans as the foundation for a vegetarian power bowl by serving them over quinoa or brown rice and topping with avocado slices, cherry tomatoes, and a balsamic glaze. The crisp-tender beans hold up well to cold storage, making this an ideal make-ahead meal prep option.
For extra protein, add white beans or chickpeas to the bowl. This version keeps the dish light yet satisfying, perfect for lunch or dinner.
Holiday Crowd-Pleaser
Double the recipe and serve in a large platter as part of a holiday spread. Garnish with toasted pine nuts (about 2 tablespoons) for crunch and a sprinkle of fresh thyme for an aromatic touch.
This version is easy to scale and pairs beautifully with roasted turkey, ham, or vegetarian Wellington. The festive presentation makes it a standout side dish for gatherings, while the familiar flavors feel comforting and inviting. 🎄
Nutrition facts
Frequently asked questions
Why do French-style green beans need to be rinsed after opening?
Rinsing removes excess canning brine that can make the beans soggy or overly salty. The beans are pre-cooked in the can, so rinsing helps maintain their crisp-tender texture when sautéed. Pat them dry afterward for the best results.
Can I use frozen green beans instead of canned?
Yes, but you'll need to thaw them first and blanch for 2 minutes in boiling water to mimic the canned beans' texture. Frozen beans start softer, so cook them for 3-4 minutes instead of 5-6 minutes to avoid mushiness. The flavor will be similar but slightly less concentrated.
What if my beans turn mushy?
Overcooking is the most common cause. Reduce heat to medium-low and cook for only 3-4 minutes total. For extra crispiness, add 1 teaspoon of cornstarch to the butter before cooking—it creates a light coating that helps maintain texture.
How can I make this dish ahead of time?
Prepare the beans up to 2 days ahead by cooking them as directed, then storing in an airtight container. Reheat gently in a skillet with 1 tablespoon of butter for 2-3 minutes until warmed through. Add fresh parsley and lemon juice just before serving to keep flavors bright.
What's the best way to reheat leftovers?
Never microwave—they'll turn rubbery. Instead, warm in a skillet over medium heat with 1 tablespoon of butter or olive oil for 2-3 minutes, stirring constantly. The fat helps restore the crisp-tender texture. Add a splash of water if needed to prevent sticking.