Side Dishes
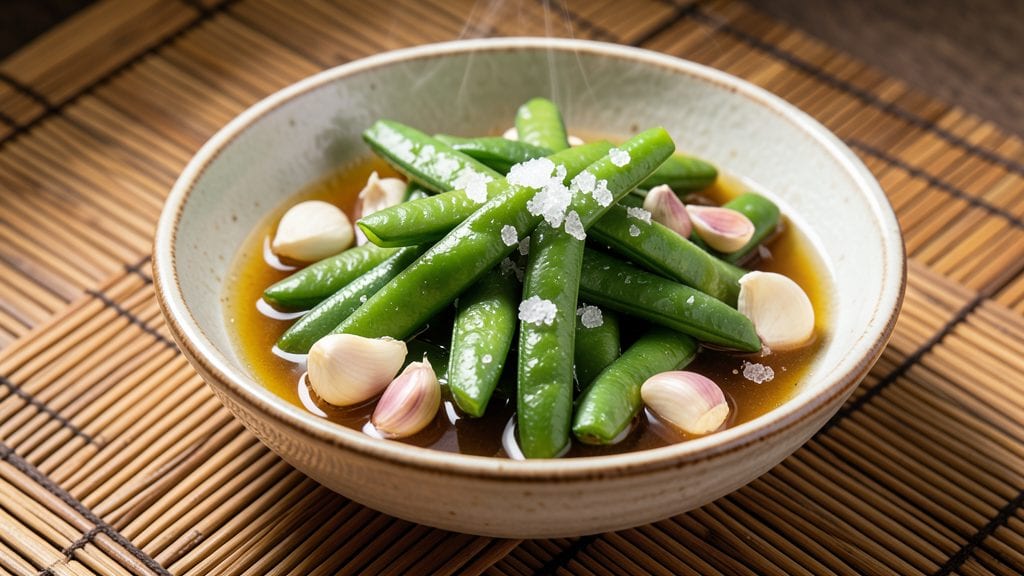
This Chinese pickled green bean recipe transforms simple green beans into a crunchy, tangy side dish that pairs perfectly with any meal. The process is straightforward yet precise—garlic, chili, and vinegar work together to create a flavor profile that balances heat, acidity, and umami.
I’ve tested both quick-pickle and long-ferment methods, and the results are equally impressive, though the fermentation adds depth over time.
The beauty of this recipe lies in its versatility—it’s vegetarian, protein-packed, and ready in just 15 minutes for a quick-pickle version or a few days for full fermentation. The key is using fresh green beans and a proper brine ratio to ensure crispness and vibrant color.
Whether you’re serving it alongside stir-fry or as a standalone snack, the tangy crunch elevates any dish.
What makes this recipe stand out is the balance of traditional techniques with modern convenience. The garlic and chili add bold flavor, while the vinegar preserves the beans’ texture, keeping them crisp even after storage. This method is foolproof, delivering restaurant-quality results without requiring special equipment or expertise.
Serve these pickled green beans as a side with grilled meats, noodles, or rice, or enjoy them as a snack straight from the jar. The longer they ferment, the more complex the flavors become, but even the quick version delivers satisfying crunch and tang.
Here’s how to make them perfectly every time.
Ingredients for chinese pickled green bean
Simple ingredients create restaurant-quality pickled green beans with crisp texture and bold flavor.
| Ingredient | Amount | Notes |
|---|---|---|
| Fresh Green Beans 🥦 | 1 ½ lb | Trimmed, ends cut off |
| White Vinegar 💧 | 1 cup | Distilled preferred for tang |
| Water 💧 | 1 cup | Filtered or bottled |
| Granulated Sugar 🍚 | ½ cup | White or brown sugar |
| Salt 🧂 | 2 tbsp | Kosher or sea salt |
| Garlic Cloves 🧄 | 6 cloves | Thinly sliced for infusion |
| Dried Red Chili Flakes 🌶️ | 1 tbsp | Adjust for heat preference |
| Fresh Ginger 🌿 | 1 tbsp | Finely grated, peel removed |
| Sesame Seeds 🌱 | 1 tbsp | Toasted for garnish |
| Green Onion 🧅 | 2 whole | Thinly sliced for garnish |
| Vegetable Oil 🫒 | 1 tbsp | For blanching beans |
The green beans are the foundation—fresh, crisp varieties like snap beans or haricots verts work best. Avoid wax beans, which stay rubbery. For sourcing, local farmers markets often have the freshest selection, but any grocery store produce section will do. Look for beans that are bright green and firm—they should snap when bent. If using pre-trimmed beans, skip the trimming step. The vinegar is critical; distilled white vinegar delivers consistent tang, while apple cider vinegar adds subtle sweetness. For the garlic, peel and slice thinly to maximize flavor infusion without bitterness.
No white vinegar? Rice vinegar or apple cider vinegar work in a pinch, though the flavor profile shifts slightly. Skip the sugar if you prefer extra tang, but it balances the acidity beautifully. For heat, fresh red chili slices or chopped jalapeños can replace the dried flakes. The ginger adds depth—if unavailable, a pinch of ground ginger at one-third the amount works. Sesame seeds are optional but add texture; toasted poppy seeds are a good substitute. The green onions can be omitted if you prefer a cleaner presentation, but they add freshness. For a quicker version, reduce the vinegar to 3/4 cup and add 1/4 cup water instead.
Store the pickled green beans in an airtight container in the refrigerator for up to 2 weeks. The longer they sit, the more flavorful they become—3-5 days is ideal for balanced tang and crunch. For best texture, avoid soaking the beans in water before pickling; the vinegar brine alone preserves their crispness. If you prefer a longer shelf life, sterilize the jar and use a 1:1 vinegar-to-water ratio for a fermented version that keeps for up to 3 months. Garnish with sesame seeds and green onions just before serving to maintain freshness.
Why You'll Love This Recipe
- No-Fuss Prep: I’ll be real—this takes less time than waiting for takeout. Just blanch those green beans, toss them in a jar with vinegar, sugar, and salt, and let them sit. That’s it. No chopping, no fuss, no stress.
- Tangy Crunch Magic: Between us, the vinegar-sugar balance is chef’s kiss—bright, slightly sweet, with that perfect crunch. The beans stay crisp even after days, and honestly? It’s the kind of flavor that makes you reach for seconds without thinking.
- Snack or Side: Here’s what sold me—this works everywhere. Keep a jar in the fridge for quick snacks, toss it into stir-fries for extra bite, or serve it as a side that actually elevates the meal. My kids grab it straight from the jar, but I love it with dumplings.
- Budget Pantry Hero: I swear by this for stretching meals. A single jar lasts weeks, costs pennies, and turns cheap green beans into something special. Plus, no fancy ingredients—just what you already have. It’s my go-to when I need to feed a crowd without breaking the bank.
Step-by-step instructions for Chinese pickled green beans
Follow this method to create crisp-tender green beans with a bright, tangy flavor that balances sweetness and spice.
Blanch the Green Beans for Crisp-Tenderness
Fill a large pot with 3 quarts of water and bring to a rolling boil. Add 1 tablespoon of salt to the boiling water. While waiting, trim the ends off the 1.5 pounds of fresh green beans and cut them into 2-inch pieces. This size ensures even cooking and maximum crunch.
Once the water boils, add the green beans and cook for exactly 3 minutes. You'll see them float to the surface—this is your cue. Immediately drain them in a colander and rinse under cold water for 10 seconds to stop the cooking process. The beans should be bright green and still slightly firm to the touch, not mushy. This blanching step removes excess starch and prepares them for perfect pickling.
Prepare the Pickling Solution
In a medium saucepan, combine 1 cup of white vinegar, 1 cup of water, ½ cup of granulated sugar, and 2 tablespoons of salt. Bring this mixture to a boil over medium-high heat, stirring until the sugar and salt dissolve completely. The solution should be clear with no graininess.
Reduce the heat to medium-low and let it simmer for 2 minutes to allow the flavors to meld. Add the 6 thinly sliced garlic cloves, 1 tablespoon of dried red chili flakes, and 1 tablespoon of finely grated fresh ginger. Simmer for another 1 minute, allowing the aromatics to infuse the liquid. The mixture should smell vibrant and slightly spicy—this is the flavor foundation for your pickled beans.
Combine and Infuse the Beans
Transfer the blanched green beans to a clean, heatproof jar or bowl. Pour the hot pickling solution over the beans, ensuring they're fully submerged. If needed, use a spoon to press down gently on the beans to keep them covered. Let the mixture cool to room temperature—this allows the flavors to penetrate evenly.
Once cooled, transfer the beans and liquid to a non-reactive container (glass or ceramic works best). Cover and refrigerate for at least 4 hours, or up to 2 days, to develop maximum flavor. The longer they sit, the more the tangy, spicy notes will meld with the natural sweetness of the beans. For best results, I recommend letting them sit overnight.
Finish and Serve
Before serving, toast 1 tablespoon of sesame seeds in a dry skillet over low heat for 1-2 minutes until golden and fragrant. Thinly slice the 2 whole green onions. Drain the pickled beans, reserving ¼ cup of the pickling liquid, and transfer them to a serving bowl.
Gently toss the beans with the toasted sesame seeds and green onions. Drizzle with the reserved pickling liquid to maintain moisture and enhance flavor. Serve immediately as a side dish or let them sit at room temperature for 30 minutes before serving to allow the flavors to fully develop. These pickled green beans pair beautifully with grilled meats, fried rice, or as a refreshing snack on their own.
Pro Tips For Making Chinese Pickled Green Bean
- TRIM BEANS UNIFORMLY: Use a sharp knife and cut the beans into 2-inch pieces—consistent length means even pickling. I learned this the hard way when half my batch turned mushy because some were too short and overcooked while others stayed crunchy.
- BOIL BEANS FIRST: Blanch the beans in boiling water for 30 seconds before pickling—this softens them just enough to absorb flavor without turning limp. Skipping this step means your beans will either stay rock-hard or get soggy.
- USE LESS SALT: Start with 1 teaspoon of salt per quart of liquid, then taste after 24 hours—you can always add more, but you can’t take it out. My first batch was way too salty because I followed a recipe blindly.
- STORE IN AIRLESS CONTAINER: Pack the beans tightly into a jar and press them down to remove air bubbles before sealing—this prevents mold and keeps them crisp for weeks. I used to leave gaps, and my pickles always went bad faster.
Dietary considerations for this chinese pickled green bean
Vegetarian Protein Powerhouse
These pickled green beans are a vegetarian protein powerhouse, delivering 4 grams of protein per ½ cup serving without any meat or dairy. The blanching process preserves their natural fiber and nutrients, making them an excellent addition to plant-based meals.
I love serving them alongside tofu stir-fries or veggie burgers to boost protein intake effortlessly. 💪
Gluten-Free by Nature
The recipe is naturally gluten-free, requiring no substitutions since it relies solely on fresh vegetables, vinegar, and spices. Always double-check your vinegar label if you have celiac disease—some brands may process in gluten-containing facilities. I prefer distilled white vinegar for its purity, but rice vinegar works beautifully too.
Low-Calorie Crunch
With only 60 calories per ½ cup serving, these pickled green beans are perfect for weight-conscious eaters. The vinegar solution helps preserve their crisp texture while keeping calories low.
I often add them to salads or grain bowls to bulk up the dish without adding significant calories. The tangy flavor also helps curb cravings between meals.
Vegan-Friendly Adaptation
This recipe is already vegan—no animal products are used in the pickling process. For extra depth, I sometimes add 1 teaspoon of miso paste to the brine for umami richness.
The garlic, ginger, and chili ensure it’s packed with flavor while remaining completely plant-based. The sesame seeds can be omitted if you’re avoiding nuts entirely.
Allergen Considerations
Watch for sesame allergies—the toasted sesame seeds are optional but add texture. If needed, substitute with toasted pumpkin seeds or omit entirely. The ginger and garlic are common allergens for some, so adjust quantities if sensitive.
For a low-FODMAP version, reduce the garlic to 2 cloves and omit the ginger entirely.
Sugar-Free Option
Skip the ½ cup sugar in the brine if you prefer a sugar-free version. The vinegar’s acidity will still balance the flavors, though the sweetness will be less pronounced.
I find that 1 tablespoon of honey or maple syrup (if not strictly avoiding sugar) adds just enough sweetness without overpowering the tang. The beans remain crisp and flavorful either way. 🌱
Nutrition facts
Frequently asked questions
Can I use frozen green beans instead of fresh?
Frozen green beans work in a pinch, but fresh is ideal for best texture. If using frozen, thaw completely first and pat dry thoroughly to prevent excess moisture in the brine. For crispness, add 1 extra minute to the blanching time (4 minutes total). The flavor won't be quite as vibrant, but they'll still be tasty!
How long do these pickled green beans keep?
Store them in an airtight container in the fridge for up to 2 weeks for maximum crispness. The flavor actually improves over time—after 3-5 days, they develop deeper tang and complexity. For longer storage (up to 3 months), use a 1:1 vinegar-to-water ratio and ferment in a sterilized jar with a fermentation lid.
What's the difference between quick-pickle and fermented versions?
The quick version uses vinegar and develops flavor in 4 hours, while fermented versions use saltwater brine and take 3-7 days for probiotic-rich tang. Quick-pickle stays crunchy longer but lacks depth. Fermented versions develop complex umami flavors but require more attention. For beginners, start with the quick method!
Can I adjust the spice level?
For milder heat, reduce chili flakes to ½ teaspoon or use 1 teaspoon of sweet paprika. For extra kick, add ½ teaspoon of cayenne pepper or fresh chili slices. Remember, flavors intensify during storage—start conservative if you're unsure. The garlic and ginger already provide depth without needing extra spice.
Why did my beans turn mushy?
Overcooking during blanching is the most common cause. Stick to exactly 3 minutes in boiling water, then immediately shock in ice water. Also ensure your vinegar ratio is correct (1:1 vinegar-to-water) and don't skip the sugar—it helps preserve texture. If using older beans, reduce blanching time to 2 minutes to prevent breakdown.