Side Dishes
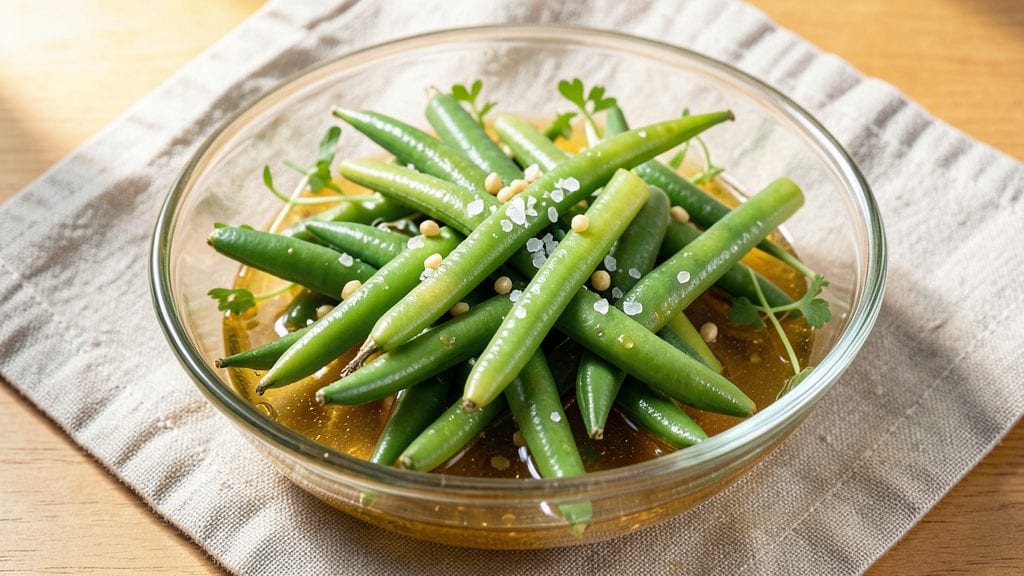
This crisp pickled green beans recipe transforms simple garden vegetables into a tangy, crunchy side dish that elevates any meal. The secret lies in the vinegar brine, which preserves that satisfying crunch while infusing bright, acidic flavor—perfect for summer barbecues or holiday tables.
I’ve perfected a method that delivers restaurant-quality results in just 15 minutes of active prep, with no fermentation required.
The process is straightforward: blanching the beans ensures they stay crisp, while a simple vinegar, water, and salt solution creates the perfect tangy brine. Aromatic spices like mustard seeds and garlic cloves add depth without overpowering the natural green bean flavor.
This recipe strikes the balance between traditional pickling techniques and modern convenience—ideal for busy cooks who still want restaurant-quality sides.
What you’ll end up with is a jar of vibrant green beans that stay crisp for days, their bright color and tangy bite making them irresistible. The beans hold their texture beautifully, whether served as a side, tossed into salads, or paired with grilled meats.
The best part? They’re ready in under 15 minutes, with minimal effort but maximum flavor impact.
Store them in the refrigerator for up to two weeks, or extend their shelf life with proper canning techniques. This recipe works equally well for quick-pickle versions or longer fermented batches—giving you flexibility for any occasion. Let’s get started on creating these addictive, crunchy green beans!
Ingredients for crisp pickled green beans
Garden-fresh beans meet bold vinegar and spices for restaurant-style crunch in minutes.
| Ingredient | Amount | Notes |
|---|---|---|
| Fresh Green Beans 🥦 | 1 ½ lb | Trimmed, ends cut off |
| White Vinegar 💧 | 1 cup | Distilled, 5% acidity preferred |
| Water 💧 | 1 cup | Filtered or bottled |
| Salt 🧂 | 2 tbsp | Diamond Crystal preferred |
| Granulated Sugar 🍯 | ½ cup | White or raw cane sugar |
| Mustard Seeds 🌶️ | 1 tsp | Whole, yellow preferred |
| Garlic Cloves 🧄 | 3 cloves | Smashed, not minced |
| Black Peppercorns 🌶️ | ½ tsp | Crushed lightly |
| Red Pepper Flakes 🌶️ | ¼ tsp | Adjust for heat preference |
| Fresh Dill Sprigs 🌿 | 2 sprigs | For aroma, optional garnish |
| Ice Cubes ❄️ | 1 cup | For immediate shock cooling |
The green beans are the star—harvest fresh or buy the thinnest, youngest ones from the store. Trader Joe's and Whole Foods usually have perfect slender beans, but any fresh green beans work. Trim the ends and snap off any woody stems. The vinegar is non-negotiable here—white vinegar gives the cleanest tang, but apple cider vinegar adds subtle sweetness if you prefer. For the best flavor, use Diamond Crystal kosher salt—it dissolves faster and has that perfect crunch. Mustard seeds should be toasted lightly in a dry pan for 30 seconds before adding to the brine—this unlocks their nutty depth.
No mustard seeds? Dill seeds or celery seeds work at the same amount. Short on vinegar? Lemon juice at half the quantity gives brightness but lacks the same preservation power. The garlic cloves can be peeled and minced if you prefer, but smashed whole keeps the texture interesting. Red pepper flakes are optional but add that perfect kick—adjust based on your heat tolerance. If you're making a big batch, double the spices for each additional pound of beans. The ice cubes are a game-changer—they shock the beans immediately after blanching, locking in that crisp texture you crave.
These beans stay crisp for 2 weeks in the fridge—no fermentation required. Store in airtight jars with the brine completely covering the beans. For longer storage, canning is the way to go—process in a water bath for 10 minutes for shelf-stable jars. The flavor actually improves after 24 hours of sitting, so make them a day ahead if possible. They're perfect for meal prep—just grab a jar when you need a quick side for grilled chicken or sandwiches. The dill sprigs can be added fresh before serving for that restaurant-quality garnish.
Why You'll Love This Recipe
- No-Fuss Pantry Magic: I swear by this recipe when I’m staring at a fridge full of green beans and nothing else. Just trim the ends, boil for 3 minutes, then dump into a jar with vinegar, sugar, and salt. That’s it—no fancy gadgets, no measuring cups that get lost in the chaos.
- Tangy Crunch Perfection: The vinegar and sugar play tag team on those beans—sharp enough to cut through rich dishes, sweet enough to make you want to eat them straight from the jar. Honestly, I’ll often grab a handful right out of the fridge for a snack, and it’s always a win.
- Picnic or Potluck Hero: These beans travel like champs—no ice needed, no mess, just grab and go. I’ve packed them in mason jars for beach trips, tossed them into sandwiches for game day, and even used them as a crunchy topping for tacos. They’re the MVP of any spread where you need something reliable.
- Budget Stretch Star: A pound of green beans and a bottle of vinegar will make jars that last weeks. I’ll batch these on sale days and keep them in the fridge for when I’m too tired to cook or need to bulk up a meal without breaking the bank. Plus, the sugar and salt are already in my pantry—no extra shopping.
Step-by-step instructions for crisp pickled green beans
Here's how to transform fresh green beans into crisp, tangy pickles in record time—no canning required!
Prepare the Green Beans for Pickling
Start by trimming the ends off the 1.5 lb fresh green beans, cutting off any tough stems. I like to snap them by hand at the natural break points—this ensures even cooking and a cleaner look. Give them a quick rinse under cold water to remove any dirt, then pat them completely dry with paper towels. The drier they are, the better they'll absorb the pickling liquid and maintain their crisp texture.
For extra crunch, I recommend blanching the beans first. Bring a pot of water to a rolling boil and cook the beans for 2-3 minutes until they're bright green but still crisp. Immediately drain and plunge them into an ice water bath with the 1 cup ice cubes to stop the cooking process. This step is crucial—it preserves their vibrant color and crisp texture while preparing them to absorb all those amazing flavors.
Make the Flavor-Packed Pickling Liquid
In a medium saucepan, combine the 1 cup white vinegar, 1 cup water, 2 tbsp salt, 0.5 cup granulated sugar, 1 tsp mustard seeds, 3 smashed garlic cloves, 0.5 tsp crushed black peppercorns, and 0.25 tsp red pepper flakes. Bring this mixture to a gentle boil over medium heat, stirring until the salt and sugar dissolve completely. The liquid should be clear and slightly cloudy—this means everything is properly combined.
Here's the thing—don't be tempted to rush this step. Let the mixture simmer for 3-4 minutes to allow the flavors to meld together. You'll notice the aroma becoming more complex as the garlic and spices release their oils. The mustard seeds will start to pop slightly, adding a subtle crunch to the finished pickles. Keep the heat low enough to prevent boiling over, but high enough to maintain a steady simmer.
Pickle the Green Beans
Once the pickling liquid is ready, add the blanched green beans and 2 sprigs fresh dill to the saucepan. Stir gently to ensure all the beans are coated in the flavorful liquid. Let the mixture return to a gentle simmer, then reduce the heat to low and cook for 8-10 minutes. You're looking for the beans to become bright green and slightly softened—just enough to be tender-crisp, not mushy.
During this time, I like to give the beans a stir every couple of minutes to ensure even cooking. The beans should float near the top of the liquid, and you'll see tiny bubbles forming around them. This is your signal that they're absorbing all those amazing flavors. The dill sprigs will add a fresh, herbal note that pairs perfectly with the tangy vinegar and spicy kick from the red pepper flakes.
Cool and Store for Maximum Crunch
Remove the saucepan from heat and let the beans cool in the pickling liquid for 5 minutes. This resting period allows the flavors to fully penetrate the beans. Once cooled, transfer the beans and their liquid to airtight jars or containers. I like to use wide-mouth mason jars—they make it easy to pack in all those crisp pickles.
Store the pickled green beans in the refrigerator for at least 24 hours before eating. This chilling time is essential—it allows the flavors to develop fully and ensures the beans stay crisp. The longer they sit, the more flavorful they become. They'll keep in the fridge for up to 2 weeks, making them perfect for snacking, salads, or as a tangy side dish. The contrast of crisp green beans with the tangy, spicy pickling liquid is absolutely incredible!
Pro Tips For Making Crisp Pickled Green Beans
- Trim the Ends: Snip off the very tips of the beans—those tough little nubs ruin texture no matter how long you cook them. I used to leave them on, and they’d always feel like chewing cardboard, even after pickling. A quick snip with kitchen shears makes all the difference.
- Boil Water First: Heat the water and vinegar mix to a rolling boil before adding the beans—this guarantees even blanching and faster crisping. I learned this the hard way when my first batch sat in lukewarm liquid, ending up soggy instead of snappy.
- Skip the Crowding: Pack the beans into the boiling liquid in batches if needed—overcrowding drops the temperature and leaves you with limp, unevenly cooked beans. Trust me, your jar space will thank you later.
- Use Ice Water: Shock the blanched beans in ice water for exactly 30 seconds to halt cooking and lock in that crisp snap. I was skeptical until I tried it—now I never skip this step, even when I’m in a rush.
Creative variations of these flavors
Quick-Pickle Version
For an even faster method, skip the blanching step entirely. Simply trim the beans and pack them tightly into a jar. Heat the vinegar mixture (without sugar) to 185°F until it shimmers, then pour over the beans.
Seal and let sit at room temperature for 1 hour before refrigerating. This version is ready in 15 minutes and stays crisp for 1 week. Perfect for last-minute prep! 💛
Fermented Crunch
For a probiotic-rich twist, ferment the beans instead of pickling. Use 2% salt brine (2 tbsp salt per quart of water) and skip the vinegar. Pack beans into a clean jar, pressing them down to remove air bubbles.
Cover with a fermentation lid or cloth secured with a rubber band. Let ferment at 68-72°F for 3-5 days, tasting daily. The result is a tangy, crunchy bean with gut-friendly benefits—ideal for health-conscious eaters.
Asian-Inspired Twist
Swap white vinegar for rice vinegar and add 1 tbsp soy sauce, 1 tsp grated ginger, and 1 tsp sesame seeds. Use ½ tsp red pepper flakes for heat.
This variation pairs beautifully with grilled meats or noodle bowls. Garnish with sliced scallions and toasted sesame seeds before serving for an authentic touch. 🌶️
Herb-Infused Variations
Experiment with fresh herbs like tarragon, thyme, or basil instead of dill. Add 2 sprigs to the pickling liquid for a fragrant twist. For a Mediterranean flair, include ½ tsp dried oregano and ¼ tsp cinnamon.
These herbs add complexity while maintaining the crisp texture. Try different combinations to find your favorite flavor profile!
Sweet & Smoky Style
Boost the sweetness with ½ cup honey instead of sugar, and add ½ tsp smoked paprika for depth. Use apple cider vinegar for a milder tang. This version works wonderfully as a side for BBQ dishes or as a topping for sandwiches.
The smoky-sweet flavor is addictive and pairs perfectly with grilled chicken or pork. 🔥
Spicy Garlic-Lover’s Pickle
Double the garlic to 6 cloves and add 1 tsp cayenne pepper for serious heat. Toast the garlic cloves in a dry pan for 1 minute** to enhance their flavor.
This bold version is perfect for those who love intense garlic and spice. Serve alongside steak or as a snack with crackers for a flavor-packed punch. 🌶️
Nutrition facts
Frequently asked questions
Why do my pickled green beans turn mushy instead of staying crisp?
Overcooking is the #1 culprit! Blanching for only 2-3 minutes and shocking with ice water preserves texture. Also, never store them in the brine longer than 2 weeks—after that, they'll lose their crunch. For extra crispness, add 1 cup ice cubes to the blanching water to speed up cooling.
Can I use wax beans or snap peas instead of regular green beans?
Wax beans work perfectly—they're naturally sweeter and stay crisp. Snap peas can also be used, but trim the strings first. For both, reduce blanching time to 1-2 minutes since they're more delicate. The recipe's tangy brine enhances their natural sweetness beautifully.
How do I make these without vinegar?
For a vinegar-free version, use a 2% salt brine (2 tbsp salt per quart water) and ferment for 3-5 days at 68-72°F. Add 1 tsp sugar and 1 tsp mustard seeds to the brine for flavor. This creates probiotic-rich "pickles" with a milder tang. Store in the fridge after fermenting.
What's the best way to reheat these for serving?
These pickled green beans don't need reheating—they're best served cold or at room temperature! For warm dishes, simply toss them into salads or pasta while still hot. If you prefer them warm, heat the beans and 1 tbsp brine in a skillet for 2-3 minutes on medium heat until heated through.
How can I tell if my homemade pickled green beans have gone bad?
Watch for these signs: cloudy brine, slimy texture, or an off smell (sour beyond the normal tang). Discard if you see mold spots or the beans feel mushy when pressed. Properly stored in the fridge, they should last 2 weeks with perfect quality. When in doubt, taste a small piece—if it's bitter or has an unusual flavor, it's time to make fresh!