Side Dishes
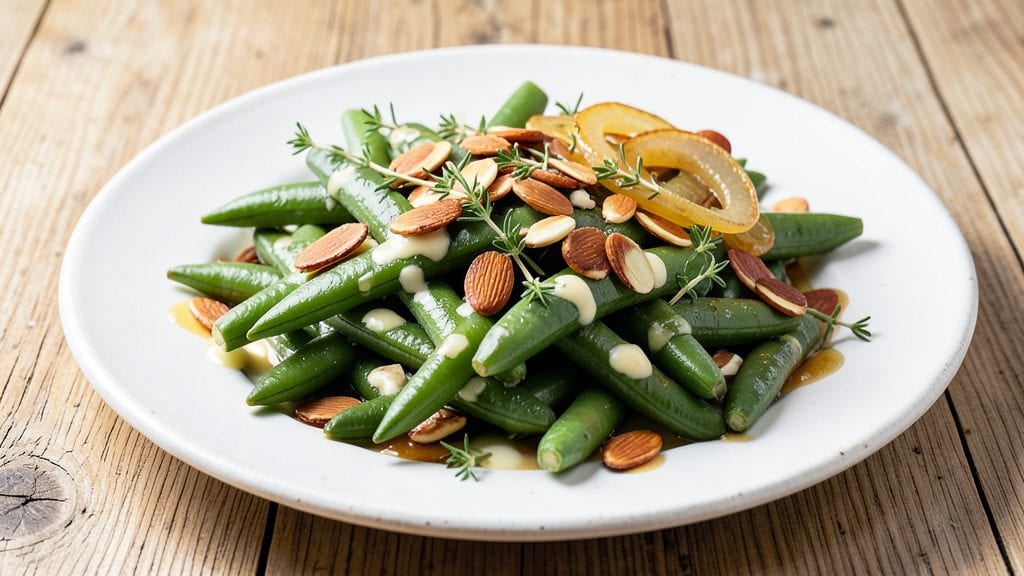
This old-fashioned green beans recipe brings back the comforting flavors of home-cooked sides that taste like they simmered all day—even when they take just 15 minutes. The secret lies in a crispy almond crust that adds texture while butter and garlic infuse every bean with rich, savory depth.
I first made these for Thanksgiving when I wanted something that felt special but still simple enough for a weeknight.
The recipe starts with fresh green beans blanched to perfection, then tossed in a buttery almond mixture that creates a satisfying crunch with every bite. A touch of garlic and thyme elevates the flavor profile, while onions add sweetness that balances the nuttiness of the almonds.
This method preserves the beans' vibrant color while delivering a restaurant-quality finish that’s foolproof for any occasion.
What you’ll end up with is a side dish that’s crispy on the outside, tender inside, and packed with old-fashioned charm. The almonds toast to a golden brown, the butter melts into a glossy sheen, and the aroma alone will have everyone at the table asking for seconds.
It’s the kind of green bean recipe that turns a simple side into the star of the meal.
Serve alongside roasted chicken, ham, or even as a vegetarian main with crusty bread. The recipe scales easily for gatherings, and leftovers reheat beautifully. Let’s get started—your table is about to get an upgrade.
Ingredients for old fashioned green bean
Fresh green beans meet crispy almonds and rich butter for a nostalgic side that tastes homemade.
| Ingredient | Amount | Notes |
|---|---|---|
| Fresh Green Beans 🥦 | 1 ½ lb | Trimmed, ends cut off |
| Unsalted Butter 🧈 | 4 tbsp | Cold, cubed for coating |
| Sliced Almonds 🥜 | ½ cup | Toasted, not slivered |
| Garlic Cloves 🧄 | 3 cloves | Minced, fresh preferred |
| Yellow Onion 🧅 | ½ whole | Diced, sweet variety |
| Fresh Thyme Leaves 🌿 | ¼ tsp | Dried works if needed |
| Sea Salt 🧂 | ¾ tsp | Fine grain preferred |
| Ground Black Pepper 🌶️ | ¼ tsp | Freshly ground |
| All-Purpose Flour 🌾 | 1 tbsp | For light dusting |
| Lemon Juice 🍋 | 1 tbsp | Freshly squeezed |
The almonds are the star here—sliced, not slivered, for better texture. Costco or Trader Joe's carry the best quality in bulk, but any grocery store's nut section will work. Toast them in a dry pan until golden brown (about 3-4 minutes) before mixing with butter—they'll release their natural oils and create that signature crunch. Fresh green beans are non-negotiable for this recipe; Trader Joe's or local farmers markets have the crispest varieties. Look for beans that are bright green and firm to the touch, avoiding anything rubbery or yellowing.
No sliced almonds? Slivered almonds work in a pinch, but they'll be slightly finer. Substituting walnuts or pecans changes the flavor profile but still delivers great texture. Fresh thyme is ideal, but dried thyme at one-third the amount works if you're out. The butter must be cold when you mix it with the almonds—take it straight from the fridge—or the coating won't crisp up properly. For extra richness, add a pinch of white miso paste (about 0.25 tsp) to the butter mixture, though traditionalists might skip it.
This recipe reheats beautifully—just toss with a splash of water and cover until warmed through. The beans keep their crisp-tender texture for 3-4 days in the fridge, stored in an airtight container. For longer storage, freeze portions for up to 3 months. The almond-butter mixture can be prepped ahead and stored in the freezer for 1 week, saving time on busy days. I always double the batch—one for dinner, one for lunches the next week.
Why You'll Love This Recipe
- One-Pan Magic: I swear by this recipe because it’s the kind of dish where you chop, toss, and walk away. No pots to scrub, no pans to juggle—just a single sheet pan with green beans, onions, and garlic sizzling in butter until everything’s golden. Honestly, I’ve made it while scrolling through my phone (bad habit, I know).
- Buttery Crunch Perfection: That moment when the almonds toast and the butter melts into the beans? It’s like a flavor hug. The garlic and onion caramelize just enough to add depth, but the real star is how the crispy almonds contrast with the tender green beans—sweet, salty, and utterly satisfying. (Yes, even on a Tuesday night.)
- Weeknight & Holiday Hero: This recipe works for everything: a quick side for spaghetti, a light main with grilled chicken, or even a centerpiece for Thanksgiving when you’re too busy to stress. I’ve served it at potlucks, family dinners, and solo nights when I just needed something simple but impressive. It’s my go-to for when I don’t want to overthink.
- Budget-Friendly Leftovers: Green beans are cheap, butter is versatile, and almonds stretch the flavor without breaking the bank. The best part? These taste just as good reheated the next day—perfect for meal prep or when you’re too tired to cook again. I’ve even frozen portions for lazy winter days, and they thaw beautifully. Practical? Absolutely. Delicious? Ridiculously so.
Step-by-step instructions for old fashioned green beans
This classic recipe delivers crisp-tender green beans with a buttery almond crust in just 15 minutes.
Prepare the Green Beans and Toast the Almonds
Start by trimming the ends off the 1.5 lb fresh green beans and cutting them into 2-inch pieces. Spread them on a baking sheet and set aside. In a dry skillet over medium heat, toast the 0.5 cup sliced almonds for 3-4 minutes until they turn a light golden brown and smell nutty. Remove them immediately and set aside on a plate to cool.
I always toast the almonds first because their flavor and texture are the foundation of this dish. Watch them carefully—they burn quickly once they start to color. The slight crunch they add contrasts beautifully with the tender green beans.
Sauté the Aromatics in Butter
In the same skillet (no need to wipe it clean), melt 2 tablespoons of the cold, cubed unsalted butter over medium heat. Add the 0.5 whole yellow onion, diced, and cook for 3-4 minutes until softened and translucent. Add the 3 cloves minced garlic and cook for another 30 seconds until fragrant.
The butter should foam gently but not brown at this stage. If it starts to darken too quickly, reduce the heat slightly. This step builds the flavor base that will carry through the entire dish. Don't skip letting the garlic cook—raw garlic can taste bitter in this preparation.
Cook the Green Beans Until Crisp-Tender
Add the trimmed green beans to the skillet and stir to coat them in the buttery onion mixture. Sprinkle with the 0.25 tsp fresh thyme leaves, 0.75 tsp sea salt, and 0.25 tsp ground black pepper. Cook for 5-6 minutes, stirring occasionally, until the green beans are bright green and just beginning to soften at the edges.
You want them to be crisp-tender, not mushy. They should still have a slight bite when you pierce them with a fork. If they're cooking too quickly, reduce the heat slightly. The beans should be hot but not wilting completely.
Create the Buttery Almond Crust
Remove the skillet from heat and stir in the remaining 2 tablespoons of cold, cubed unsalted butter, the 1 tbsp all-purpose flour, and the toasted almonds. Toss everything together until the butter melts completely and forms a creamy coating around the green beans. The mixture should look like a thick, buttery almond paste.
Here's where the magic happens: the cold butter creates steam when it melts, which helps distribute the almonds and flour evenly. If the mixture looks dry, add 1-2 tablespoons of water to loosen it slightly. The texture should be like a thick, creamy sauce.
Finish with Lemon and Serve Immediately
Return the skillet to medium-low heat and cook for another 2-3 minutes until everything is heated through and the almonds are lightly toasted again. Stir in the 1 tbsp lemon juice and toss once more to combine. Taste and adjust seasoning if needed—you might want to add a pinch more salt or pepper.
Serve the green beans immediately while they're hot and crisp. The lemon juice brightens all the rich flavors and cuts through the buttery richness. This dish tastes best right out of the pan, so don't let it sit too long before serving. Pair it with grilled meats or crusty bread for a complete meal.
Pro Tips For Making Old Fashioned Green Bean
- Trim the Beans Right: Cut the ends off the green beans at a 45-degree angle—this keeps them from rolling around the pan and ensures even cooking. I used to just snip them straight across, and half the batch would end up in a pile instead of on your plate.
- Sweat the Onion Low: Cook the onion in the butter over medium-low heat until it’s soft and translucent, not browned. After burning two batches, I finally realized high heat turns the butter into a sad, greasy mess instead of a flavor base.
- Toast Almonds Separately: Dry-toast the sliced almonds in a separate pan over medium heat until they’re golden and fragrant—about 3-4 minutes. Adding them raw to the green beans makes them soggy and dulls their crunch, which is the whole point.
- Salt the Butter First: Melt the butter in the pan, then sprinkle in a pinch of salt before adding the garlic and onions. This way, the salt dissolves into the butter instead of clumping on top of the beans later—no one likes a salty surprise in the middle of the bite.
Storing and reheating this old fashioned green bean
Refrigerator Storage
Store your almond-crusted green beans in an airtight container with a splash of lemon juice to preserve freshness and brightness. They’ll keep well in the fridge for 3-4 days, maintaining that crisp-tender texture when reheated properly.
I always use glass Pyrex containers with snap-on lids—they seal tightly and won’t absorb odors. 🌿
Freezer Prep
For longer storage, freeze portions in single-serving portions (about 1 cup per container) to avoid thawing the whole batch. Spread the beans in a single layer on a tray first to prevent clumping, then transfer to freezer bags or airtight containers.
They’ll stay good for 3 months, though the almonds may lose some crunch after thawing. Label with the date—trust me, you’ll forget!
Stovetop Reheating
My go-to method is stovetop reheating: place the beans in a skillet over medium-low heat with 1 tablespoon water or butter per serving. Cover and heat for 3-4 minutes, stirring occasionally, until warmed through.
The steam helps restore that crisp-tender texture. Add a pinch of salt and a squeeze of lemon juice to revive the flavors. 🔥
Microwave Revival
For quick reheating, use the microwave at 50% power for 1-2 minutes, stirring halfway. Add 1 teaspoon water to prevent drying, then cover with a damp paper towel.
The microwave can make beans soggy, so this low-power method keeps them tender. Finish with a sprinkle of toasted almonds to restore that golden crunch.
Oven Crisp Refresh
If you want restaurant-quality texture, preheat the oven to 375°F and spread the beans on a baking sheet. Drizzle with 1 teaspoon melted butter and toast for 5-6 minutes until crispy.
This method works best for larger batches and gives you that perfect crunch. Perfect for when you’re serving seconds! ✨
Make-Ahead Tips
Prep the butter-almond mixture ahead and store it in the fridge for up to 1 week. When ready to cook, simply toss it with fresh green beans straight from the pot. I also like to blanch green beans in advance—boil for 3 minutes, then shock in ice water.
Store them in the fridge for 2 days before finishing with the almond crust. Time-saver alert! ⏰
Nutrition facts
Frequently asked questions
Can I use frozen green beans instead of fresh?
Yes, but with a few adjustments. Thaw frozen beans completely first, then pat them very dry with paper towels to remove excess moisture. The texture won't be identical—fresh beans have more natural crispness—but they'll still work well. For best results, add them to the pan 1-2 minutes after the fresh beans to prevent steaming.
Why do my almonds burn before the beans are done?
This happens when the almonds toast too long before mixing. Remove them from heat the moment they're golden brown (about 3-4 minutes) and keep them in a separate bowl. The key is to add them back in cold when combining with butter—they'll reheat quickly in the pan without burning.
What's the best way to make this vegetarian?
This recipe is already vegetarian-friendly! For extra protein, serve with a side of quinoa or add 1/2 cup crumbled feta cheese at the end. If you want to make it vegan, use olive oil instead of butter and omit the flour (or substitute with cornstarch). The almond crust will still work beautifully.
Can I make this ahead for a holiday meal?
The almond-butter mixture can be prepped 1 day ahead and stored in the fridge. Reheat the beans from scratch on serving day—they'll taste just as fresh. For even better planning, blanch the beans 2 days ahead, store them in ice water in the fridge, then finish with the almond mixture when ready to serve.
What if I don't have sliced almonds?
Use slivered almonds instead—they'll create a finer texture but still add great crunch. For a different flavor, try pecans or walnuts (toasted), though they'll have a slightly different taste profile. Just remember to toast them thoroughly first—they need that golden color to develop their full flavor.