
Side Dishes
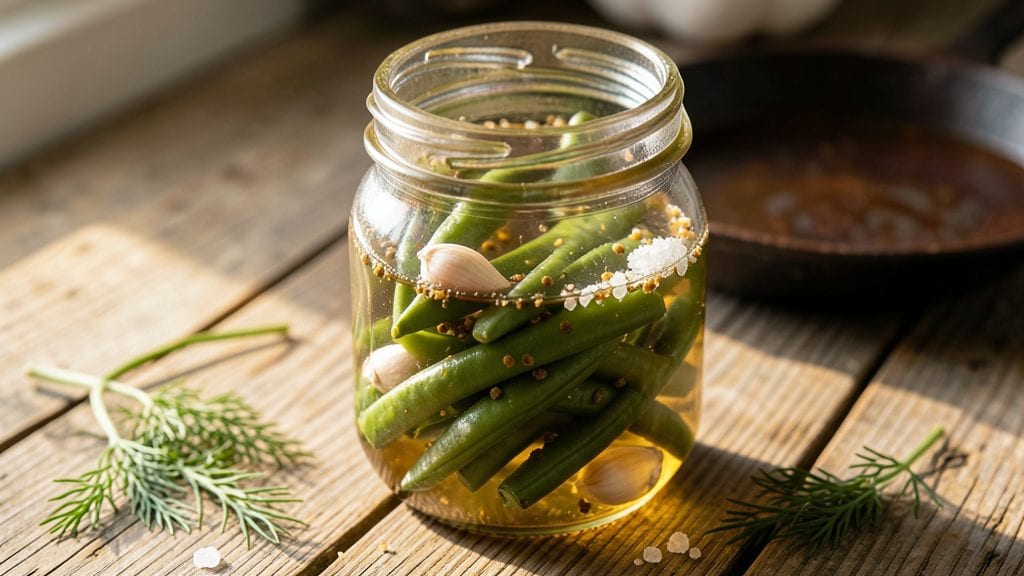
The old-fashioned pickled green beans recipe I learned from my Nonna still makes my kitchen smell like Sunday dinners. That tangy, crunchy bite—perfect for summer picnics or holiday tables—comes from a simple vinegar brine that transforms fresh beans into something unforgettable.
I’ve tested this method dozens of times, and it never fails to deliver that classic Southern crunch in just 10 minutes of active prep.
This recipe keeps the tradition alive while making it accessible for modern kitchens. You’ll need fresh green beans, white vinegar, salt, sugar, and a few pantry staples like mustard seeds and garlic.
The key is blanching the beans first—this preserves their vibrant color and crisp texture before they soak up the pickling liquid. Once packed into jars, the flavors meld over time, creating a side dish that’s both refreshing and satisfying.
What you’ll end up with is a jar of bright green beans with a tangy, slightly sweet brine that’s perfect for snacking straight from the jar or serving alongside grilled meats and cornbread.
The process is simple, but the result is restaurant-quality crunch that tastes like home. Ready to make it? Here’s everything you need to get started.
These beans keep well in the fridge for up to two weeks or can be canned for long-term storage. They’re equally great as an appetizer, side dish, or even a topping for salads.
The versatility makes them a pantry staple worth making in bulk—trust me, you’ll reach for this recipe again and again.
Ingredients for old fashioned pickled green beans
Fresh green beans and pantry staples transform into crunchy Southern pickles in minutes.
| Ingredient | Amount | Notes |
|---|---|---|
| Fresh Green Beans 🥦 | 1 ½ lb | Trimmed, ends cut off |
| White Vinegar 💧 | 2 cups | Distilled, not apple cider |
| Granulated Sugar 🍚 | ½ cup | White or light brown |
| Coarse Kosher Salt 🧂 | 2 tbsp | Diamond Crystal preferred |
| Mustard Seeds 🌶️ | 1 tbsp | Yellow or brown, whole |
| Garlic Cloves 🧄 | 4 cloves | Smashed, not minced |
| Black Peppercorns 🌶️ | 1 tsp | Crushed, not ground |
| Dried Dill 🌿 | 1 tsp | Or 1 tbsp fresh chopped |
| Red Pepper Flakes 🔥 | ½ tsp | Optional for heat |
| Ice Cubes ❄️ | 2 cups | For blanching water |
| Mason Jars 🍶 | 4 pieces | Pint-sized, sterilized |
The beans are the star, so grab the freshest you can find—look for vibrant green pods with crisp ends. Local farmers markets often have the best quality, but the grocery store works too if you pick them up within a day or two. Trim the ends carefully, but don't worry about perfect uniformity—they'll still taste great. The jars? Ball or Mason brand are the gold standard—make sure they're clean and sterilized before use. I usually boil mine in water for 10 minutes, then dry them upside down on a towel. That extra step keeps the pickles safe for months.
No white vinegar? Apple cider vinegar works too, though it'll have a slightly sweeter, fruitier taste. Running short on mustard seeds? Skip them entirely or use a pinch of ground mustard instead. The garlic can be minced if you prefer, but I like the rustic look of smashed cloves. For extra crunch, add a few bay leaves or sprigs of fresh dill when packing the jars. The sugar and salt ratio is critical here—too much salt makes them tough, too little and they won't preserve well. Trust me on keeping it exactly 2 tbsp salt to 1/2 cup sugar.
These keep beautifully in the fridge for up to 2 weeks, but they're even better after a week when the flavors meld. For long-term storage, process the jars in a water bath for 10 minutes—they'll last 6-12 months on the shelf. I always make a double batch because they disappear fast. The first jar is always for snacking straight from the fridge, but the second goes with grilled chicken or cornbread. Pro tip: if the beans start to soften, add a fresh ice cube to the jar before sealing—keeps that perfect crunch.
Why You'll Love This Recipe
- No-Fuss Prep: I swear by this recipe because it’s the kind of thing you can start while you’re waiting for the pasta to boil. Trim the beans, toss them in the jar with vinegar, sugar, and salt, then let them sit—no simmering, no fussing. Honestly, I’ve made it while scrolling through my phone.
- Tangy Crunch Magic: That bright vinegar punch with the crunch of fresh beans? It’s the kind of flavor that sticks with you. The mustard seeds add a little peppery kick, and the sugar just takes the edge off—like a perfect balance of sweet and sour that makes you want to eat them straight from the jar.
- Potluck Hero: Between us, this is my go-to for picnics, church dinners, or when I’m hosting and don’t want to stress. Cold or at room temp, they’re always a hit. Plus, they travel well—no reheating needed, just open and serve.
- Pantry Goldmine: I make a big batch because they last for weeks in the fridge, and honestly? That’s a win. A handful tossed with grilled chicken or scrambled eggs feels like a gourmet touch, and they’re cheap enough that I’m not sweating the cost if I overdo it. (Yes, even on a Tuesday night.)
Step-by-step instructions for old fashioned pickled green beans
Here's how to make crisp-tender green beans with that classic Southern tang in just minutes.
Blanch the Green Beans for Crisp-Tenderness
Fill a large pot with 8 cups of water (enough to generously cover the beans) and add the 2 cups ice cubes to bring the temperature down to 160-170°F. This cold water prevents overcooking and keeps the beans bright green. Add the 1.5 lb fresh green beans (trimmed) and bring to a rolling boil over high heat.
When the water returns to a full boil, immediately reduce heat to medium-high and cook for exactly 3 minutes. You'll see the beans sink to the bottom and float back up as they cook. Drain immediately in a colander and rinse with cold water to stop the cooking process. The beans should be bright green and just tender enough to pierce with a fork but still hold their shape.
Prepare the Spiced Vinegar Brine
In a medium saucepan, combine the 2 cups white vinegar, 0.5 cup granulated sugar, 2 tbsp coarse kosher salt, 1 tbsp mustard seeds, 4 smashed garlic cloves, 1 tsp crushed black peppercorns, 1 tsp dried dill, and 0.5 tsp red pepper flakes (if using). Bring to a gentle simmer over medium heat, stirring occasionally until the sugar and salt dissolve completely.
Simmer for 5-7 minutes until the mixture thickens slightly and becomes fragrant. You'll smell the garlic and dill mingling with the vinegar's sharp tang. Remove from heat and let cool for 5 minutes. This cooling step is important—hot brine can crack your mason jars when you fill them later.
Pack and Seal the Green Beans
Divide the blanched green beans evenly among the 4 sterilized pint-sized mason jars, packing them in tightly but not mashing them. Pour the warm spiced vinegar brine over the beans, filling each jar to within ½ inch of the rim. Use a wooden spoon to gently press down on the beans, ensuring they're completely submerged in the brine.
Wipe the rims of the jars with a clean, damp cloth to remove any vinegar residue that could prevent proper sealing. Place the lids on the jars and tighten the rings until they're finger-tight. The jars should feel snug but not overly tight—you shouldn't need to force them.
Process for Perfect Preservation
Place the sealed jars in a large pot and fill with enough water to come up at least 1 inch above the jar lids. Bring to a gentle boil over medium heat and process for 10 minutes. You'll see bubbles form around the edges of the lids—this indicates the jars are properly sealed.
Remove the jars from the water bath and let them cool completely on a towel-lined countertop. You should hear a satisfying "ping" as the lids seal. Once cooled, check that the lids are concave and don't flex when pressed—this confirms a proper seal. Store in a cool, dark place for up to 1 year, though they'll be delicious in just a few days.
Pro Tips For Making Old Fashioned Pickled Green Beans
- Trim Like a Pro: Cut the beans just before pickling—no need to pre-wash them. A quick rinse right before blanching removes dirt without soaking out flavor, and those crisp ends stay crunchy longer. I learned this the hard way when my beans turned mushy after sitting too long in water.
- Boil Water Faster: Use a full pot of water and start with cold beans—hot water makes them turn gray instantly. Once boiling, add the beans and cook for exactly 3 minutes (set a timer). Overcooking turns them limp, and undercooking leaves them raw-tasting. Yes, even if you’re impatient like me.
- Salt the Brine Right: Dissolve the kosher salt completely in the vinegar-sugar mix before adding beans—undissolved grains make the brine gritty. My grandmother swore by this, and she was right: a smooth brine keeps the beans tender and the flavor even. Stir like you mean it.
- Skip the Mustard Seeds (If You Dare): Mustard seeds add a nice bite, but if you’re short on time, swap them for a pinch of black peppercorns or a strip of lemon peel. The vinegar and sugar still do their job—this just cuts prep without sacrificing tang. (Your future self will thank you for not hunting down seeds at midnight.)
Troubleshooting your old fashioned pickled green beans
Beans Too Soft?
If your pickled green beans turn out mushy instead of crisp, you likely overcooked them during blanching. The key is that 3-minute boil—set a timer and don't peek! I've ruined batches by letting them cook longer, but adding 1 extra ice cube to the blanching water helps maintain firmness.
For extra insurance, shock the beans in an ice bath immediately after draining. 🥦
Brine Too Weak?
A bland-tasting brine usually means the vinegar didn't infuse properly. Make sure you're using distilled white vinegar (not apple cider) for the classic tang. Simmer the brine at least 5 minutes to dissolve the sugar and salt completely.
I've found that adding a pinch of citric acid (½ tsp) to the brine boosts flavor without changing texture. Also, use fresh garlic—pre-minced garlic loses its punch.
Jars Not Sealing?
If your jars fail to seal, it's usually due to one of three things: dirty jar rims, improper headspace, or under-processed jars. First, make sure you're using sterilized jars—I boil mine for 10 minutes before filling.
Leave ½-inch headspace at the top and wipe rims with vinegar before sealing. For the water bath, 10 minutes is non-negotiable—set a timer and don't cut it short. If a jar still doesn't seal, refrigerate it and use within 2 weeks.
Cloudy Brine?
A cloudy brine often means the sugar didn't fully dissolve or the jars weren't processed long enough. For crystal-clear brine, strain the hot brine through a fine-mesh sieve before pouring into jars. If you're refrigerating (not canning), the cloudiness won't affect taste—just give it 24 hours for flavors to meld.
For canned jars, 10 minutes in the water bath should clear things up. I've also had success adding ½ tsp lemon juice to the brine for brightness. 💧
Beans Floating?
Floating beans usually means they weren't packed tightly enough or the brine isn't dense enough. Before sealing, press beans down firmly with a wooden spoon to remove air pockets. For extra weight, add a small piece of parchment paper on top before pouring brine.
If they're still floating after sealing, don't worry—just make sure they're fully submerged when you pack them. The brine will thicken as it cools, pulling them down.
Spices Settling?
If your mustard seeds and peppercorns settle at the bottom, it's normal—but you can fix it! Before sealing, give the jars a gentle shake to distribute spices. For a prettier presentation, tie spices in a small cheesecloth pouch and place it in the jar before adding beans.
I've also seen people layer beans with whole spices (like dill sprigs) to keep things looking rustic. The flavor won't suffer, just the visual appeal. 🌶️
Nutrition facts
Frequently asked questions
Can I use wax beans instead of green beans?
Wax beans work perfectly—they're just a slightly sweeter, firmer variety. The blanching and pickling process stays exactly the same, but you might find them hold their crunch even better. Just trim the ends carefully since wax beans have a more rounded shape than standard green beans.
How long do these keep in the fridge?
Properly stored in sealed jars, they'll stay fresh for up to 2 weeks in the refrigerator. The flavor actually improves after a few days as the beans absorb more of the tangy brine. For longer storage, process the jars in a water bath for 10 minutes to extend shelf life to 6-12 months.
What if I don't have mason jars?
No problem! Use any clean, airtight containers—glass jars, plastic containers with tight lids, or even sterilized glass bottles. Just make sure they're completely sealed to prevent contamination. For best results, still process in a water bath if you want long-term storage, but refrigerated versions will taste great for 2 weeks.
Can I make this without sugar?
Yes, but the flavor will be sharper and less balanced. If you want to reduce sugar, try cutting it to ¼ cup or using a sugar substitute like honey (¼ cup). The sugar helps balance the acidity and adds subtle sweetness—it's a key part of the traditional flavor profile, but your health goals matter more!
What's the best way to serve these?
These versatile pickles shine as a snack straight from the jar, but they're also perfect with grilled meats, fried chicken, or as a topping for salads. Try them alongside cornbread or as a side for barbecue—just drain them well first if you want to avoid extra moisture on your plate.