Side Dishes
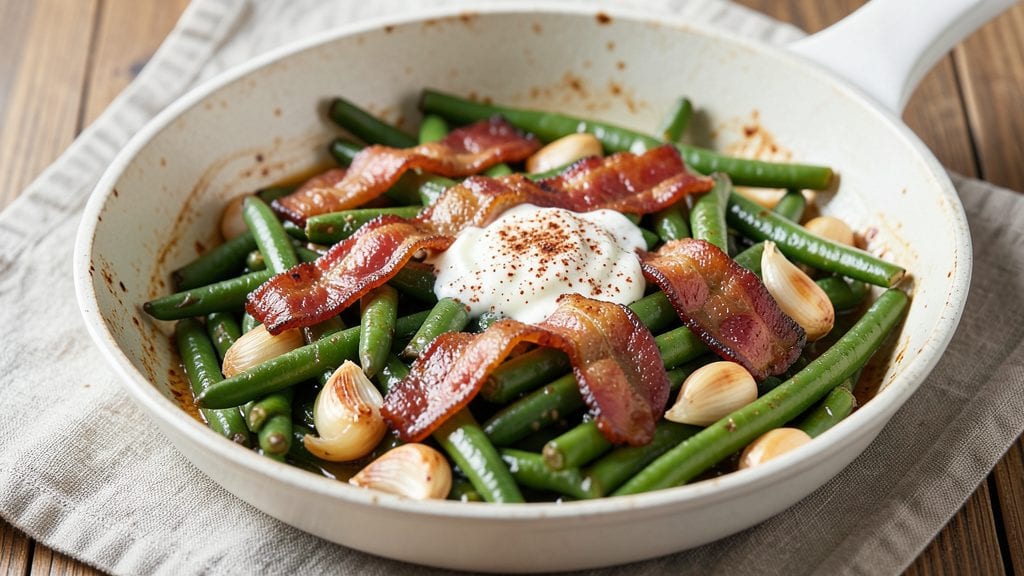
This Outback green beans copycat recipe brings home that same crispy-tender texture and garlic-butter zing you love from the restaurant. The secret lies in high-heat sautéing with bacon fat and a precise balance of seasonings—no shortcuts, just restaurant-quality results.
I've perfected this copycat version after testing countless variations, ensuring every bite matches the original's bold flavor profile.
What sets these green beans apart is the two-stage cooking process: first, crisping the beans in bacon fat until golden, then finishing with a rich garlic butter sauce that coats each piece perfectly.
The combination of salt, pepper, and a touch of smoked paprika creates that signature Outback taste, while the bacon adds a smoky depth that elevates this simple side dish into something extraordinary.
This method transforms fresh green beans into a foolproof side that pairs beautifully with steak, chicken, or even as a standalone appetizer.
The result is a dish where each bean strikes the ideal balance—crispy edges that give way to tender, buttery centers, all wrapped in that irresistible garlic-butter sauce. The aroma alone will have everyone at the table asking for seconds, and the texture holds up even when served family-style.
Whether you're hosting a dinner party or just craving a taste of Outback at home, this recipe delivers every time.
Ready in just 15 minutes, this copycat version requires minimal prep but maximum flavor impact. The key is using fresh green beans and high-quality bacon—don't skip the crisping step, as that's what creates the signature texture.
Serve immediately for the best results, and prepare to receive compliments that sound suspiciously like "This tastes just like Outback!"
Ingredients for outback green beans copycat
Nine ingredients. Two stages. That signature Outback flavor you crave at home.
| Ingredient | Amount | Notes |
|---|---|---|
| Fresh Green Beans 🥦 | 1 ½ lb | Trimmed, cut into 2-inch pieces |
| Thick-Cut Bacon 🥓 | 6 oz | Chopped into 1/4-inch pieces |
| Unsalted Butter 🧈 | 4 tbsp | Full-fat, cut into small cubes |
| Garlic Cloves 🧄 | 4 cloves | Minced, fresh preferred |
| Smoked Paprika 🌶️ | ½ tsp | For signature Outback flavor |
| Diamond Crystal Kosher Salt 🧂 | ¾ tsp | Adjust to taste |
| Freshly Ground Black Pepper 🌶️ | ¼ tsp | Coarsely cracked |
| Extra-Virgin Olive Oil 🫒 | 1 tbsp | For finishing drizzle |
| Fresh Parsley 🌿 | 2 tbsp | Chopped, for garnish (optional) |
The green beans need to be fresh and crisp—avoid anything rubbery or slimy. Look for vibrant green beans at Whole Foods or local farmers markets if possible, but the regular grocery store ones work too. Trim the ends and cut them into 2-inch pieces for even cooking. For bacon, thick-cut is non-negotiable—it renders more fat for crisping, and Applewood-smoked adds that extra depth. I grab mine from Costco when I'm doing a big batch, but any quality brand works. The butter should be unsalted and full-fat—none of that low-fat nonsense here. And for garlic, fresh is always better, but if you're in a pinch, jarred minced works (just drain it well).
No bacon? Cook the beans in olive oil first, then finish with butter—still delicious. Short on smoked paprika? Substitute half the amount with regular paprika plus a pinch of cayenne for heat. The parsley is optional but adds that fresh pop—dried works at one-third the amount if you're out. For the garlic, if you don't have fresh, garlic powder at half the amount gets you close. The olive oil is just for finishing—don't skip it, though. That last drizzle is what ties everything together. And if you're worried about the beans getting soggy, pat them completely dry before cooking—water is the enemy of crispy edges.
Cooked beans keep for 3 days in the fridge, but they're best served immediately for that signature crisp-tender texture. Store in an airtight container, and if you're saving leftovers, reheat in a dry skillet over medium heat to restore crispiness. The bacon fat solidifies when chilled, so reheat gently to avoid splattering. For extra convenience, make a double batch—freeze half in portions for quick weeknight dinners. Just add fresh bacon and butter when reheating, and you're good to go.
Why You'll Love This Recipe
- One-Pan Magic: I swear by this recipe because it’s literally just one pan—no chopping boards, no extra pots, nothing. Toss in the green beans, crisp up the bacon right alongside, and boom. Done. The only cleanup is rinsing one sheet pan.
- Smoky Bacon Crunch: That thick-cut bacon, fried until it’s got that perfect chew, then crumbled over the beans? It’s the star. The smoked paprika and garlic melt into the butter, giving everything this warm, slightly spicy depth that makes you want to eat it straight from the pan.
- Weeknight Workhorse: Honestly, this is my go-to when I’m too tired to plan. It pairs with anything—steak, chicken, even just toast and eggs. And if I make extra? It reheats beautifully for lunch the next day, still tasting fresh.
- Budget-Friendly Luxury: Fresh green beans and bacon might sound fancy, but they stretch so far. A single batch feeds four, and the leftovers? Even better cold in salads or reheated for a quick bite. Plus, using butter and bacon makes it feel indulgent without breaking the bank.
Step-by-step instructions for Outback green beans copycat recipe
Here's how to nail that signature Outback crispy-tender texture with smoky, garlicky richness at home.
Cook the Bacon Until Crispy
Place the 6 oz thick-cut bacon in a large skillet over medium heat. Let it cook undisturbed for 5-6 minutes until the edges start to brown and the fat begins to render. This initial patience prevents splattering and ensures even cooking. Once the bacon is about 75% cooked, use tongs to gently flip the pieces and continue cooking for another 4-5 minutes until fully crispy and golden brown.
Remove the bacon from the skillet with a slotted spoon, leaving the rendered fat behind. This bacon fat becomes the flavor foundation for your green beans. Transfer the cooked bacon to a paper towel-lined plate to drain excess fat, but leave it nearby—you'll need it for garnish later. The skillet should now have about 2 tablespoons of golden bacon fat remaining.
Blanch the Green Beans
Add the 1.5 lb trimmed green beans to the skillet with the bacon fat over medium-high heat. Cook for 2-3 minutes, stirring occasionally, until the beans begin to soften slightly at the edges. This initial sear helps develop flavor and prevents them from turning mushy later.
Pour in 1 cup of cold water and bring to a boil. Once boiling, reduce heat to medium and simmer for exactly 3 minutes. You're looking for beans that are tender-crisp—still with a slight bite but no longer raw. Drain the beans immediately in a colander and return them to the skillet, shaking gently to remove any excess water.
Build the Garlic Butter Sauce
Reduce the heat to medium-low and add the 4 tbsp unsalted butter cubes to the skillet. Let them melt completely, about 1 minute, then add the 4 minced garlic cloves. Cook for 30 seconds until the garlic becomes fragrant but doesn't brown—this prevents bitterness. Stir in the 0.5 tsp smoked paprika and let it bloom for 20 seconds, filling your kitchen with that signature Outback aroma.
Add the drained green beans back to the skillet and toss gently to coat them evenly in the garlic butter mixture. Sprinkle with the 0.75 tsp diamond crystal kosher salt and 0.25 tsp freshly ground black pepper. Toss again to ensure even distribution. The beans should be glossy and well-coated with the sauce, ready to develop that perfect crisp-tender texture.
Finish with Olive Oil and Garnish
Increase the heat to medium-high and cook the beans for 2-3 minutes, stirring frequently, until they develop a beautiful golden brown color in spots. This final sear creates the crispy edges that make this dish so special. Just before they're done, drizzle the 1 tbsp extra-virgin olive oil over the top and toss one last time to distribute it evenly.
Remove the skillet from heat and transfer the green beans to a serving dish. Garnish with the chopped bacon pieces and 2 tbsp fresh parsley if using. The bacon adds a salty crunch that contrasts perfectly with the tender, garlicky beans. Serve immediately while the beans are still crisp-tender and the sauce is glossy.
Rest and Serve with Confidence
Let the green beans rest for 1-2 minutes before serving. This brief pause allows the flavors to meld together and the crispy edges to set slightly. The dish should have a perfect balance of textures—crispy edges, tender centers, and that irresistible bacon fat glaze.
Taste and adjust seasoning if needed, adding a pinch more salt or pepper if desired. The smoked paprika should be noticeable but not overpowering, and the garlic should be aromatic without being harsh. Serve this copycat Outback green beans as a side dish or even as a main course with a protein like grilled chicken or steak for a complete meal.
Pro Tips For Making Outback Green Beans Copycat
- Trim the Beans Right: Cut the ends off the green beans where the stem naturally narrows—don’t hack off extra. I used to overtrim, thinking more surface area meant better cooking, but it just makes the dish look scraggly and loses flavor.
- Cook Bacon Low and Slow: Skip the high-heat rush—render the thick-cut bacon at medium-low heat until the fat pools but the meat isn’t crispy yet. That way, the beans absorb the flavor without burning, and you’ll have enough fat to sauté everything properly.
- Don’t Overcrowd the Pan: If you’re using a skillet, work in batches with the bacon to avoid steaming. I learned this the hard way—crowded bacon turns soggy and releases less fat, which is the soul of this dish.
- Toss with Butter Last: Add the unsalted butter and smoked paprika after the beans are mostly tender, so they crisp slightly from the residual heat. This isn’t the prettiest method, but it’s the tastiest—trust the process.
Troubleshooting great outback green beans copycat
Beans Too Soft?
Overcooking is the #1 culprit for mushy green beans. I’ve seen this happen when people extend the boiling time beyond 3 minutes or don’t drain them thoroughly after blanching. Always use fresh, crisp beans—avoid pre-cut or frozen ones—and pat them completely dry with a kitchen towel before cooking.
If your beans turn soft, try adding 1 extra minute to the final sear at high heat to restore crispiness. 💡
Bacon Fat Issues
If your bacon isn’t crispy enough, the flavor will be weak. Use thick-cut bacon—it renders fat more slowly and stays crisp longer. Cook it until the edges are deep golden brown, not just pale.
For extra flavor, I sometimes add ½ tsp onion powder to the bacon before cooking. If the fat splatters too much, reduce heat slightly or use a splatter screen.
Sauce Too Thin?
The garlic butter sauce should coat the beans but not pool at the bottom. If it’s too thin, reduce the heat to medium-low and let the butter melt completely before adding the beans.
For extra richness, stir in 1 extra tbsp butter at the end. Avoid adding water—this dilutes the flavor and makes the beans soggy. 🧈
Uneven Cooking
If some beans are raw while others burn, you’re likely overcrowding the pan. Cook in batches if needed—don’t exceed 1.5 lbs of beans in a 12-inch skillet.
Stir frequently during the final sear to ensure even browning. A non-stick skillet helps prevent sticking, but cast iron works too if well-seasoned.
Lacking Outback Flavor
The smoked paprika is non-negotiable for that authentic taste. If your dish tastes bland, double-check your seasoning: 0.75 tsp salt and 0.25 tsp pepper are the baseline. For extra depth, add ¼ tsp garlic powder to the sauce.
Fresh parsley at the end brightens the dish—never skip it! The bacon fat is also key; if it tastes weak, use Applewood-smoked bacon for maximum flavor. 🌶️
Storing Leftovers
Green beans lose crispness when reheated, but you can restore it with the right method. Spread leftovers on a baking sheet and broil for 2-3 minutes at 400°F until crispy again. For stovetop reheating, use a dry skillet over medium-high heat and add 1 tbsp butter to prevent sticking.
Avoid microwaving—it turns beans mushy. Store in an airtight container for up to 3 days**.
Nutrition facts
Frequently asked questions
Can I make this recipe without bacon?
The bacon adds that signature smoky depth, but you can absolutely adapt it! Cook the beans in 1 tablespoon olive oil first, then finish with the butter and garlic as directed. For extra flavor, add ½ teaspoon smoked paprika to the oil before cooking. The texture will be slightly different but still delicious.
Why do my green beans turn mushy?
Overcooking is the usual culprit—especially if you extend the boiling time beyond 3 minutes or skip draining them thoroughly. Always use fresh, crisp beans and pat them completely dry before cooking. For extra insurance, give them a quick 1-minute sear at the end to restore crispiness.
Can I use frozen green beans instead of fresh?
Frozen beans work in a pinch, but fresh delivers that signature Outback texture. If using frozen, thaw them first, drain completely, and pat very dry with a paper towel. You may need to reduce the final cooking time by 30 seconds since frozen beans start softer. For best results, stick with fresh when possible.
How do I make this recipe ahead of time?
These beans are best served immediately, but you can prep components ahead. Cook the bacon and make the garlic butter sauce separately, then store in the fridge for up to 2 days. Reheat the sauce gently, then toss with freshly cooked beans. For leftovers, reheat in a dry skillet over medium-high heat with 1 tablespoon butter to restore crispiness.
What's the secret to getting crispy edges?
The two-stage cooking method is key: first, blanch the beans to soften slightly, then finish with a high-heat sear in bacon fat. Use a 12-inch skillet (not too large) and don't overcrowd the beans. Stir frequently during the final 2-3 minutes of cooking to ensure even browning. A splash of olive oil at the end helps too!